Render Unto Caesar

Plant Inspector: Gum used to seal crack in cooling tower.
Mr. Burns: I’m as shocked as you are!

Last week, the general inspector signed off on our 16-month-old building permit.

stamp

Almost everything done on the various permits had been approved months earlier; the roof and a second air conditioning inspection were the sticking points.

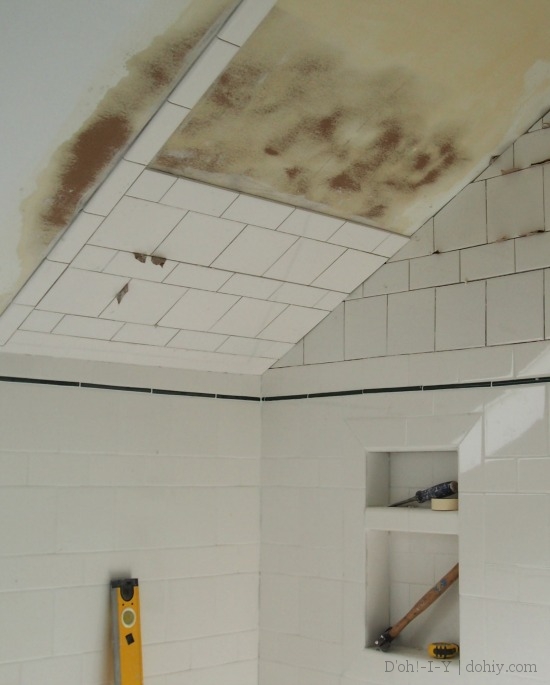
The roofer (a subcontractor) hadn’t had the roof checked, and the inspector wanted to see the underlayment and an added vent on the porch. As you might expect, the underlayment is UNDER the finished roof, so the roofer had to tear off (and then re-install) shingles. We provided photos, but they were not detailed enough. On the porch vent, the roofer argued that our porch is not heated and therefore did not need venting (a fair point), but the inspector was unmoved.

Porch roof on

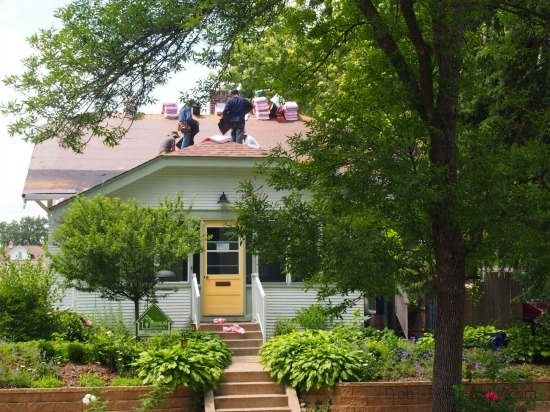
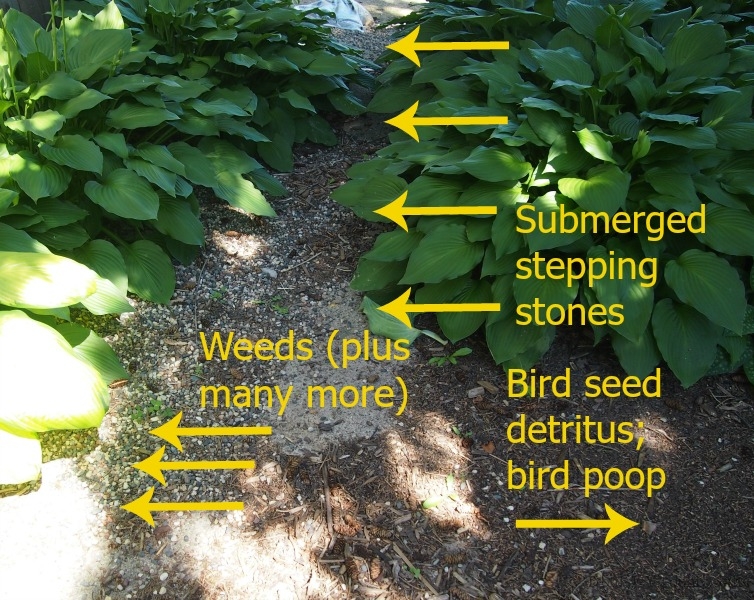
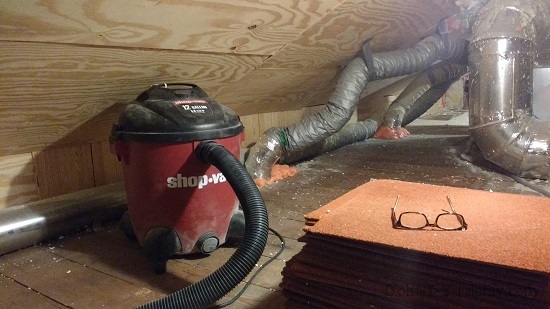
This photo didn’t do it for the inspector on the underlayment. There’s a new ridge vent along the apex of the porch roof (right between those guys).

We were really happy with the roofing crew and how the roof turned out, and the roofer was nice about getting the permit closed out, although there was some minor grouchiness and excuse-making.

The HVAC people, on the other hand, kept telling us that we shouldn’t worry about a second inspection because it was all squared away. Even though the permit showed it was still open online, and the inspector gave us a punchlist of things to fix in the technician’s absence (and mailed a copy to the HVAC place). The system was wrong, you see — there’s no need to change anything.

goodcat

Also, we never got anything in the mail!

Finally, I had the inspector call the HVAC people directly. Then the HVAC people called me to say how silly it was that they had to come back for ten minutes to do a few little things. And THEN their guy did not show up to for those ten minutes on two separate occasions. We ended up fixing most of the issues, leaving almost nothing for them to finish. Their ever-changing stories, grousing, and missed appointments were really aggravating. I had been recommending this company to everyone, and we’d given them three different projects. Maybe they knew we were out of HVAC projects!

So out of five contractors/subcontractors on this project, two vendors had issues with inspections. Despite their grumpiness, we’ve never had anything but cordial and professional interactions with St Paul inspectors. That includes the time an enforcement officer visited after someone “anonymously” reported work without a permit (I misread the requirement, but the enforcement guy just let us scoot down and pick up the permit, no harm/foul).

They don't usually wear hats, but often have gadgets.

St Paul inspectors don’t usually wear hats, but often have gadgets.

Some inspectors are more strict than others, but overall, they are friendly, prompt, and willing to explain the rationale behind the rules (as well as what you need to change to satisfy them). I don’t find inspections thrilling fun, but they are always collegial.

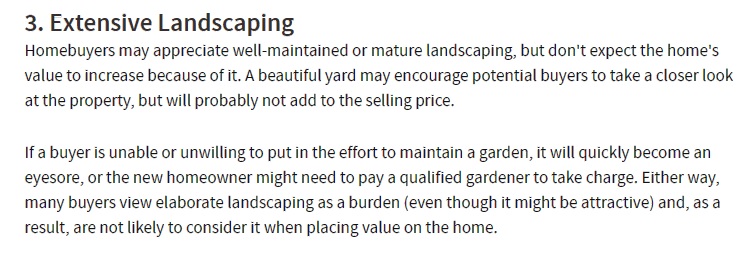
Would home improvement (either DIY or by contractors) be easier and quicker without inspections? Yes, of course! But inspections help support market value and insurance coverage. More basically, though, inspectors exist. They are a known-known. It makes no sense to gripe to the customer about the part of the job the customer can’t control.

From the truly ridiculous movie Dark Star.

From the truly ridiculous movie Dark Star

As a homeowner, take the following steps to avoid inspection woe from contractors:

  1. If your would-be contractor gripes about inspections generally or your municipality’s inspectors specifically (or suggests that you don’t need an inspection), consider whether chasing them around is an activity you want in your future.
  2. Make sure you have a written contract that requires the contractor (and his/her subcontractors) to work to code and schedule/complete all necessary inspections.
  3. Make the final payment contingent on passing all relevant inspections (then stick to that in practice).
  4. If you don’t see a building permit posted at your house within a couple of days of work starting, find out exactly when the permit will be pulled and posted.
  5. Acquaint yourself with the inspection routine for each sub-permit so you know at what point inspections will happen.
  6. Ask that the contractor gather proof (St Paul has a card system, but check with your city) for each passed inspection.
  7. Double-check that the permits are updated accordingly (give it a few days after inspection to be entered in the system).
  8. Don’t take blame for something that is wholly coincidental to your geographic location!

Rant over!

Posted in Construction, D'oh! | Tagged , , , | 1 Comment

Update

Since last we posted, in no particular order:

1. New Pet

We brought a large dog into a two-cat household, with better-than-expected results.

cat and dog

They aren’t best buds yet, but they will all sit in the same room together.

My brother’s dog Karma needed a retirement home with no children, so we decided to give that a try. It’s been remarkably successful! I love dogs, but I’ve never had one (weird, I know), so it’s fun having her around. Mayya mostly ignores Karma, but Inigo is getting with the program, as seen above.

2. Permit Closed

At long last, we closed out our building permit for the remodel.

yes

Of course, this has no bearing on the actual completion of the project. But it’s a step in the right direction.

3. Medical Fun

I had an emergency appendectomy, but I’m fine now!

appendix

Unexpected operations will tend to complicate your home improvement plans.

Anyway, between dogs and appendices, not much is happening on the house or garden — even less than what we planned for the summer, which wasn’t much to begin with. Back soon.

Posted in D'oh! | 2 Comments

Japanese Beetles are Unamerican

The monster is me! Who’d a thunk it?

– Mr. Nakamura

While bagging up Japanese beetles last night, it occurred to me that the two things that I have battled the hardest in the garden are Japanese beetles and Japanese knotweed. I therefore hasten to add that it is a coincidence! I’d hate the beetles and the knotweed just as much if they were Swiss. Maybe more.

Heh! Moving on: Japanese beetles are unusually good-looking bugs.

"Look at my coordinating iridescent exoskeleton! I'm gorgeous!" (via)

“Look at my iridescent exoskeleton! It’s shiny!” (via)

So pretty! They don’t bite people or pets, and they are fairly easy-going. But they are not from here, and that’s a problem because they don’t have the natural predators that keep them in balance at home. Here, they just roam at will, skeletonizing leaves and having sex in public.

I'm next! I'm next!

Not sure if that’s a queue or an interested onlooker.

Here’s a good, short description of their life cycle.

No natural predators plus horny beetles equals lots of beetles. I very rarely spray pesticides because I am promoting bee and butterfly habitat, and pesticides don’t make distinctions. If (a) there area large number in one spot and (b) there is no wind to carry the stuff elsewhere, then I might use an insecticide soap like Safer in a surgical strike. But to combat them well chemically, you really have to go after their grubs. That is a longer-term strategy that doesn’t get the beetles off your plants today.

You can buy beetle traps that attract the bugs then funnel them into a bag, but unless you put that a long way from your plantings, you’re attracting bugs to your garden. People either love or hate these; I can’t figure out where I can place one far enough away from my plants without it interfering with the neighbors’ gardens.

sdf

Tanglefoot Trap (via)

So…what to do?

1. Soapy Water Bath. Beetles congregate on plants they like, so you can find concentrated populations/orgies. Depending on your tolerance, you can pick them by hand or knock them off with a stick. Either way, drop them straight into a bucket of soapy water. The soap makes the water hard to get out of, so the beetles drown. Bad karma, but fewer beetles.

2. Bag ’em. At twilight, the beetles are dozy. You can cut entire leaves off target plants and transfer them with their beetles into a trash bag. Then seal up the bag and toss it or compost once the beetles are dead. Further bad karma, but fewer beetles faster.

3. Grub Step. Japanese beetles lay eggs in the ground, which become grubs. You can apply grub treatments to your lawn, but unless everyone else does it too, you’re still going to have beetles. (Note that lots of grubs can ruin your lawn by chewing the roots off your grass, but that’s not as common.) When you are digging in your garden, if you run across a C-shaped white grub about an inch long, stomp on it. One fewer beetle.

I typically use the soapy water approach, but started bagging them this year. Bagging is a faster way to get more bugs, but you do have to cut some of a plant off. If the beetles have been busy, the leaves in question may be pretty much gone anyway.

Mostly skeletonized leaf

Mostly skeletonized leaf

Under either technique, some beetles will fly away (and some may land on you — remember they do not bite!) but most of them will just sit placidly on the leaf if you don’t flap it around too much. They make it easy to kill them, but they compensate for that in sheer numbers.

Not a fun task, but necessary. I only combat the bugs that cause serious damage, versus minor cosmetic chewing. Fortunately, the beetles focus on the raspberries and the Virginia Creeper almost exclusively.

Those are my tricks, such as they are. Holler if you have a technique that works for you.

Posted in Repair & Maintenance, Yard & Garden | Tagged , , , | Leave a comment

Entropy is Real

We’re all going to sit down and listen to an inspiring story of wilderness survival.

– Homer Simpson

This spring, I saw an Investopedia article on six misguided home improvements, which included:

investopedia

Around the same time, Nicole Balch of Making it Lovely wrote on the difficulty of maintaining her home’s mature garden. Upon moving in:

The neighbor tells us the previous owner was always out there working on things like it was her full-time job. Come on, we think. How hard can it be?

As I’m sure you guessed, the answer is PRETTY DANG HARD.

I brought gardening on myself, and I love it, but it’s less fun if you don’t keep up with it. Last summer, we were so wrapped up in the (still ongoing) remodel that I left the garden mostly to its own devices. The plantings all did just fine, but so did the weeds and general decay.

OLYMPUS DIGITAL CAMERA

The quick onset of decline surprised me, because I have a cottage garden — the whole idea is that it’s a little crazy. THAT’S WHY I PLANTED A COTTAGE GARDEN. It’s a profusive and forgiving form

Not every weed is going to drive you crazy (via).

Cottage garden: Lots going on, so not every weed is going to drive you crazy (via)

But it turns out that a year of neglect is a year of neglect, regardless of garden style. Even the areas that look acceptable at first glance have issues to be addressed. Hostas are great for covering up problems, but the results of taking a year off are there nevertheless.

OLYMPUS DIGITAL CAMERA

(Nicole’s garden is far more formal — I really feel for her!)

Since we decided that we weren’t going to knock ourselves out on the house this summer, I’ve had some time to knock myself out on the garden. (It’s better than watching the news.) The front of the house and about a third of the back is about 85% in shape now, thanks in part to buying a truck.

via

Ford Ranger made right here in St Paul before they tore down the plant (via)

Oh, how I have missed owning a truck! I know my redneckitude is showing, but between the DIY and the gardening, it’s just so convenient. There were Other Good Reasons to pick up a pickup, but it certainly is making the garden mess disappear faster. That compost doesn’t haul itself!

Even with the truck, the rest of the back is going to take some more time, and possibly a machete. We decided against moving our cherry tree — turns out, it’s too big to move, but too lovely to chop down. Keeping the cherry tree means losing the surrounding Tetris-shaped raised beds that it now overshadows. Really a shame, but the wood sides are starting to succumb to the elements anyway (or so I rationalize). Removing those and redistributing the dirt will be a big job. I might hire me some teenagers. Really burly teenagers.

Despite the garden getting away from me, there are still good things happening. The monarchs arrived this weekend, and we have a new hummingbird this year, plus more goldfinches than ever. Our apple trees are bearing for the first time, and my sickly clearance-sale Zephirine Drouhin rose is finally coming into its own. Even a messed-up garden is a good thing, and the neglect can be put right (eventually). The fact that it blooms regardless is a reminder not to take it for granted.

OLYMPUS DIGITAL CAMERA

Experts might say that extensive gardens are not good returns on investment, and they might even be right. But you can’t make every decision on financial grounds or maintenance requirements. The garden does far more for me than I could ever do for it.

Posted in D'oh!, Repair & Maintenance, Yard & Garden | Tagged , , , | Leave a comment

In the Market for a Squeegee

Homer_Simpson's_Mambo_No._5

With the shower tile (and niche) done, nothing was stopping us from taking showers except the gaping open side. Some very long time ago, I ordered a frameless shower door (on sale!), and it was finally time to install it.

Aqua Ultra Hinge Shower Door -- we got ours from Wayfair, and it's well worth signing up for their sale emails and lying in wait for the best price.

Aqua Ultra Hinge Shower Door (got ours via Wayfair.com)

The first instruction was to install the base channel. This was to be caulked into place if used on a bath tub, or drilled into place if used on a shower base. Our shower base is porcelain over steel, and I was not super-keen about drilling into it. The internet suggested that the tub/base installation difference was that tubs were often porcelain over cast iron, whereas shower bases were tile or various composites. Customer service could not vary from the instructions (understandably). Reasoning that the bottom channel was mainly a guide, and that the concern about drilling into something that could rust was warranted, we decided against screws. We didn’t caulk it either — we used white Liquid Nails.

The instructions say to center this on the edge, but since we have quite a bit of edge and the shower is a little narrow, we placed it toward the outside edge.

The instructions say to center this piece, but we have quite a bit of side ledge and the shower is a little narrow, so we placed it toward the outside edge.

Another channel runs perpendicular up the front wall. This one was screwed through the tile into studs, then tightened down over silicon caulk. Screws came with the door, but they were pretty short. Figure out how long you need your screws to be given the wall depth, then pick up non-rusting screws that length with the same head diameter (because the head has to fit into the channel, which is pretty narrow). We put in 3-inch brass screws to get well into the studs. To avoid tile cracking, we used a glass/ceramic drill bit to get past the tile.

Not promoting this brand -- it just happened to be at Menards. It did work, though.

Not promoting this brand — it just happened to be at Menards. It did work, though.

Apply tape over the drilling spot to further protect the tile.

Apply tape over the drilling spot to further protect the tile.

Front channel in place

Front channel in place

Then the glass. Squirt a bead of silicon inside the two channels, then sliiiiiide the glass to the wall. The instructions say to use a rubber mallet to push it forward, which we did, with trepidation. That pushed it right into place.

First pane in

First pane in; so hard to get pictures in this bathroom!

The last supporting cast member is a brace that runs from the top of the stationary glass pane to the front wall of the shower at roughly a 45-degree angle. Kevin had screwed in some wood behind the cement board for the attaching screw to bit into, but apparently put it too low because nothing met the screw on the other side. (Probably, I told him that the thing was five feet tall as I first thought.) It wasn’t a huge deal — the instructions called for a wall anchor. Anyway, a bigger tile bit, one wall anchor, and more silicon later, it was in.

Odd angle for this picture, sorry -- the brace is level. In actual practice, the brace and shower head don't seem as crowded as they look here.

Odd angle for this picture, sorry — the brace is level. In actual practice, the brace and shower head aren’t as crowded as they look here.

There’s plenty of structure, even if it is “frameless.” Plus, there’s gap enough around the back to get in and out of the shower without even moving the door (assuming we don’t gain a bunch more weight).

The last bits were attaching and adjusting the door with reversible hinges, and then adding some clear trim between the door and and stationary piece and along the bottom of the door. And there’s a towel rack on the front, also easy.

The hinges have enough play to move the door up and down to be level with the stationary pane (this was before we did that).

The hinges have enough play in them to move the door up and down to be level with the stationary pane (this photo was taken before we did that).

I am generally pro-curtain, especially since our municipal water is pretty hard. The Kev had to talk me into this door, but it does look good!

We removed the drop cloth pre-shower.

The drop cloth did come out pre-shower.

We finally get to use the shower, hurrah!

Apparently, if we squeegee it every time we take a shower, it will stay pristine. I don’t see that much squeegeeing in my future! Any recommendations for cleaning products or maintenance?

Posted in Bathroom, Windows & Doors | Tagged , | 8 Comments

Hey, Look! Tile

Just do it do it do it NOW!

– Mr. Burns

On the FIFTH of JANUARY, I posted this photo on our Facebook page:

tiledone

It was a happy day.

I then learned that the shower door was taller than the top row of tile, so I took a mental health break from tiling. Upon return, I ripped off the existing bullnose, then vacillated between just going up a couple more rows or TILING EVERYTHING. I figured in for a penny, in for a pound, so everything it was.

The drywall above the cement board had been primed by my gallant father. When I pried away the bullnose, I noticed that some of the primer came with it. I was concerned about the ceiling tiles adhering firmly to the drywall, so in an overkill move, I sanded the primer off the shower ceiling, then coated the surface with Peel Stop I had on hand.

OLYMPUS DIGITAL CAMERA

Next thing was to get to the ceiling by tiling up the remaining vertical walls. Only one of the walls was perpendicular to the roofline. Knowing from sad experience that I cannot estimate, trace, or even measure an angle with any accuracy, I asked the Kev to cut a jig that would account for the roofline. Which he did.

OLYMPUS DIGITAL CAMERA

Measure the desired angle, then cut that same angle into the wood, then finish the notch by cutting at a right angle to hold the tile. Says Kevin.

This allowed me to cut tiles by running the jig along the fence with a tile cozied up in it so the tile was cut at the correct angle. It worked so well, it was a shame that the ceiling tiles later butted up against the cuts.

OLYMPUS DIGITAL CAMERA

Anyhoo, other than the jig, wall tiling was…wall tiling. I just continued the pattern on up. What I was concerned about was tiling the ceiling, because a tile to the head is no fun. I read up on it, and the recurring advice was to prevent air getting between the tile and the ceiling. This struck me as a bit like saying the way to fly is to miss the floor.

Jimmy Cagney ("you dirty rat!"), missing the floor

Jimmy Cagney (“you dirty rat!”), missing the floor

The Floor Elf and others recommend this technique for ceiling tiles.

  1. Put mortar on the ceiling and comb it.
  2. Put mortar on the tile and comb it, then trace a spiral or bullseye pattern in the tile mortar from the middle out.
  3. Stick the tile on the ceiling mortar and press until all the air hisses out from behind the tile, basically suctioning the tile onto the ceiling.
  4. Adjust as needed.

So that’s what I did. But I could not get the air to hiss out. Maybe I’m losing my hearing. But I did find that these not-very-big and not-very-heavy ceramic tiles seemed to be pretty well suctioned without hissing when the mortar had maximum contact with the ceiling. After the first couple of rows, I started just slathering the backs of the tiles with mortar and applying them directly to the drywall.

(via)

Like this, only mortar (via)

I stuck the tiles about a half-inch away from where they were going and pressed out the excess mortar (which went back in the bucket). Then the tile could be floated into place. If a tile was wrong somehow, I could slide a putty knife behind it and twist to break the suction (but it wasn’t easy!). The whole thing dried up very solidly — they seem to be there to stay.

OLYMPUS DIGITAL CAMERA

I put the border tile up first to help keep everything on track.

I wouldn’t recommend this technique for bigger or heavier tiles, but for ceramic tiles sized 6×6 or less, it worked well (although it was messy).

Then grout, then:

Hard to get the whole thing, so...

Hard to get the whole thing, so…

...here's the part I couldn't get in.

…here’s the part I couldn’t get in.

So is the tile all done? NO. We will be putting cabinet doors and shelves into the corner behind the shower, so there will be some tiling around that, and on a little sliver of wall at the other end.

OLYMPUS DIGITAL CAMERA

But this is done enough (once the grout is sealed) to put in the shower door and actually use the room for its intended purpose.

Posted in Bathroom, Construction, Walls & Floors | Tagged , , , , , | 4 Comments

Nice Shower Niche, Part 2

Yes, it has been a while, but I’m back! Part 1 ended with the niche secured flush with the shower wall and (hopefully) waterproofed. Next: tiling!

As discussed in Part 1, I installed the niche once I had the tiles up far enough to confirm how it should be placed to work with the tile pattern.

OLYMPUS DIGITAL CAMERA

I used 3×6 subway tiles and 6×6 square tiles. These are plain white tiles from Menards. The available edging tiles included 3×9 bullnose pieces that I used to frame the niche. I kept everything divisible by three to help line everything up. I also had a stack of 9×12 tiles to cut down for the shelves, sides and tops of the niche (that’s one leaning against the back in the picture above).

So I had all that and I was ready to go!

If my measurements were right, then the 4×12 bullnose should span from the last tile course to level with the bottom shelf. First, I cut a piece of the 9×12 tile the size of the bottom shelf and mortared that in place. Then, I cut tiles from the corners of the shelf out 45 degrees. I did that several times, in fact.

trim niche

I continued the tile pattern from outside the nice on the back, but I lined the sides and flat surfaces with continuous pieces cut from the 9×12 tiles.

trim done

Tiling inside the niche is no different from tiling a wall, only there are more corners. I ran the vertical tiles down so that they landed on top of (rather than behind) the horizontal tiles, on the theory that would decrease the possibility of water leakage through the back. I also added a little more mortar to the wall edge of the “shelf” tiles so that water would tend to run out of the niche, rather than puddling at the back — not enough to look un-flat, though.

I’m led to believe that whenever there’s a turn in the tile, that seam should be caulked instead of grouted. Ergo, there were MANY caulk seams in the niche. I had the color-matched caulk for the TEC grout color I used (Standard White), but after it dried, it wasn’t all that great a match. When I was next grouting, I rubbed some grout into the caulk lines, and they came out great. Now, I don’t know if that’s a legit use of grout (or caulk), so I’m not saying you should do that. I’m just saying I did that. And that it worked.

OLYMPUS DIGITAL CAMERA

Disregard the grout haze that I didn’t notice until now. I’m not totally thrilled with the top “ceiling” tile. Ideally, the top trim tile would come down further and hide the edge, but I’m not unthrilled enough to rip it out.

OLYMPUS DIGITAL CAMERA

Since I am a blogger, I also styled it for you:

OLYMPUS DIGITAL CAMERA

Seriously, it’s a shower niche. Styling = shampoo and razors. But I might just stare at it being done for a few days first.

Posted in Bathroom, Construction, Walls & Floors | Tagged , , , | 5 Comments

Wiring Level: Acceptable

My work is done. Now to reward myself with a case of wine.

– Helen Lovejoy

I picked up a little steam from finishing the fort, and decided to pick something else achievable: closing out the electrical permit. The electrical has been up and running for a while, but to get the permit closed, we need a final inspection. That meant buttoning up the remaining items in hopes of a one-stop approval.

The punch list included:

  • Closing up junction boxes.
  • Installing outlet plates.
  • Labeling lines and circuits.
  • Installing arc fault breakers.

There were a lot of fiddly things to do, but we thought that was it. And then we had a last-minute panic involving TAMPER RESISTANT RECEPTACLES.

troutlet

TR receptacle — see how the slots are closed?

I was so excited about making sure that I had the Electrical Code’s arc fault requirement pinned down that I somehow missed this more basic “new” (2008) requirement. All receptacles need to be tamper-resistant.

When I was a kid, I playfully pulled the vacuum cleaner’s plug out of the wall, upon which my mother appeared over me and impressed upon me the importance of resisting the temptation to tamper with an outlet.

That's right, Mom -- in my memory, you are Pinkie Pie from My Little Pony.

In my toddler memory, Mom appears as Pinkie Pie of My Little Pony fame.

Because parents can’t be everywhere all the time, the “resistant” part is now built-in: plastic shutters inside the slots that will only open if both slots are accessed at the same time. The hypothetical child-tamperer would have to work pretty hard to stick something into both slots simultaneously.

A single-implement approach is more traditional.

A single-implement approach is more traditional.

The tamper-resistant receptacles were about $1.25 apiece at Menards, compared to $0.39 for un-tamper-resistant (tamper receptive?) outlets. That they have in huge bins at eye level. Even though they can only be used residentially above five feet or behind large appliances. And most DIY store customers are homeowners.

Hmm...

Maybe the margin on obsolete receptacles is high? And big box stores don’t care if they meet code or not? Mostly the latter, I suspect.

There’s only so far you can trust a place selling you something. After all, some tile guy at Menards recently suggested we use Liquid Nails for ceramic tile installation. Compelling idea, but completely goofy. WHAT’S THE MARGIN ON LIQUID NAILS, MENARDS?

[Having said all that, commenter Marie noted below that some cities might still be on the prior version of the code or allow like-for-like swaps. Both may well be true, as well as the fact that Marie is more charitable than I am.]

But I digress (in all-caps). Back on topic, this requirement also includes GFCI outlets, which are rather more than $1.25 each.

51nOjX7ZnwL._SL1000_

“TR”: tamper resistant; “WR”: weather resistant (likely just coincidentally, owing to the holes being covered with plastic)

All told, we had three GFCIs and over 20 regular receptacles to change out. When we chatted with the inspector about the switch, he said, “Yeah, and there are a LOT of outlets up here!” Dude. I know.

Anyway, they are all in now, and we passed the inspection. WOOOO! What I haven’t passed is the upper-body-strength test for plugging in my hair dryer.

Posted in Construction, Electrical | Tagged , , , | 3 Comments

Arc de Harumph

Nothing to see here, just kneeling in front of the electric outlet appreciating Edison’s miracle!

– Homer Simpson

Remember the remodel? With the homeowner electrical permit? Well, the updated electrical code requires arc-fault protection, which is different from the more familiar ground-fault protection. Ground-fault interrupters deal with electricity that runs to an unintended ground, like someone standing in a puddle wielding a hair dryer.

GFCI outlet (sometimes called a GFI). The "test" and "reset" buttons are in the middle.

Ground fault interrupting receptacle

Usually, arc faults are less immediately freaky. They occur when current jumps between conductors. For instance, a wire nut might not be on tightly enough, so the current arcs between the wires a tiny distance. Arcs are hot (duh) and can start fires, but they don’t automatically trip a regular breaker. To comply with the electrical code, we needed to install an arc-fault circuit breaker on every new and modified circuit.

siemensafci

Siemens AFCI breaker

THOSE OF YOU WHO UNDERSTAND HOW TO WORK IN A BREAKER PANEL WITHOUT FRYING YOURSELF, READ ON.

For a standard circuit, the hot/black wire from the line attaches to the breaker, while the neutral/white wire and the ground go to the neutral bus and ground bar respectively. (Stop reading if this is news to you!) The arc-fault interrupting breaker is connected to both the hot wire and the neutral wire. Then, a curly white wire extends from the breaker to the neutral bus. Dad taught me to keep panel wires neat, and the curliness is a little untidy, but that’s incidental.

OLYMPUS DIGITAL CAMERA

Despite unsightly curliness, most of the circuits in question worked fine with the new breakers. But on the last modified circuit:

nope-cat

Installed. Turned on. Flipped. Reset. Flipped. Reset. Flipped. In denial, I bought a replacement breaker. Same result. So…there was an arc fault.

Finding and fixing the fault involves checking every connection on the circuit. Assuming there wasn’t a hole in the wiring somewhere (from a stray nail, for instance), there were 26 potential spots to check.

Daunting list

Daunting list

But it wasn’t that bad once we thought about it strategically.

  • Divide and Conquer:  If the circuit branches at a junction box, disconnect everything and then try each sub-branch separately. If one section doesn’t trip the breaker after you try everything under load, then that part’s ok. We eliminated about 80% of the connections this way.
  • Likely Suspects: If the fault is in the connections, then it’s probably in a wire nut rather than at a switch or receptacle. Switches and receptacles should have screwed-down connections, so prioritize checking junction boxes, light fixtures, and pigtails. Make sure that each connection is solid and that the wire nut is the right size.
They look so innocent.

One size doesn’t fit all.

  • Even More Likely Suspects: If you are still reading despite my many disclaimers, you know that many light fixtures have small-gauge stranded wires. They tend to go all frayed when connected with a single larger wire with a wire nut. To combat the problem, strip the fixture wire so it’s a little longer than the ends on the solid wire, then line the insulation up and spin the wires together with pliers before applying the wire nut.
sdf

This would have worked better with 14-gauge solid wire instead of 12-gauge. With 14-gauge, you can spin both wires for more of a barber-pole effect. Either way, make the stranded wire a bit longer to really wrap the solid wire for a good connection.

We found two problems. A junction box (pre-existing) had a loose wire nut, and a sconce light (installed by me) had a sub-par connection involving stranded wire. These worked fine with a regular breaker, which doesn’t sense these small faults.

I don't judge.

“I don’t judge.”

The hunt was time-consuming, but doable (especially working together). If checking connections hadn’t worked, though, we would have called an electrician in a hot second (pun!). We don’t have the equipment or knowledge (or, in my case, the fortitude) to isolate an arc fault inside the wall.

Next: closing out the electrical permit!

Posted in D'oh!, Electrical | Tagged , , , , | Leave a comment

Fort D’oh

All I’m gonna use this bed for is sleeping, eating, and maybe building a little fort!

– Homer

In the interest of getting one thing completely done, we made a fort (UK: den) in the attic. We decided to make the attic area that contains the air conditioning handler into a dedicated fort area (using the non-AC part of the space, obviously). This space is accessed through a hatch in the back of our new closet. Here’s the pre-fort stage:

You know the Golden Goose? My dad has a Carpet Tile Goose.

You know the Golden Goose? My dad has a Carpet Tile Goose.

Here’s the inspiration photo:

Inspiration photo (via)

And here’s what we came up with:

OLYMPUS DIGITAL CAMERA

I lined the plywood ceiling with reflective bubble-style insulation sheets because they (a) reflect the string lights and (b) prevent head bumps. To avoid other injuries, the Tick is standing guard.

OLYMPUS DIGITAL CAMERA

I seeded the place with all sorts of random stuff from around the house–games, books, poster-frame-made-into-a-chalkboard, baseball mitts, a hard hat. And an art gallery.

OLYMPUS DIGITAL CAMERA

In the middle, there’s a place to snuggle in and read or nap.

OLYMPUS DIGITAL CAMERA

Right now, I’ve just got a blanket tacked up across the entrance, but eventually, I want to do some sort of hidden bookcase-door. I can’t justify taking enough time out to do that right now, but someday, it will be all Narnia up in here.

NarniaWardrobe

I’m perfectly aware that focusing on the fort steals time from finishing the larger project, but it was so gratifying when the nephews–13 and 6–both said, “OOOOOOOOH!” when they crawled in there. Sometimes, you just gotta do something on the house for funsies.

Related Posts Plugin for WordPress, Blogger...
Posted in American vs English, Before & After, Family | Tagged , , | 8 Comments