Relax, we’re just looky-loos. We’re only here to compare our lifestyle.
– Marge Simpson
After a year that included an unfinished bedroom redo dating from early spring, let’s focus on Other People’s Makeovers! Today’s virtual visit is to the Kev’s sister’s place. Helen (“the Hel”?) and her partner Geoff had a nice roomy kitchen. Unfortunately, no one appears to have ever photographed it, so we only have the following archival footage.
Me dragging nephew Charlie around the kitchen floor during a Pictionary tournament. I don’t remember why, but he doesn’t seem bothered.
Helen (right) and me talking while Helen cooks (2011?).
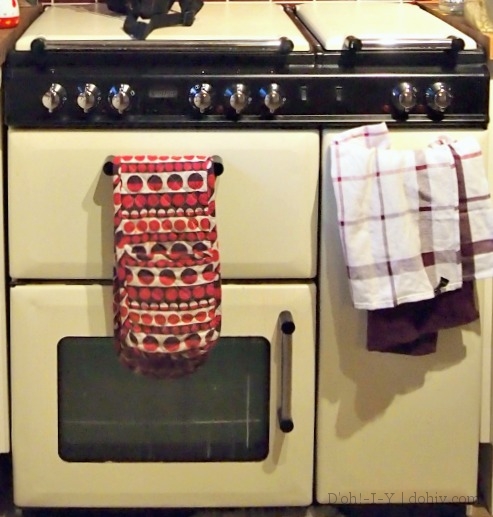
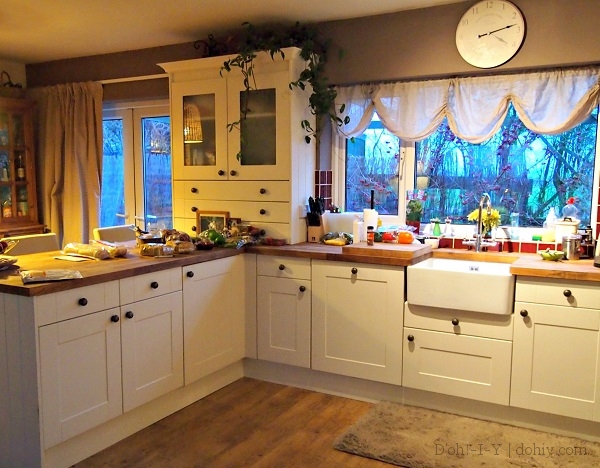
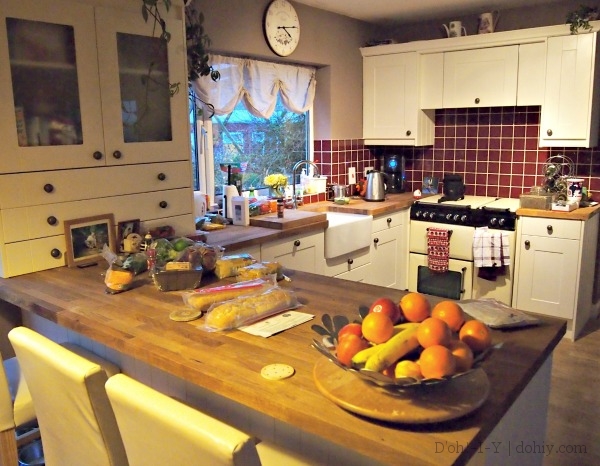
Helen and Geoff knocked through the wall between the kitchen and the living room (UK: sitting room), creating a great room. The old kitchen was mostly located on one wall, with a short “L” at one end. A massive china cabinet was used for storage on the opposite wall (you can see it in the second picture above), but the opposite wall is now missing because that’s where they broke through into the living room. After the great-room remodel, the row of cabinets on one wall didn’t make as much sense. When a friend basically gave Helen a dual fuel cooker (US: range), a kitchen redo was ON.
Helen’s fancy cooker.
Helen did not want an island in the middle of the great room space; instead, she opted for a U shape that brought the kitchen closer to the great room and provided in-kitchen bar seating. Helen says they may add peninsula lighting later.
The cabinet unit between the windows and at the end of the peninsula is such a great feature. They chose natural oiled butcher block throughout the kitchen, and paneled the dishwasher and fridge.
There was much debate among the men of the family about the sugared-almond color Helen chose for the accent wall. I love it with the cream cabinets (although it didn’t want to photograph true to tone in our low-light, no-flash session). Helen picked up this color again on the fireplace wall elsewhere in the great room. Do I have a picture of that? No. You’re just going to have to trust me on it. But here’s another picture of the kitchen (during dinner prep):
Marge: Once we get the cats out of the way, it won’t be too bad. Real Estate Agent: Actually, according to the will, the cats own the house.
– The Simpsons
Remember the slipcover project? That I was going to finish in January? I haven’t had time for sewing, but I have spent some time trying to decide on the fabric. We were down to two finalists, and I decided to test them for the conditions the slipcover is going to face.
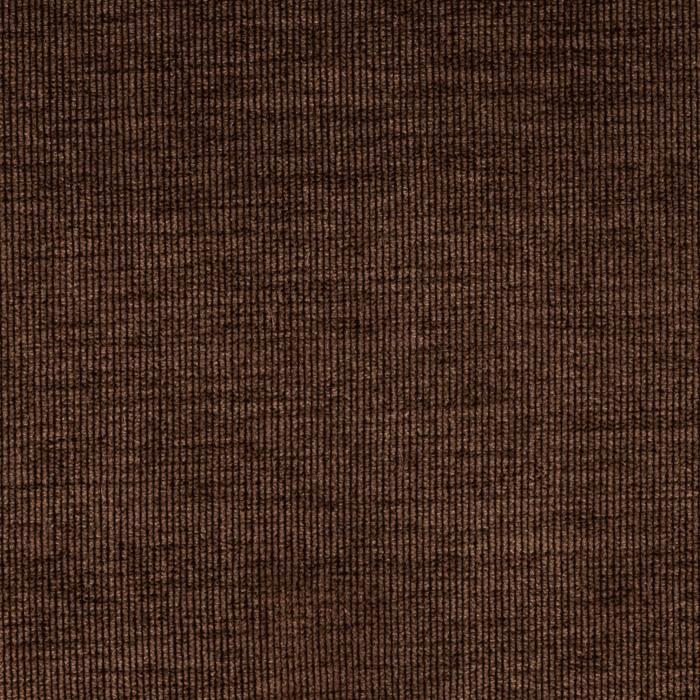
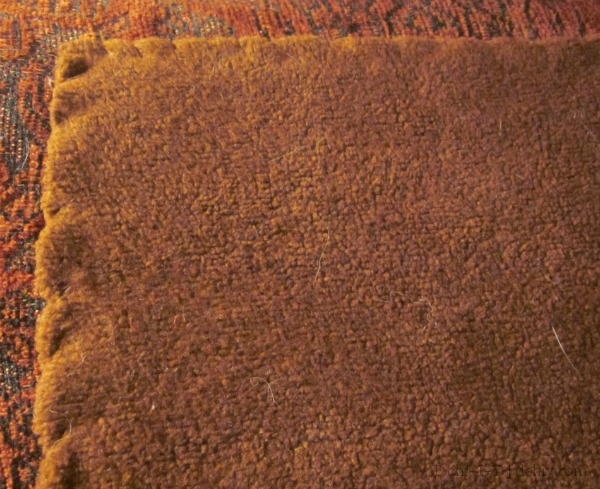
This slipcover needs to resist cat hair, cat claws, human wallowing, and miscellaneous foods and beverages. I decided that this slipcover was going to be dark brown and then dressed up with pillows; this is primarily because dark brown won’t show my sewing mistakes as readily! The finalists:
I have decent-sized swatches of each. I was sold on the cotton duck until I kept looking at the internet. Damn you, internet! I found professional upholsterers pointing out the shortcomings of cotton duck (shrinkage, wrinkling, staining). They recommend fabrics with some polyester in them. The “velvet” piece (not really velvet, but slightly fuzzy) is 100% polyester (with a mostly-polyester backing), so that is definitely “some”. They are about the same price, and they are both reorderable online, so everything depends on what happens in testing!
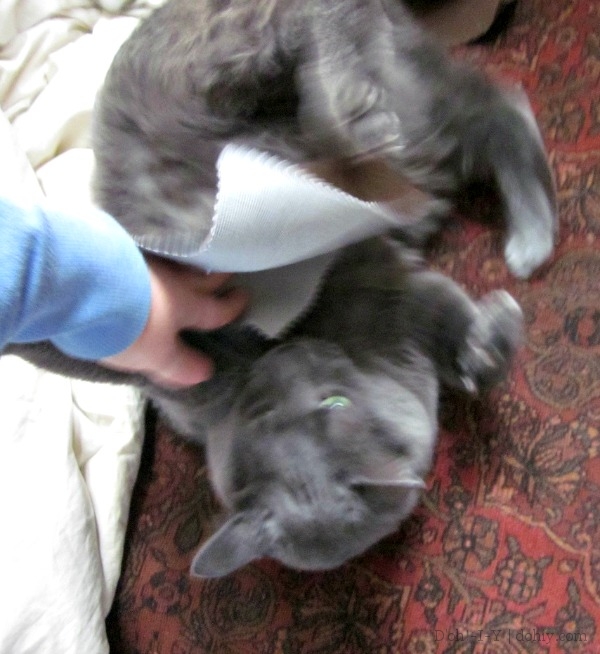
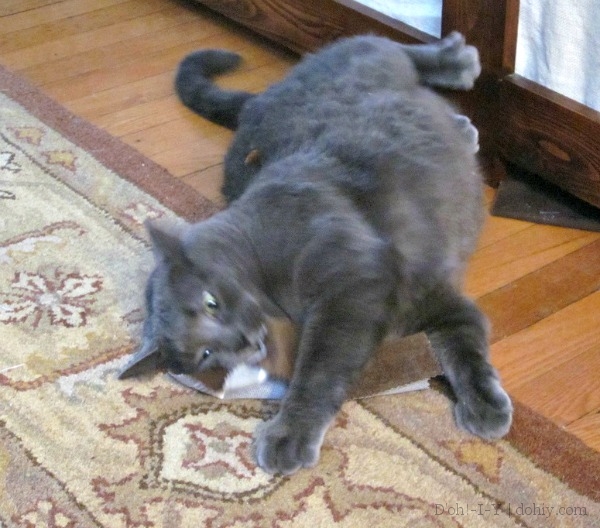
1. Cat Hair
Methodology: I rubbed cats vigorously with the fabric swatches. Then I used a fabric brush to see which cleaned up better.
What is happening??? I was asleep!
BAD TOUCH! BAD TOUCH!
Results:
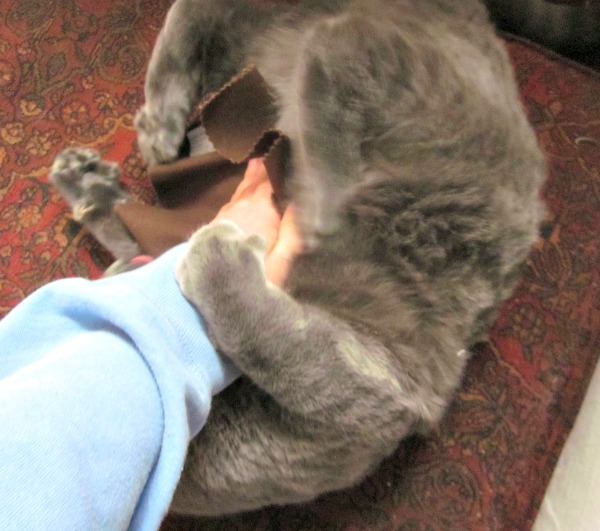
I laughed. The cats did not. Under the heading “relevance” though, the pseudo-velvet (on the left below) did not pick up as much cat hair. It was also easier to remove hair from that piece.
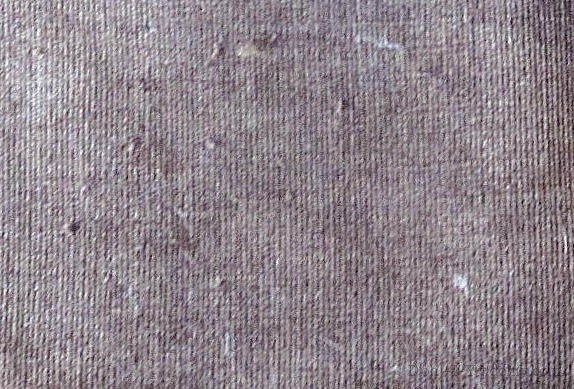
Cat hair pre-brushing.
Cat hair post-brushing.
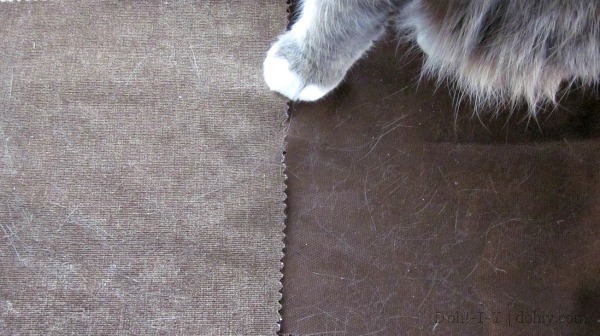
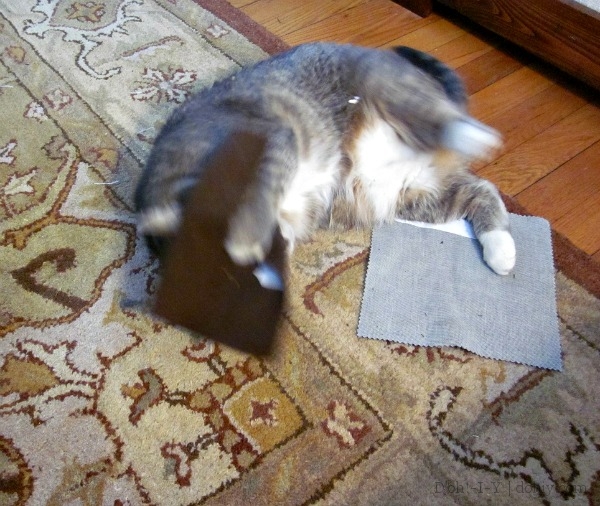
2. Cat-Based Violence
Methodology 1: I rubbed catnip into each swatch and stood back. Action shots:
My name is Inigo Montoya. You are covered in catnip. Prepare to die.
Aaargh! Pirate cat will wear you as a hat!
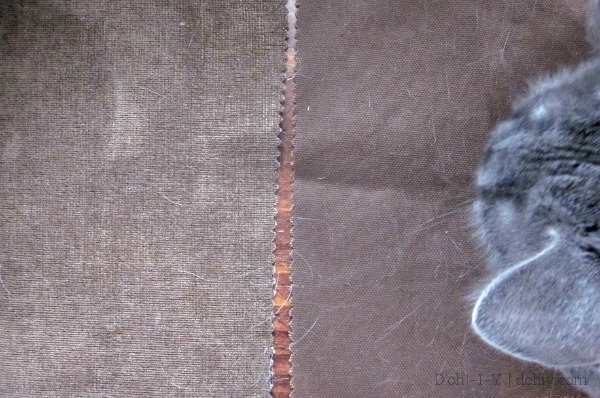
Methodology 2: I strapped the swatches to a scratching post, but the cats just scratched around them. So I replicated scratching by attacking the swatches with dental tools instead, using a claw-like motion. WHAT CAN I SAY? It’s winter!
Pseudo-velvet fail.
Results: The pseudo-velvet was easy to snag and mar (see above), but I had a struggle even slightly marking the cotton duck.
3. Human Wallowing
I could not come up with an effective way to test something swatch-sized for this! But the pseudo-velvet is rated for 100,000 double rubs (she said, as if she knew what that was, but it sounds good), and I know cotton duck is durable from experience. So both get a pass here.
4. Miscellaneous Foods and Beverages
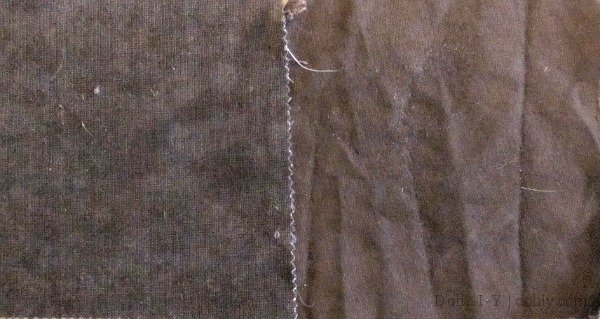
Methodology: Smear swatches with wine, cheese, and condiments, rub it in, then throw in the washing machine.
Mustard, chocolate sauce, red wine, cheddar.
Results: The pseudo-velvet washed up like a dream. The cotton duck washed up pretty well, but the cheese did not come out completely. I suppose if we actually ground cheese this far into a slipcover, we’d probably pre-treat it, unlike I did here. The cotton also came out very wrinkled, but I would normally air fluff a cotton slipcover, which calms it down a lot. I could even iron them…?
Still damp, but clean and basically unstained.
The verdict? I wish we’d had one clear winner. Up until the scratch test, pseudo-velvet was in the lead. In fact, other than the scratch test and the fact that I don’t like the color as much, it would be pseudo-velvet for the win! But cat clawing is a central issue — they aren’t terrible about scratching, but they do lose their minds from time to time and forget that the furniture is not their enemy. I don’t want to put in the sewing time and have them mess it up in six weeks.
So cotton duck it is! I’ll just have to preshrink it and buy a cat hair roller.
Now there’s something you don’t see in a toilet every day!
– Homer Simpson
I had the idea to do a post about replacing a toilet seat. (Because I needed to replace a toilet seat. And people wonder where bloggers get their ideas!) But I was of two minds about it — I mean, talk about the World’s Shortest and Most Obvious Tutorial! When the new toilet seat arrived (from Amazon), I started the job, taking pictures along the way so I could decide later whether to post about it or not.
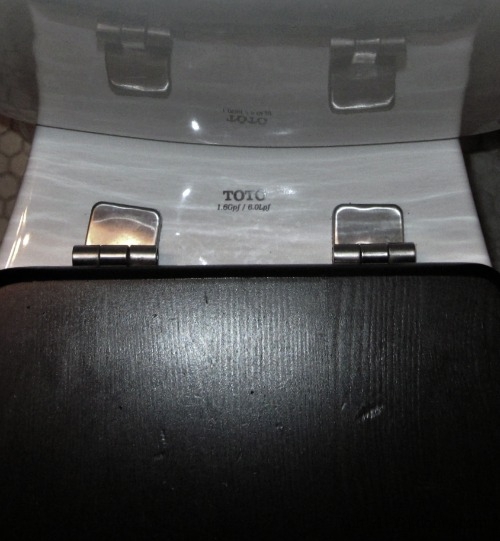
Before: Toto round toilet with Ikea Freden seat
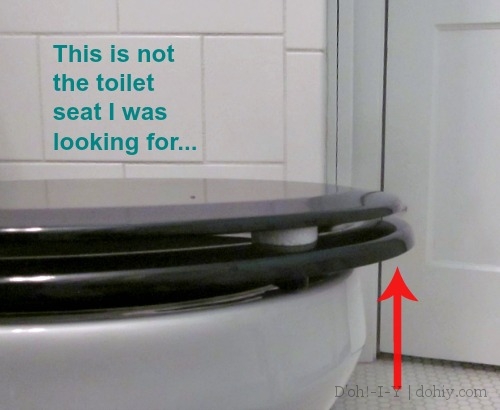
You know how projects fall apart when you think they will be super-easy? If so, you probably won’t be surprised to hear that I started changing the seat on Wednesday, and until Friday afternoon, the toilet had NO SEAT WHATSOEVER.
There are two basic types of toilets–round and elongated. A round toilet’s bowl (UK: pan) is about 16 inches back to front, while an elongated one is about 18 inches. Our toilets are both round: small house, small bathrooms, small toilets. These two sizes are standardized enough that you only need to order a round or enlongated seat and it will fit (UK toilet seats are different, apparently). The bolt holes should always be 5.5 inches apart on center, but if you have an old or weird toilet, you might want to check that.
Ok, we have a round toilet with standard-sized everything, so I had the brilliant idea to order a round toilet seat! Somehow, though…
That would be an enlongated seat.
Well, d’oh. I’d already removed the prior seat. I contacted Amazon customer service, and something fairly awesome happened. They said since they sent the wrong thing, they would overnight me a replacement. I wonder what this made the folks in the warehouse think. “What’s with this chick and her burning need for a new toilet seat??”
Once my SUPER-CRITICAL-HYPER-URGENT Fed Ex delivery arrived, I proceeded to replace it in the standard way, basically as demonstrated here:
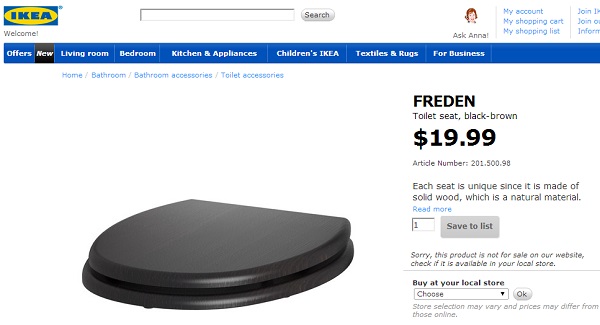
But it turns out that not every toilet seat is this easy, so I do have some useful information to offer the toilet-seat-changing community. The seat we had was an Ikea Freden.
We had a contractor help us with some parts of our bathroom project. The toilet seat was already purchased and one of the guys just decided to put it on. The builder said, “Tim reallllly hates your toilet seat!” Um, ok. I thought it must be because it was wood or because it was black. (Shut up, Tim! Remodelista says black toilet seats are glamorous.)
But when I removed it, I realized what the problem must have been. While most toilet seats have a tab that flips up to reveal a bolt head (as seen in the video), the Ikea seat just has the tab; the bolt doesn’t have a head, but is suspended by a flared end between two rails on the underside of the tab.
The other thing with the Ikea seat is that the bolts are wicked-long. This must be so that you can hold onto the thing to be able to tighten it! If you get an Ikea seat, you should test-fit to see if you need to shorten up those crazy bolts. A long bolt pushing against a different part of the toilet could crack it. You don’t want that — it’s plumbing’s Humpty Dumpty.
The headless bolt and the length make the installation (and removal) a tiny bit trickier than the standard routine shown in the video. You can’t stabilize the bolt from above with a screwdriver. Instead, if installing, hold the bolt right underneath the bolt hole, and start screwing on the plastic nut. Once the nut is screwed on far enough to get past the end of the bolt, switch and hold on to the end while hand-tightening the plastic nut. You don’t want to over-tighten a toilet seat anyway — like a long bolt, it can crack the porcelain.
Ikea is probably not the only seat out there with these issues. Having said that, it was a very nice seat, as these things go. I mean, it did the job! It was just a bit knackered, especially from the Mayya cat skidding across it at great speed. I really wish I had that on video — now, she jumps up on the back of the toilet from the floor to beg me to turn on the sink. But she used to come charging into the bathroom, jump onto the toilet seat, fail to gain any traction…aaaaaand scrape her claws across the top in a last-ditch braking attempt, before finally falling off the other side. I thought I would die laughing the first four or five times it happened.
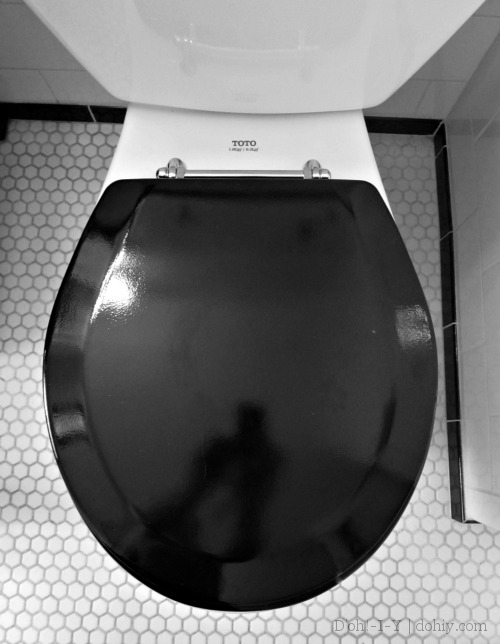
The new toilet seat (on Amazon here, also available in white) also does not have tabs because it has a fancified metal hinge at the back. But the bolts are fixed rather than sliding as with the Ikea seat, so there was no need to stop the bolt spinning. There are some plastic spacers to help adjust this model for your toilet. They are useful, but also easy to drop into the toilet, I found out.
After I took this picture, I realized that the seat was on just a tiny bit crooked. I fixed it but didn’t take another picture. How many pictures can you really take of your toilet anyway?? Judging by this post, four. Maybe five, tops.
Call Mr. Plow, that’s my name! That name again is Mr. Plow.
– Homer Simpson
It snows here. That’s a given. But this month has been a little ridiculous. It is pretty.
But still ridiculous!
As the winter wears on, it can bring on some serious cabin fever.
We received over four inches of snow overnight and this morning, so this afternoon, it was time to dig out. One of the things I love about winter here (and there aren’t many!) is that snow management is a community event. After a big snowfall, everyone emerges about the same time, armed with roof rakes, snow blowers, and other implements of destruction. There’s a lot of friendly chitchat and shared mock exasperation at the season. People help each other free their cars while their kids run around making snow angels. Digging out is one of the warmest traditions in this very cold place.
That warm feeling lasts right up until the plow comes during the night and deposits a wall of ice at the end of the driveway. Yay, winter.
Homer: Aw, twenty dollars? I wanted a peanut! Homer’s Brain: Twenty dollars can buy many peanuts. Homer: Explain how! Homer’s Brain: Money can be exchanged for goods and services.
– The Simpsons
If you are in the vicinity of a Menard’s and have basic planning skills, you are in for a treat (depending on your definition of “treat”). They are having one of their 11% deals, only better. If you shop there, you know how these work: go in, buy almost anything you might want (with some exclusions), and send in your receipt for an 11% rebate.
The rebate is a merchandise credit, but if you shop at Menard’s a lot, that’s as good as cash money! We’ve always sent in for these rebates and really like the program. But Menard’s is offering something new this time–you can buy gift cards and receive a rebate.
I stood in the store, slightly stunned. “Gift cards don’t have to be gifted,” I mused. If I could figure out how much we were going to spend at Menard’s for the next project, we’d save 11% using an ungifted gift card. AND if we used it during another sale or rebate promotion, it would be even better. A gift to ourselves!
There had to be a catch. I went to check-out and grabbed a gift card. Before buying it, I interrogated the cashier. “The rebate applies to the card, right? And I can use the card for other sales? And the card doesn’t expire in a week or anything?” I turned into that supposedly famous guy in the Arby’s ads.
“Really?? REALLY???” (If this is legendary detecting, I’m the bloody queen.)
Anyway, it’s REALLY true. But for it to be a good deal, you have to:
Send in the rebate form on time (get the form in store or at the rebate center on their site).
Use (and do not lose) the rebate form when you receive it.
Use (and do not lose) the gift card.
So there’s some minor organization and safekeeping required. If you can do that, then it’s a heckuva deal. Hie thee to Menard’s! (I’m the queen, remember?)
Marge: I can’t count how many times your father’s done something crazy like this. Lisa: It’s 300, Mom. Marge: I could have sworn it was 302.
– The Simpsons
We’re sort of in the market for a new countertop. I say “sort of” because we’ve been kicking the idea around since 2006. Don’t blink — things move fast around here! Our existing laminate counters (UK: worktops) took a beating when we had tenants in the house, and we’d like to replace them with something long-term. We only have about 21 square feet (1.95 square meters–that does sound small!) of counter space; on a square-foot basis, this must be our most drawn-out house decision of all time.
Formica “Crayon” (7226)
I’ve got nothing against laminate! It’s homey and durable, scrubbable and generally lovable. I would go for laminate in a heartbeat if I could find any that I liked or that I thought was appropriately priced.
As you’ll be able to discern from the laminate we have (left), I prefer laminate to be what it is. I don’t really care for the laminate that is trying too hard to look like something else, be it stone or metal or wood. Laminate makers, however, seem hell-bent on either replicating something or being self-consciously retro. I do like a few options from the Wilsonart HD line — some of them are less stone-like but still have pattern and depth. But for cripe’s sake, they are proud of it! For my money, it’s too high-priced for plastic bonded to particle board.
With laminate out of the picture (probably), we considered and rejected many other options — the granites we like are expensive, soapstone is too dark, solid surface and quartz are too uniform (although we almost bought quartz a couple of years ago, so it’s not completely ruled out), tile is too grouty. Given all that, there are three major finalists under consideration.
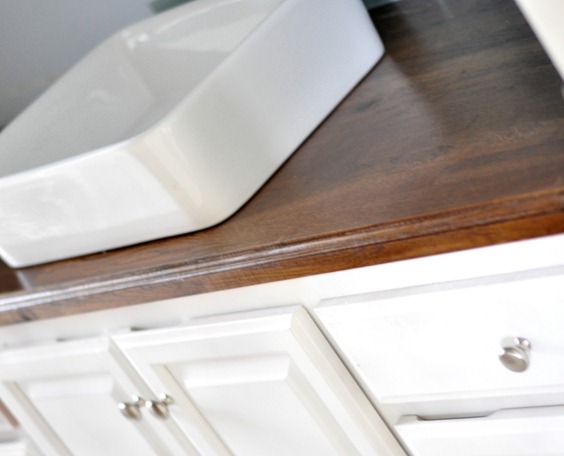
1. Wood
I have a big ol’ crush on dark wood countertops. If I were in high school, wood counters would have long hair and wear a lot of Drakkar Noir. Wood would totally be in a band, and drive a restoration project 1968 Camaro.
Ok, yes, this is a bathroom, but look at the edge! (via Centsational Girl)
I like the dark wood–walnut or another wood stained dark–because our cabinets are a light wood and so is the floor. If we go with wood, the countertops need to be a different color or it’s going to look weirdly same-y. Also, if we stain we could use the countertop to pick up the deep woodwork color that runs through the house. I bookmarked this tutorial about staining and sealing butcherblock years ago in case we went that direction.
Pros:
Affordability (I’m estimating under $500 for the whole kitchen, including stain and sealer).
DIY-ability (some cutting, sanding and sealing, plus installation).
Appearance (organic and somewhat authentic to the period, should patinate well).
Workability (if it doesn’t patinate well, it could be sanded down and refinished).
Cons:
Durability (can it stand up to my level of messy cooking and general hard kitchen use?).
Woody-ness (wood floor, wood cabinets, wood countertop…that’s a lot of wood).
Color (our kitchen is small and north-facing; a dark surface might not be the most brilliant idea in there).
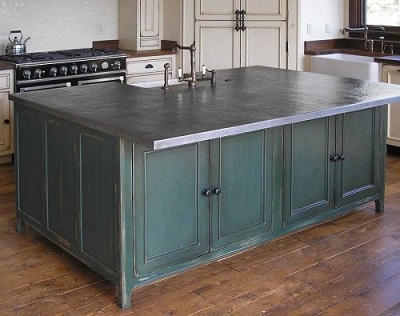
2. Zinc
If wood were my high school crush, then zinc was that young comparative lit professor. He had incredible blue eyes, had lived in Europe, and was sooo deep. Years later, I’d realize that zinc was stoned in class most of the time and that was probably why zinc didn’t get tenure.
Zinc is one of those “living surfaces” designers talk about. It’s a reactive metal, so over time scratches and etches give it a soft-focus finish. But it can also be pre-aged or waxed to give it a more uniform look.
Affordability (NOT affordable bespoke–yikes!–but reasonable if DIYed; I estimate around $650 for zinc, plywood, and tools).
Appearance (like wood, it’s authentic to the period and should patinate well).
Cons:
Doability (this is DIYable, but could be a fussy business — would we actually finish the work before the zombie apocalypse?).
Color (not super reflective for a metal, and with patina might be too dark for our kitchen).
Durability (how much patination is too much patination? and what about dents?).
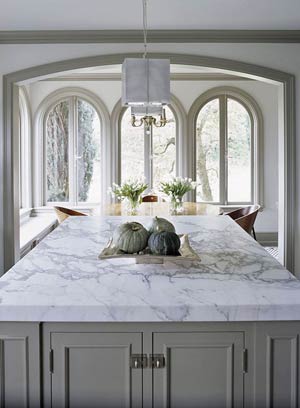
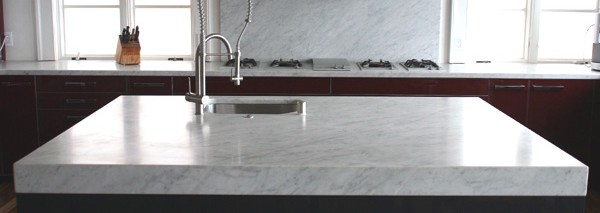
3. Marble
Oh, marble. I place it on a pedestal made of a lesser stone. Marble is my daydream countertop. In the crush pantheon, marble is…
Bond. James Bond.
Understated. Timeless. Veiny! Gorgeous, but even better looking with a bit of age.
All other thing being equal, my vote would be for marble. People are fond of wringing their hands over marble — it etches! It’s fragile! It’s soft! To quote Greg from The Petch House:
It’s a freakin’ rock, people!
The marble vs. granite (and everything else) debate will rage as long as there’s an internet, but if you are ok with patina (and if you live in an old house, it’s likely you are), marble is a good option. Petch House’s famous staining test (and my less-famous marble cleaning test) show what can happen, and it’s nothing drastic. Because it’s a rock. And what a rock!
For many months, I’ve played around with the idea of finding salvage marble somewhere and cutting it ourselves (I’m told it can be done with the right wet saw), but it seems ALL the stars would have to align for that to happen. There are also large-format marble tiles, but there’s still a grout issue. Slab remnants (since our kitchen is small) would seem to be our best option.
Pros:
Appearance (oh-la-la! also house-appropriate).
Durability (aside from the etching, which doesn’t bother me).
Color (white marble would certainly lighten up the kitchen).
Function (of all three options, marble is the one that would actually be useful just because of what it is — I bake, and marble is ideal for rolling out dough).
Cons:
Cost (tiny kitchen = lower cost, but unless we find some salvage marble somewhere, the right remnant piece and installation would be roughly $1200…certainly not terrible, but it’s about twice the cost of zinc).
Durability (maybe half of the internet is right about the fragility? I don’t think so, but I needed another con).
I would love any thoughts on any of these options, particularly if you have (or had) any of these counters. I’ll let y’all know about our decision-making progress, and I promise not to use the verb “to patinate” quite so often in future updates.
We’re mourning the imminent loss of two great local businesses.
Seven Corners Hardware, a St Paul institution for 80 years, just announced they will close after clearing out their inventory this spring. Its location on West Seventh Street is suddenly a hot commodity, and will be redeveloped. (So strange! I remember West Seventh as a dodgy area back in the day.)
As I’ve mentioned, Seven Corners was The Place to go for unusual or specialized items that you can’t find at the large chain stores. If you couldn’t find it there, it probably couldn’t be had. They’ve saved us on several occasions, and I love the place. It’s an old-school hardware store packed to the gills; there’s probably as much product in there as in a Home Depot, but in about a quarter of the space. And the staff! Super knowledgeable and so great. D’oh!
Double dukes! Or d’oh. Whatever.
But that’s not the only d’oh. I was late to the news that Mill End Textiles (only 45 years old!) is also closing. That clearance has been ongoing since November, but I’m still planning a run over to my local shop this week. Mill End has been one of my mother’s and my main fabric sources since a long dang time ago. I picked up our bedroom curtain fabric there last year (no, still not done–don’t look at me!!), and blithely mentioned shopping there in a recent sofa post. That’s when a friend shared the sad news.
Not for much longer, it isn’t!
When a shop has a store-closing sale, I feel a little weird shopping there if I didn’t support the place when it was a going concern. But we’ve been to both places so frequently that I have no compunction about picking over the remaining inventory for deals. Plus, they do need to close out the inventory, so here are links to their sales — you don’t even need to be local to benefit from the Seven Corners clearance!
Seven Corners: 5% off everything on their website (as of today–surely that will keep going down) and an inventory clearance sale going on in store.
At least S.R. Harris is still in play for fabric! Long may they continue. But does anyone local have a recommendation for obscure hardware? Once Seven Corners closes, we’re going to be at a bit of a loss.
Little Miss Springfield, which one will it beeeeeee?
-Krusty the Klown
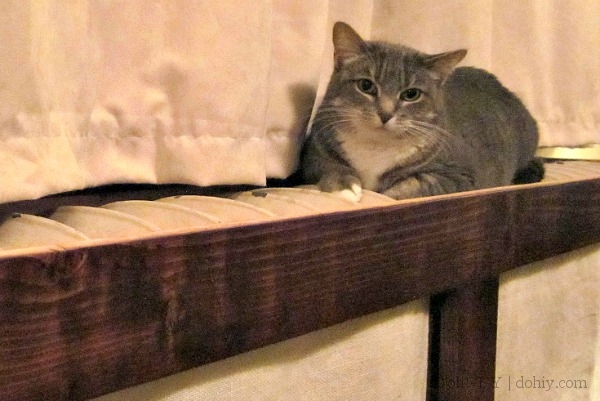
Our Mayya is a heat-seeking feline who worships at the Holy Shrine of the Radiator. Her technique is to stretch out as much as possible to take in all the available heat. This tendency leads to some amusing (and clickable) centerfold-style poses.
This little photo session reminded me of a project I’ve been meaning to get around to — adding a screen to the radiator cover on which Mayya is writhing.
This radiator runs under double window (width: approximately 2.5 stretched Mayyas), and must weigh over 400 lbs. (182 kilos). The Kev build a radiator cover for it a few years ago (or is it a cat performance space?) with the intention of adding a screen to the front openings. After he finished it, though, we liked the look of the fins, so we left it open, intending to strip the radiator at a later date.
Our radiator cover is a Kev Original, but there are lots of great plans online. Check out this one from the DIY Network, or this diagram from RadiatorCover.org:
Stripping a radiator is a messy business, so professional sandblasting is the usual solution. If you can move the radiator to the sandblasting company, it’s a very affordable proposition. But we are NOT moving a 400 lb. radiator. “I bet there are enterprising people who are willing to come pick up a radiator and bring it back sandblasted and painted!” I thought.
There aren’t.
“Or maybe there’s a cool way to wrap it up and blast it in place!”
There isn’t.
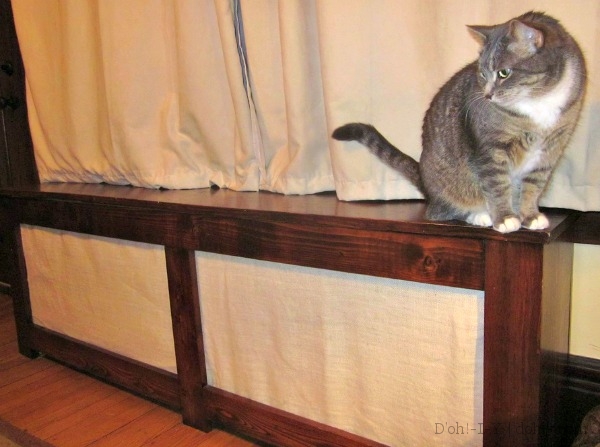
So, back to the screen idea! The classic radiator screen is a decoratively perforated metal sheet, and several radiators in the house already have such a cover.
But I still cherish the fond hope of someday stripping this particular ridiculously heavy radiator, so I looked for a cheap and temporary option that wouldn’t block heat or otherwise annoy me. We’ve used wicker caning (that flat stuff used on dining chair seats and backs) in the past, but I didn’t have enough left to cover these gaps.
But I did have burlap! And duct tape and tacks. WOOD STAIN MATCHING DUCT TAPE!
I used pinking shears to cut two pieces of burlap to size, then I folded duct tape over the edges of the pieces–pinking is not enough to stop this stuff from unraveling in a big old hurry. (Obviously, I made the pieces big enough to keep the duct tape behind the edges of the radiator cover.) I ironed the pieces, then thumb-tacked them inside the cover.
“What did you do with the top? This is not comfy for writhing!”
It’s not super-tight because the weave is so loose that there’s just no getting it super-tight. But the loose weave is good for letting heat through.
Whole thing took not long (but too long by Mayya’s reckoning), and effectively covers up the chipped radiator paint, for the time being.
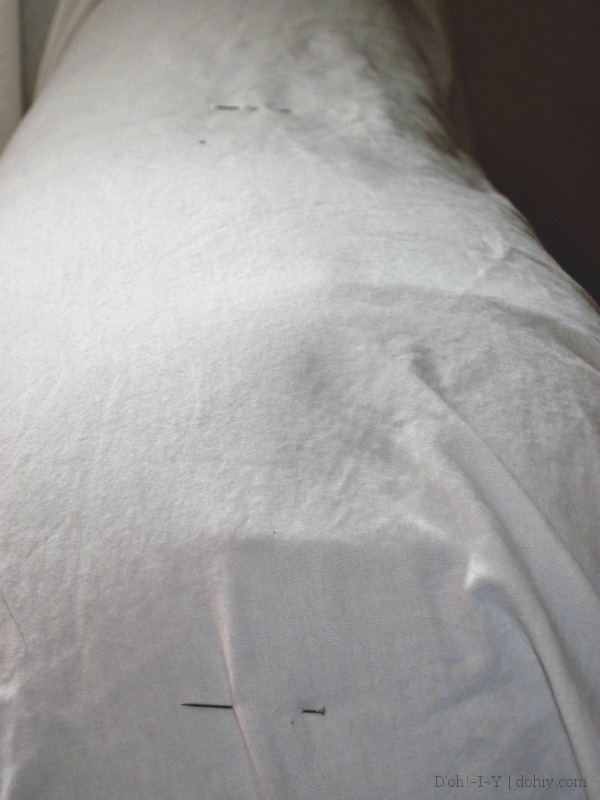
We meet again, my nemesis.
The photo captures the fact that APPARENTLY, I CAN’T IRON. This is no news to the Kev, whose mother (hi, Jean!) could iron for England.
But here’s my brilliant idea: spritz the not-quite-ironed part (all of it, both pieces) with water, turn the radiator on, and let physics sort it out.
Last time I posted about the couch updating, I talked about reinforcing the sofa frame to deal with a crack. After that job, I started working on the pattern for the slip cover.
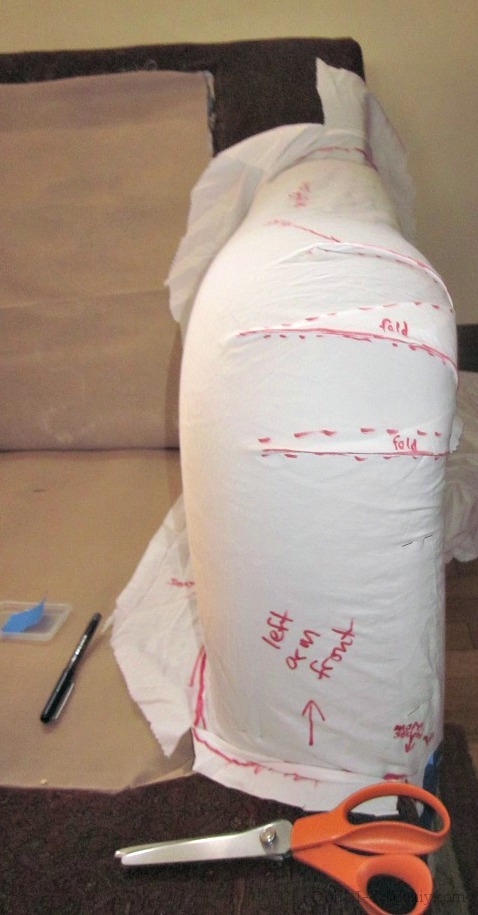
The cushions are going to be relatively easy (ha!) because I can rip the seams on the existing ones and use those as patterns, but the body is a different matter. I took an old sheet and started draping it over one arm and pinning it directly to the sofa as it started to take shape. This would definitely make a professional pattern-maker cry (and even most amateurs!), but I am not great at visualizing things in three dimensions. Being able to fiddle with the fabric until each piece made sense was a good way for me to work it out. When one area worked, I would pin it down and cut it away from the larger sheet to make a pattern piece.
Many slipcover tutorials recommend making a pattern by pinning the pieces inside out, but this sofa has some asymmetrical tucks on the arms that make the inside-out technique a little tricky, if not outright impossible (for me).
Tucks marked up on the pattern piece.
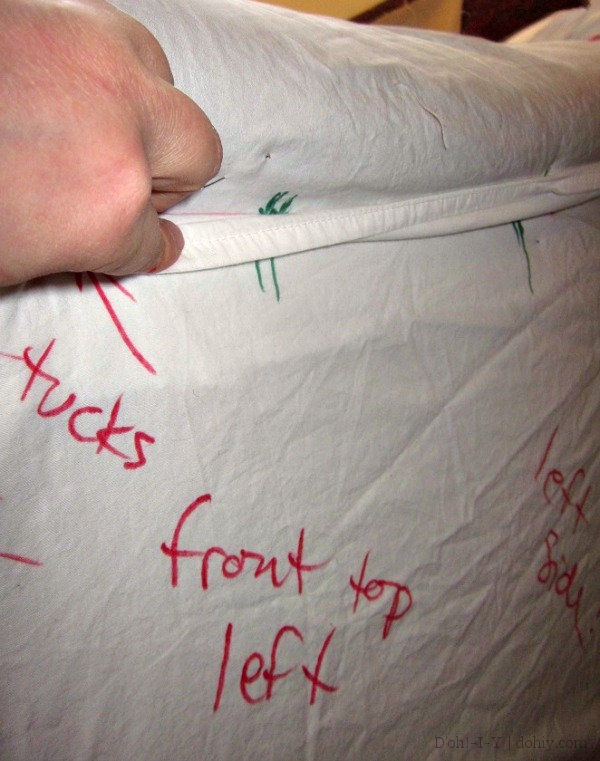
Instead, I used drew the connecting lines right on the sheet with permanent markers. I could make sure these seam lines would match up because I could see through the thin sheet material. I also made marks in different colors for spots that would match up when sewing to keep everything on track. These registration marks will be cut out as diamond shapes on the real slipcover fabric (just like on a real pattern!).
I also wrote all over the pattern pieces to help me keep track.
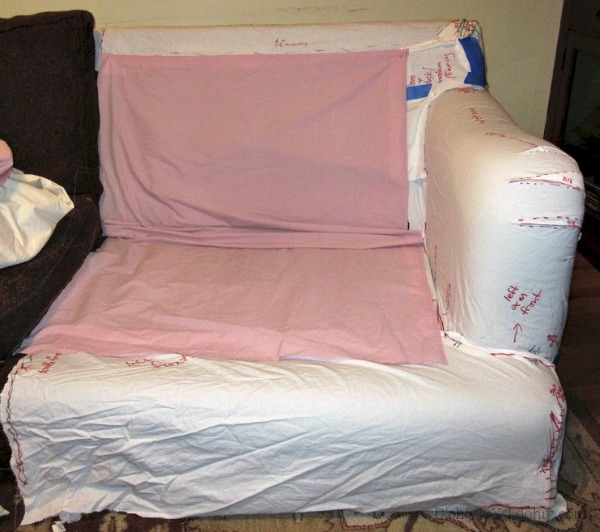
The pattern only needs to be made on one end of the sofa because the other end is a mirror image; the pattern pieces will just be flopped over when cutting the other side. So after a lot of pinning and cutting and marking, I arrived here:
Where there’s pink sheeting, there will be less expensive fabric just to hold stuff together under the cushions. Not that I’m going to buy anything particularly expensive for any part of this effort — I’m still not convinced I’ll be able to make this work! So I’ll save the fancy fabric for the next slipcover (or for just reupholstering the thing — my staple-gun-level reupholstery would be far less work than this slipcover lark).
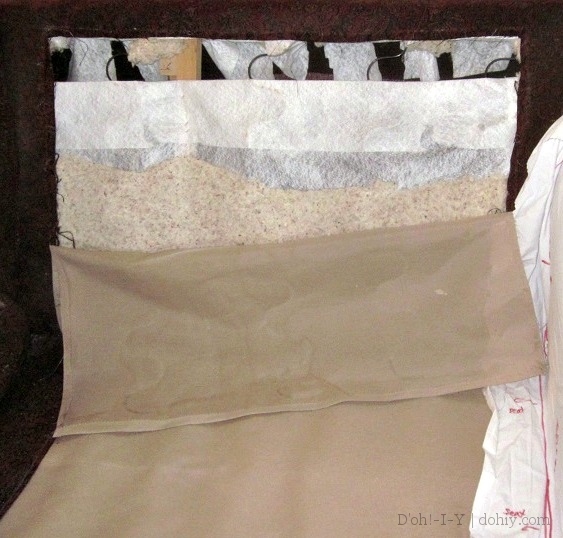
Speaking of less expensive, here’s one of the things that made me doubt whether this dumb sofa is even worth the effort. The back cushions were sewn to the back of the couch, and when I removed them…
The cushion itself is only covered up to where it’s sewn to the body, leaving a big open hole in the back, and the body was just barely covered by the beige stuff, which was sewn into the same seam. You know, we spent more than we could afford at the time on this sofa, and cheesy stuff like this is retroactively disappointing!
Despite the fact that this mess will be covered by the slipcover and then the cushions, I didn’t like this all hanging out, especially since the back cushions won’t be attached in future. I whip-stitched the beige thing back into place, but I still thought the back cushions could use a bit more protection from those springs. I picked up a remnant of a thick knit, doubled it up, and then used a curved upholstery needle to stitch it right to the existing upholstery.
This covers the entire inside of the back, but will be behind the cushions and under the slipcover. It should add a little protection and help support the cushions better when they are loose.
I’ve received all the fabric samples I ordered online during the POLAR VORTEX!! and they are now draped around the place. It looks like Barbie decided to have a blanket drive in here! There are some very cool options, but I’m inclined to go with a deep brown canvas and then dress it up with pillows. It’s affordably priced (important since this is a bit of an experiment), and it seems like it would be cat-resistant. I’m really drawn to an orange fuzzy fabric, but the other sofa is green and I’m just imagining the room ending up looking like a statement on Irish unity. Neutral canvas slipcovers are at least a less overtly political option!
Ben bought a house last year. On a recent visit, I helped fix a couple of things around the place. The biggest challenge was tidying up the floor transition from the kitchen to the sitting room.
Before moving in, Ben and Lois did a lot of work on the house. They took up the carpet from the sitting room floor to expose the floor boards, which they also sanded and refinished. This has greatly added to the character of the house (check out their living room before and after).
A door leads from the sitting room to the kitchen. The floor in the kitchen is laminate, which looks nice. But the kitchen floor is 1½ inches higher than the newly refinished sitting room floor, and there was no smooth transition between the two. Additionally, the ends of the laminate floor boards were not attached to anything, and they were all different lengths. With the carpet gone, you could see underneath the laminate from the sitting room.
The doorway between the sitting room (left) and the kitchen. The exposed ends of the laminate floor need cutting off.
So our mission, which we did choose to accept, was to:
make a straight cut across the ends of the laminate boards,
secure the ends of the laminate boards, and
create a smooth transition between the rooms.
Straightening the floor boards was the easiest part. We used a tenon saw to cut the ends of the boards along a line parallel to the floor boards in the sitting room.
Securing the ends of the laminate floor boards was somewhat trickier, because they sit ¾” above concrete. Obviously, if one is in possession of a hammer drill (which we were), it isn’t difficult to put anchors into concrete. However, we were trying to achieve an invisible fix, so that wasn’t an option.
Making the sill piece was also not without its problems. The biggest problem was the difference in slope between the kitchen and sitting room floors. The height difference between the floors ranged from 1¼” at the hinge side, to 1½” at the other side of the doorway.
We spent quite a lot of time discussing and researching possible solutions. Laminate companies do make end caps for this type of issue, but with the slope, this gap was beyond that fix. B&Q, the largest UK home improvement chain store, offered no help, and the independent stores were not much better. But eventually, we came up with a solution.
At one of the independent stores we found trim that was 2½” x ⅝” with a nice big radius on one edge. It was exactly the kind of profile that Ben wanted. We cut a piece to length, and held it flush with the top of the laminate floor. Then we measured the gap beneath this piece to sitting room floor. The gap was ½” at one end, and ¾” at the other.
This is the fabricated transition piece.
Using a jig saw, and Ben’s newly acquired workmate, we cut two strips of the 2½” x ⅝” to this profile so the trim piece would run along the slope of the floor. These strips were attached to the top piece. Once the joint on the front had been sanded it was virtually invisible.
At this point, Ben’s cousin Tom and Tom’s girlfriend Ruth arrived. We took a break and went for a walk along the canal to a pub, where we had lunch. All projects should have a pub lunch break.
Once we got back to work, it was time to fit the whole thing. First, we had to take off the door, because the bottom edge of the door was too low to go over our fabricated end cap. Then, we put packing under the edge of the kitchen floor so the laminate would be supported, and screwed it into place through the the top of the laminate.
The transition piece was attached with three screws. The heads of the screws were countersunk so that they can be hidden with wood filler prior to sanding and staining.
The transition piece screwed into place. Laminate floor on the left.
Once that piece was in place, we attached a strip of 1¼” x ¼” trim to cover the gap between the transition piece and the laminate floor. This trim holds down the edge of the laminate. Unfortunately, we couldn’t find any small finish nails or pins, so the nail heads are still visible. But Ben will countersink and fill these spots before he finishes the whole thing to match the sitting room floor.
Trim added to cover the gap and to hold down the laminate.
The last thing was to trim the bottom of the door. I held the door in position, while Ben marked a line along the top of the new piece. The jig saw came in useful once again.
With the door trimmed and back in place.
With the door back in place, the job was done. All that was left was for us to sit and admire our work. Oh, and tidy up the considerable mess we’d made before Lois came home to cook the green Thai curry she’d offered to make for dinner. And very nice it was, too.


 and the kitchen.The rough, exposed ends of the laminate floor need cutting off.")


