Completely unrelated to the usual topic of this blog…
Hull City, we could not be more proud!

#hcafc
The way you put it, it sounds so perfect. But it’s not.
– Homer Simpson
Sometimes, I look at this place and don’t see how far we’ve come, but how far there is to go. Our attic project stalled (more on that later/update: here), and I’m having trouble picking the next big thing to focus on. Meanwhile, I’ve got a stack of almost-finished things that I should just DO: the dang slipcover for one (should be done this week), and the window treatments in the bedroom (from LAST YEAR’S bedroom project). And I’ve been feeling a little out of sorts when it comes to DIY stuff.

At times like these, I tend to dither over smaller issues, such as tile patterns and picture framing. These are parts of real projects, but they are also delaying tactics–and I’ve done a bunch of them lately!
1. LED Cabinet Lighting
After I mirrored our glass-doored kitchen cabinet, I thought it would be cool to be able to light it up. I ordered a battery-operated LED strand (under $7 on Amazon):

(via)
I tucked the short strand inside the front frame of the cabinet, using masking tape to keep it in place and out of sight. When I’m feeling fancy-pants, I just flip the switch on the battery pack.

Easier than hard wiring! Especially when we’re going to use this approximately six times a year (which is exactly how often I feel fancy-pants).
2. Bed Finish Touch-up
When I posted our storage bed review, I included a picture that gave me pause.

It gave me pause because my photography skills need serious improvement, but also because the photo emphasized where the stain job stopped. I did not stain inside the frame, and I was surprised how obvious that was with the inset drawers.
So I ran a stain pen (from the walnut vs. stain pen competition) around the first half-inch or so of each drawer and frame and that’s all it took!

Sure, I stained the entire interior of this piece!
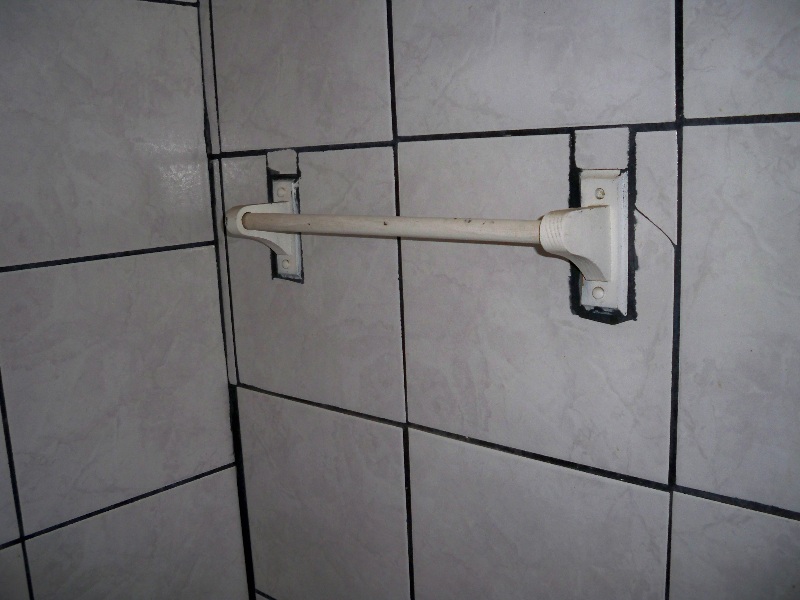
3. Countertop Bracket
Since we installed the Riverstone countertop, I’ve removed the faux beadboard wallpaper, repaired and primed the walls (from wallpaper and old backsplash removal damage), and caulked between the counter surface and the walls. All of these tasks are necessary and part of the larger backsplash project.
I also added a completely unnecessary bracket under part of the countertop. We have two overhang areas, and neither one really needs additional support, but I just thought it would make these areas look more finished. The piece I worked on is a small area that wraps around the chimney chase at the end of the kitchen.

I cut down a piece of small crown molding and added a flat piece to the top, then sank plugs into the plaster for the screws. I pushed the piece up against the underside of the overhang and screwed it into place. It probably does provide some support, insofar as if someone huge fell in the kitchen and grabbed that overhang to break their fall, it might (a) actually help, and (b) not break off. Mostly, though, I thought there should be something under this piece so it looked solid.
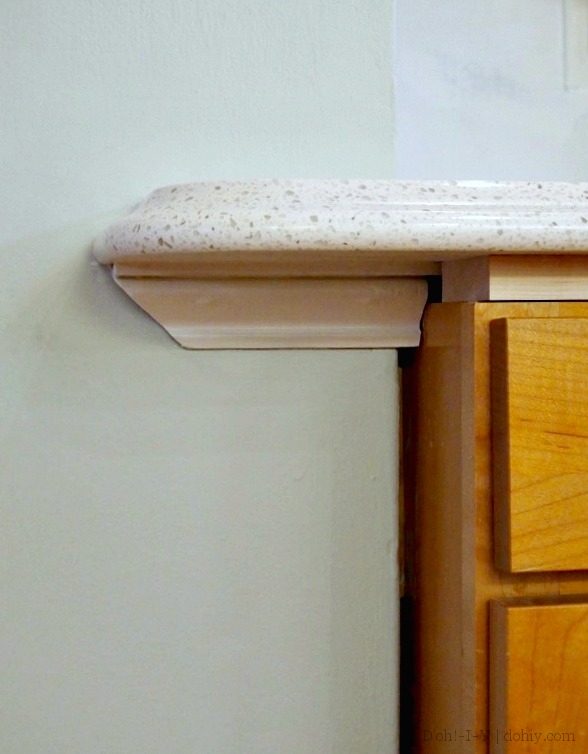
We still need to add molding to cover the substrate between the cabinets and the countertop, and to cover the gap between the cabinet and the chimney wall, but this pointless little piece is done!
Delaying tactic or not, tiny tweaks like these provide quick gratification and a little bit of forward momentum.

EXCELSIOR!!!
Postscript: Despite my enthusiastic use of products here, this post was not sponsored by anyone (as if!).
It worked! The de-bigulator worked!
– Professor Frink
Ever had anything framed? It’s spendy, huh? And completely worth it–professional framers really know their stuff. But sometimes, you want to frame an inexpensive poster or something that you love but that doesn’t make sense to splash out on.
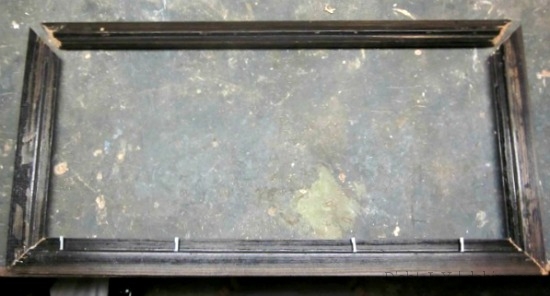
Often, you can find a frame just the right size–and sometimes with an intact mat–at a thrift shop or garage sale. But if you have something that’s a weird size, a standard cast-off frame might not cut it. In that case, measure your image (plus mat, if desired) to identify the dimensions you are seeking. With that in hand, stop at Goodwill (or similar) and look for a wood frame that is the right size in one dimension. I found this puppy, which is the right length, but too big height-wise.
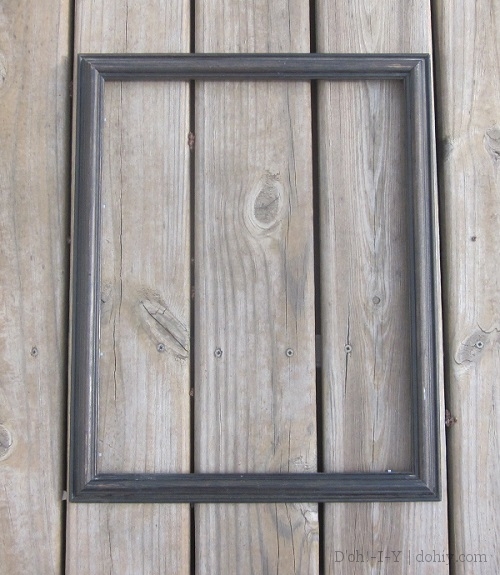
It was housing this fabulous canvas, which my friend Wendy said looked like a mustachioed Stacy Keach. One of his character roles, perhaps?

Oh, beer…I love you so much…
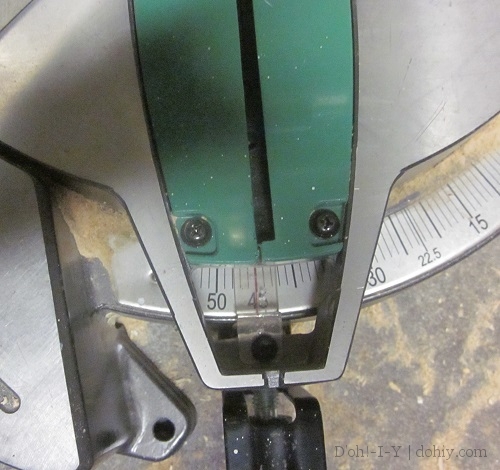
Mark the dimension you want on the inside of the frame. Set your miter saw to 45 degrees (or you can use a miter box and a hand saw; it’s still 45 degrees) and line up the blade so that the shorter end of the cut matches your mark on the frame.
No picture of the actual cutting until I get that camera installed in my eyeball.
Once you’ve cut the first piece, you can use the offcut to measure exactly the amount to cut off the other side (once you detach it).

Mark and miter that side too, then detach the other offcut, and check that the cuts line up with the loose side that you just liberated.
I tacked these pieces together with staples, then used flat corner braces to join the pieces securely.

My joints were close, but not super-tight. D’oh! After touching up the raw edge with a stain marker, I backed each joint with black electrical tape to shade any gap. Framers would be appalled.
I cut a piece of glass for the new frame from some scrap glass I had in the garage. I also picked up some mat board. I don’t have a mat cutter, but I thought, hey, a mat cutter is basically a razor blade set on an angled base. So I screwed a razor blade to a random offcut from the miter saw. Questionable concept, bad execution.
D’oh.
“Well!” I thought. “Fortunately, I have lots of extra mat board!” But take two was…WORSE. Take three was pretty awful too. It turns out you can’t just strap a razor blade to a piece of wood and cut a mat. I’ll have to learn how to do that properly at some point.
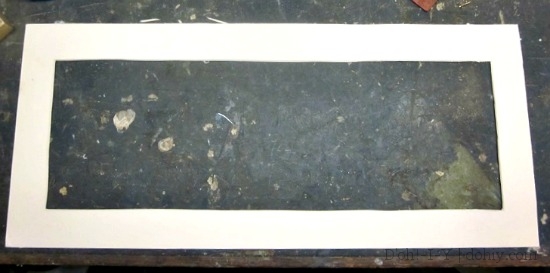
In the meantime, I came up with a Plan B. I took the least-bad mat and wrapped it in a scrap of sheer curtain fabric, adhering it with spray adhesive.

The idea was that the fabric would blur the wobbly edges of the mat to a semi-acceptable level. And it does, pretty much. For now. I guess.
But let’s focus on the fact that the frame was successfully smallified! Here’s the whole thing assembled.

The picture is cover art we bought at a Portland Cello Project concert. If you think you might like Pantera or Kanye West played on cellos–and who wouldn’t?–check them out.
I’m reorganizing our gallery wall, so I’m not ready to hang this guy yet. When I do hang it, I’m going to use a technique that a commenter told me about in response to this post about framing problems.
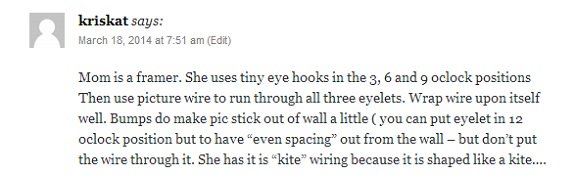
Told you framers know their stuff! Thanks for that tip, Kriskat (and Kriskat’s mom!).
There’s only one girl whose opinion matters to me–my mom.
– Bart Simpson
It’s Mother’s Day in the states.* Happy Mother’s Day, Momma!

She’s the younger-looking blonde. DNA FAIL.
My mother is an artist and decorator with a great eye. I am neither of those things. But in a level-up for the nurture side, I learned a thing or two over the years. Here are just a few of the home decor lessons Mom taught me.
1. People are more important than a look. If someone you love contributed something to your home, make it part of the mix (for at least a reasonable amount of time).
2. Your eye doesn’t need to see everything at once. Let there be things to be discovered. BUT this is not a license to clutter!
3. Think twice about wall treatments with strong vertical patterns. Your house isn’t perfectly square. Unless you are a wallpaper genius (or can hire one), it’s easy for something to end up looking wonky.
4. Don’t “stack” furniture on the wall. If you have an uninterrupted stretch of wall, avoid lining up furniture of the same type on that wall unless it reads as one bigger piece (as with bookcases). This is not a furniture shop!
5. Take off your shoes. The floors will look better and last longer. But let your guests do as they will.
6. It’s your house. If you like it, do it! Unless it’s striped wallpaper, in which case see above.
Hope you have a lovely day, Momma!
* As opposed to its being in March in the UK; I’m not sure why this is, except to trip up expats.
Oh, I hate having two heads.
– Homer Simpson
Sometimes, I dislike my brain very much. It fixates on odd details. It keeps me up late, then wakes me up at dawn to tell me its latest idea.

My brain stays up late, but never makes me waffles.
And the fixation is always about something that will eventually be happily resolved without being dealt with RIGHT NOW. This week, for instance, my brain is all hepped up about tile patterns for backsplashes.
I mean, really. THIS IS TIME I WON’T GET BACK AT THE END, BRAIN.
But I have learned quite a bit about what to consider when picking a tile pattern, so that’s something! Whether you are looking at stone, glass, or ceramic, the tiles have to go up in some sort of order. Here are some things to keep in mind when you are deciding on a tile lay-out.
1. Small vs. Large Tiles
Maybe you are drawn to large-format tiles with very few seams, or maybe you like the mosaic tile sheets made of dozens of tiny pieces. Your wall might have something to say about the choice. For kitchen backsplashes (as opposed to tiled bath enclosures), you can apply tile directly to the wall without a backer board (assuming the wall is in relatively good shape). But if the wall is older, wavy plaster, a large format tile might be hard to install. Uneven areas can cause a big tile to “seesaw” and exaggerate the issue. A smaller tile or mosaic sheet won’t emphasize these imperfections as much; they follow the contours of the wall better by virtue of being smaller.
Here are some classy graphics to make the point:


The adjacent tiles in the first case are going to be noticeably less prominent, but the smaller tiles “drape” around the problem area more closely.
If you are set on large-format and have wavy walls, you can work on the walls or use an otherwise-unnecessary backer board to give you a flat surface. (On a floor, you could use a self-leveling product, but we’re talking walls here.)
Smaller tiles do mean more grout, which means more grout cleaning. Make sure you use the right kind of grout for the project, seal it properly, and choose a color that won’t make you completely insane. (I’m still annoyed that we used white grout in the bathroom.)
2. Pattern Start and Finish
A pattern should be laid out to make sense on the wall. For instance, a chevron or angled herringbone pattern should have one of the “V”s line up behind a focal point like the cooktop or the faucet/tap. Then, the pattern proceeds outward from there.
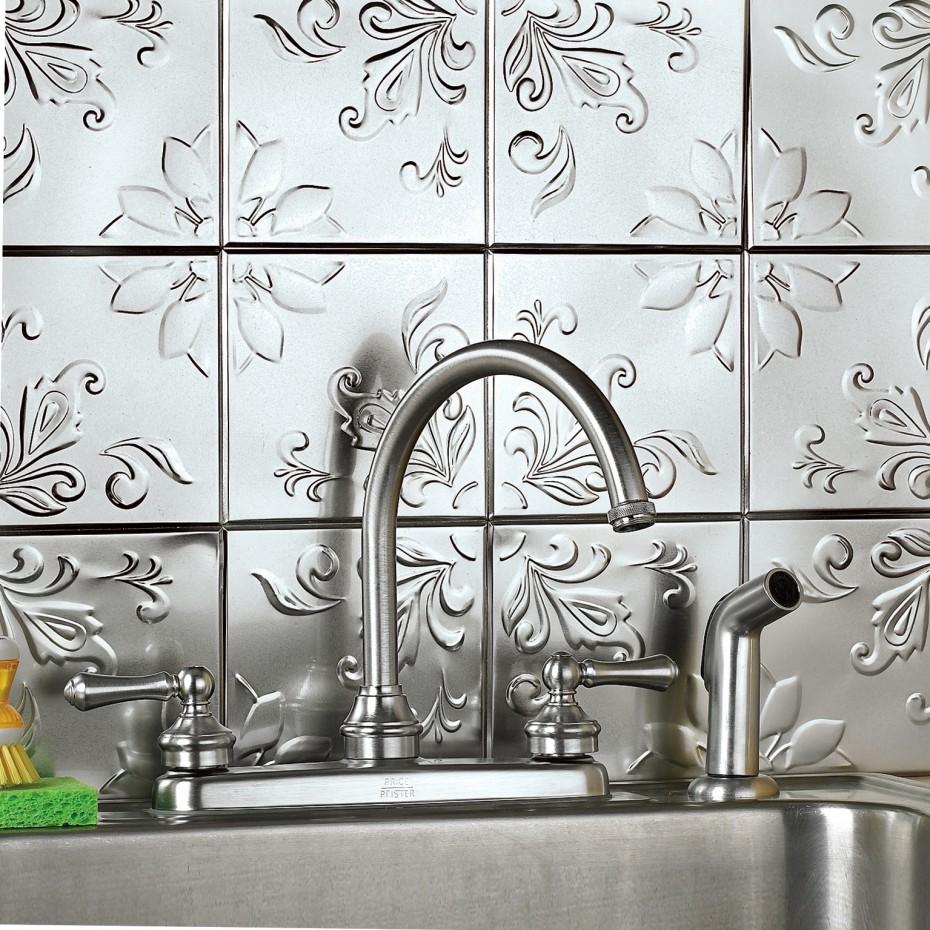
This tile is lined up so the tap is in the center of a tile, but could be lined up on the pattern instead; imagine the tile moved over a half-tile to your left so the faucet is in the middle of the embellished area (via).
But centering the pattern may mean that when you get out to the edge of the area, you’ve got a bunch of little slivers. It’s important to lay out the tile–with grout spacers–to make sure that the pattern doesn’t get ridiculous-looking at the tops and the edges. Grout spacing may take care of such problems, but keep in mind that more grout might look weird in its own way.
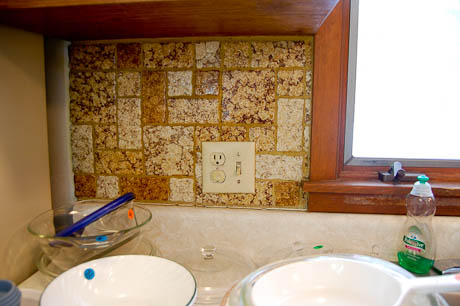
Square pattern showing off un-squareness, slivers, and bad tile spacing: a worst-case scenario from Ugly House Photos.
3. Pattern Scale and Effect
I’m no interior decorator or designer, but even non-designers should generally remember scale when selecting a tile pattern. Some patterns might not be right for a specific space. We were playing around with the idea of a modified hopscotch pattern, but I was having trouble finding images of such a pattern on a wall. A designer friend pointed out that there was a good reason for that–a pattern that tends to draw the eye outward (large tile to large tile) is good for a floor because it creates the feeling of a bigger space. But in a confined space on the wall like a backsplash, a pattern that draws the eye in that way could be annoying–your vision would keep crashing into the countertop or the upper cabinets. EYE WRECK!

A modified hopscotch pattern on a floor; we were going to use smaller tiles, obviously (via).
On the other hand, a pattern can help distract from other things. If nothing sits quite square in your kitchen, don’t pick a pattern full of straight lines that will emphasize the issue. Using a running bond (brickwork) pattern rather than a straight stacked installation might be enough, or something on the diagonal or a mosaic with a lot of angles could be a better choice.

Something organic like this would hide leveling problems (via). I’d spend all my time just stroking it and whispering, “Pretty! Pretty!” instead of noticing things out of square. Of course, if you can afford this tile, just have your whole house levelled already.
4. Popularity vs. Style
A more subjective issue is whether the pattern will look dated in a short time. In the age of Pinterest, trends take on sharper spikes, arguably for shorter cycles than in the past.
1970s backsplash: dated or fabulous? (via)
Ultimately, it’s just tile, but it would be nice to not have to rip it out for quite a while. You just have to go with what you love (and not what you’re told to love) for a reasonable outlay and hope for the best!
5. Installation
Earlier in this process, my overexcited brain decided that the backsplash should be a Penrose mosaic. Penrose tiling was discovered by an English physicist and mathematician (Roger Penrose), and it has all sorts of funky mathematical qualities. It also looks completely cool:
(via)
There are only two shapes in there. Really! So one night, my brain kept me up playing around with the idea of cutting standard tiles into hundreds of these two shapes, and then using a Penrose generator to make the pattern for the backsplash. Or? OR?? Making the tiles out of epoxy and painting/sealing them! Less cutting that way!

WE COULD TOTALLY MAKE THE TILES!
Saner parts of my head prevailed, though. In addition to picking a pattern that will suit your kitchen, fit the area neatly, and not immediately go out of fashion, pick a pattern that won’t make you pull out your hair when you install it. In the end, it’s just a way to keep the kitchen mess semi-contained.
With all those things in mind, here are some good resources for tile pattern names and examples:
If you have tiled your own backsplash, please comment on how you picked your pattern and whether you would do it again. Because seriously, I’m still looking for a reasonable idea!
I’m seeing double here: four Krustys!
– Louie
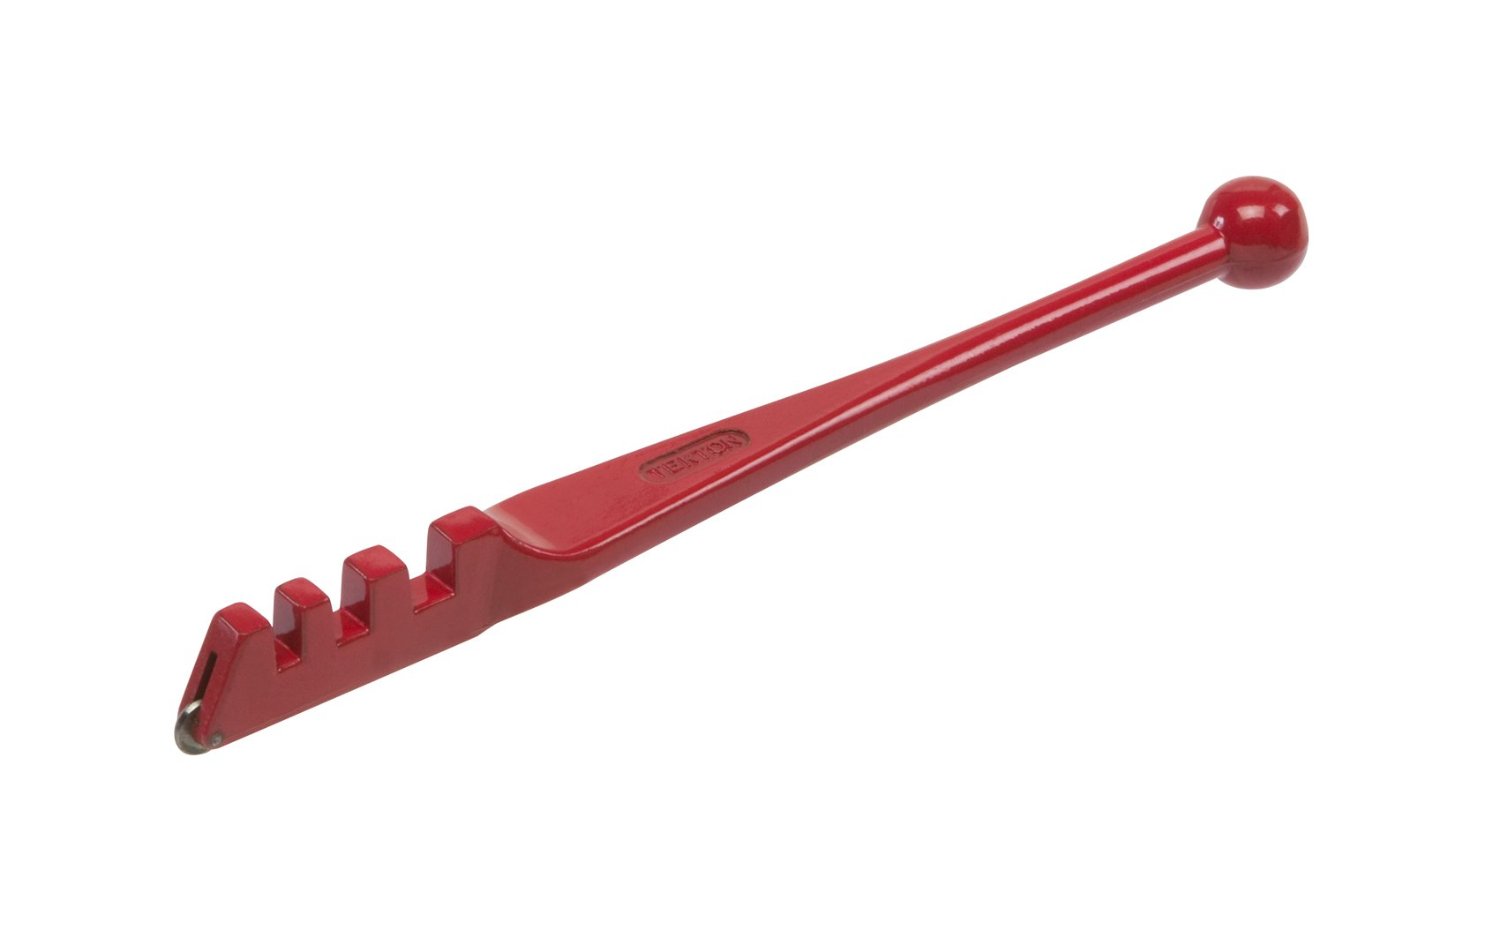
The Kev’s sister is a nurse, and she says if she could tell people one thing, it’s to wear eye protection. Here’s a project that should have you reaching for the goggles and gloves — cutting cheap mirrors to line the back of a cabinet.
A few years ago, I bought three of those super-cheap full-length mirrors and mounted them on the inside of the garden fence. I can’t find a picture of it, but I liked the effect.
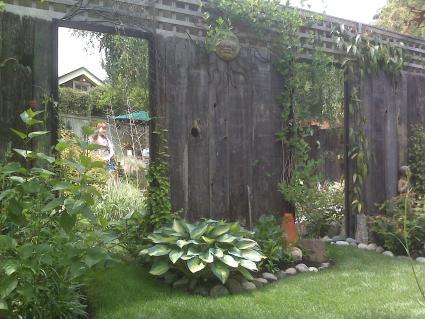
This sort of thing, but mine wasn’t nearly this good (via).
Anyway, the cheesy frames broke down after a couple of seasons, but the mirrors stayed intact and I’ve been moving them around the house. For a while, I had them propped on the counter in the kitchen so we could try out a mirrored backsplash (nixed). Then they were in the work-out space until I kicked a barbell into one of them. Since then, they’ve been leaning in a corner of the garage for some time waiting for an idea.
So here’s the idea: put mirrors in the back of our glass-doored cabinets.

This cabinet is fine, but I thought putting some mirror panes in the back would make the glassware sparkle a little more and bounce some light around.

The mirror is about a foot wide, but at about five feet tall, it was obviously not going to go into this cabinet. Enter the glass cutter! And here’s where it gets dangerous.
I store this thing in its original packaging, but it wasn’t until I got it out for this project that I saw the best product warning EVER.
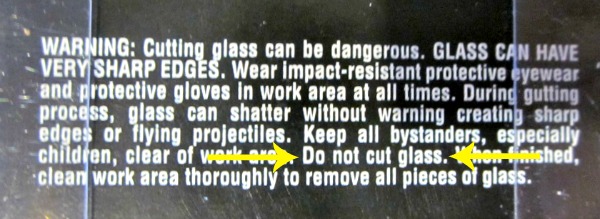
DO NOT CUT GLASS! WITH THIS GLASS CUTTER!
Don’t be (too) scared! Glass-cutting is a really satisfying and useful skill to pick up.
To cut straight lines in glass (and mirror), gather goggles, gloves, the CUTTER OF HORRIBLE DANGEROUSNESS, a ruler/straight edge, a marker, and some household oil (just 3-in-1 oil is fine).

Before you really get started, two quick notes:
Got that? Ok, now don all your protective gear (wear long sleeves). Put the piece on a hard surface (the garage floor for me). Measure and mark where you want your cut using the marker and straight edge. Then, spread a thin line of oil on the line.
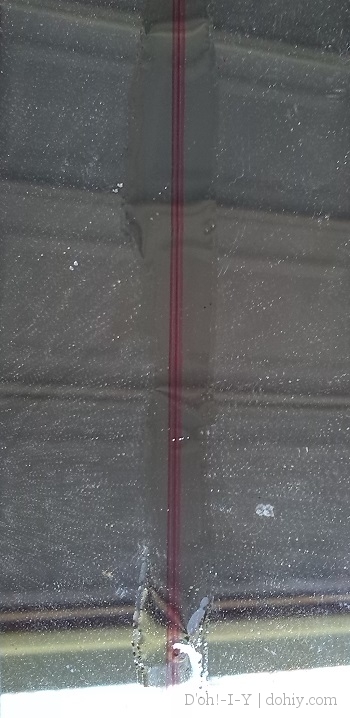
I oversquirted the oil here. Too much oil can make it hard to cut straight, and the cut I made on this oil slick was not particularly clean. If your cut is not going to be very long, you can muddle the glass cutter’s blade in oil, making sure it’s completely coated (but, again, not dripping) instead of applying oil to the glass.
Now, score the glass. You can use the straight edge to help guide the blade or go all freehand. I start nearest me and push the blade forward, but you can go either way. Push firmly but don’t bear down like you’re birthing a baby or anything. If it’s going right, the glass will make a sound much like fabric ripping. (Practicing on scraps will help you figure out the pressure you need.)
But this doesn’t actually cut the glass. You break the glass along the score line. Wearing gloves and goggles, carefully bend the glass. It should break neatly right along your line.

Break along the score line
You can smooth off the break with fine sandpaper if you like.
I cut two pieces to go side by side in the back of the cabinet. I wanted the pieces to stand flat against the back of the cabinet, where they would be held in place by the shelf. I did add some tape rolls to the back, but they were mainly to keep it all upright until I pinned everything in place with the shelf.
One of my pieces was a tiny bit shorter than the other, so I shimmed the bottom edge. I don’t think it would have been noticeable if I hadn’t. In fact, it’s a very subtle effect overall. The Kev is only learning that we have a mirrored cabinet while reading this post. (G’morning, sug.)


All in all, a pretty easy (but DANGEROUS) project–and a great way to reuse cheap or damaged mirrors.
40,000 Watt Energy Miser Lighthouse Lightbulb
– The Simpsons
We are in the process of changing over our lighting from CFL and incandescent bulbs to LEDs. We started with the lights that we use the most.

The kitchen fixture came with halogen GU10 lamps, but we found LED replacements that are as bright and slightly warmer than their predecessors. The only difference is that the bulbs are a bit longer than the original halogens. It doesn’t bother us at all.
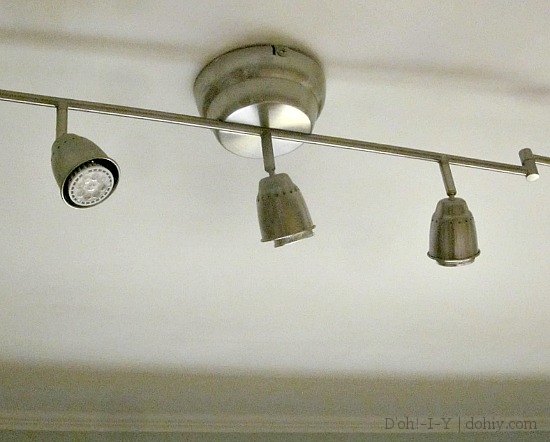
Fixture by Ikea; it now comes with LEDs from the get-go. Our retrofits stick out slightly.
We’ve also swapped our table lamp bulbs and utility fixtures (tip: Ikea LED bulbs are a good deal, and they are often on special), and we’re starting on ceiling lights.
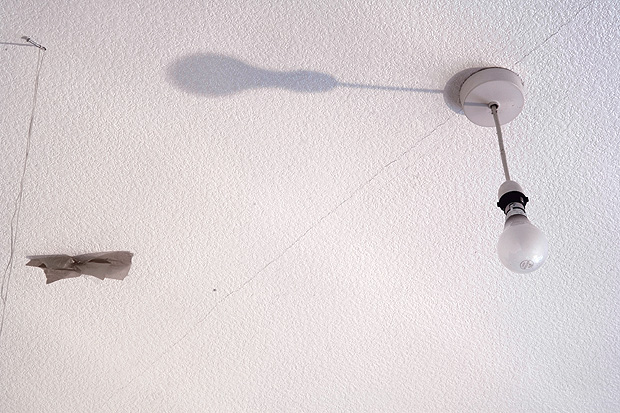
For exposed-bulb fixtures that don’t see much use (like our restored vintage ceiling lights), we still use incandescents. As I mentioned in one restoration post, we intend to swap these lights over as well.

Incandescent for now
The problem is, most LED lights ain’t pretty. I mean, they aren’t anything like as bad as CFLs, but most of them are not winning any pageants.
Kind of a radio face (via)
Even though LEDs use much less electricity than standard bulbs, they still need a way to move heat away from the diodes themselves, often via exposed fins. This heat sink helps LEDs last a loooooong time, but they do change the look of the light. That doesn’t mean they can’t be attractive, though, as long as we update our thinking on what a bulb should or can be. After all, if we always stuck with how things used to look, bike rides would be much less fun.

As more companies manufacture LED lamps, there are more and better-looking options for exposed-light fixtures. Some of them incorporate the heat sink element as a design feature, and others emulate existing styles. Here are a few of the lookers now available.
1. Candlelabra/Chandelier Bulbs
LED manufacturers tackled the appearance of candlelabra bulbs early on. This Martek 3-watt flame-tip bulb (40w equivalent) is frosted so you don’t see the diodes inside, and they dressed it up with that bit of brass instead of the usual white plastic. This bulb could be used in a medium-base fixture with an adapter.

3W Flame Tip (via)
For a vintage look, try this flame-look bulb from Philips. It’s 4.5 watts (also 40w equivalent) with a medium base. It reminds me of turn-of-the-century flame lamp shades (like this shade from House of Antique Hardware).
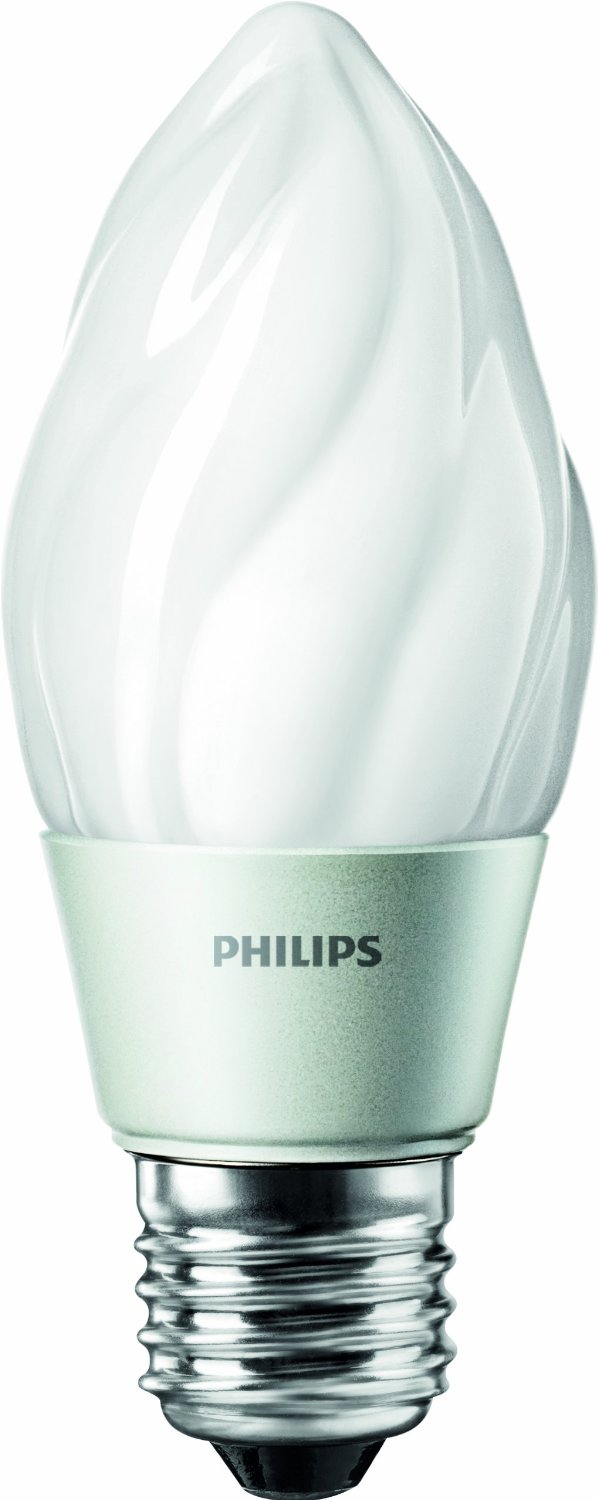
4.5W Philips Bulb (via)
If your vintage light takes candlelabra bulbs, these sympathetically styled LEDs have you covered.
2. Downlight Bulbs
While candlelabra bulbs are an easy visual transition, bulbs for more general use have a very different look. Brighter lights mean larger heat sinks, but that’s not necessarily a bad thing. This downlight bulb from ThorFire (seriously: ThorFire) makes a feature of the heat sink fins, adding a contrasting band. It almost looks steampunk to me. This 7-watt unit comes in warm and cool white versions, and replaces 70 watts of incandescent light.
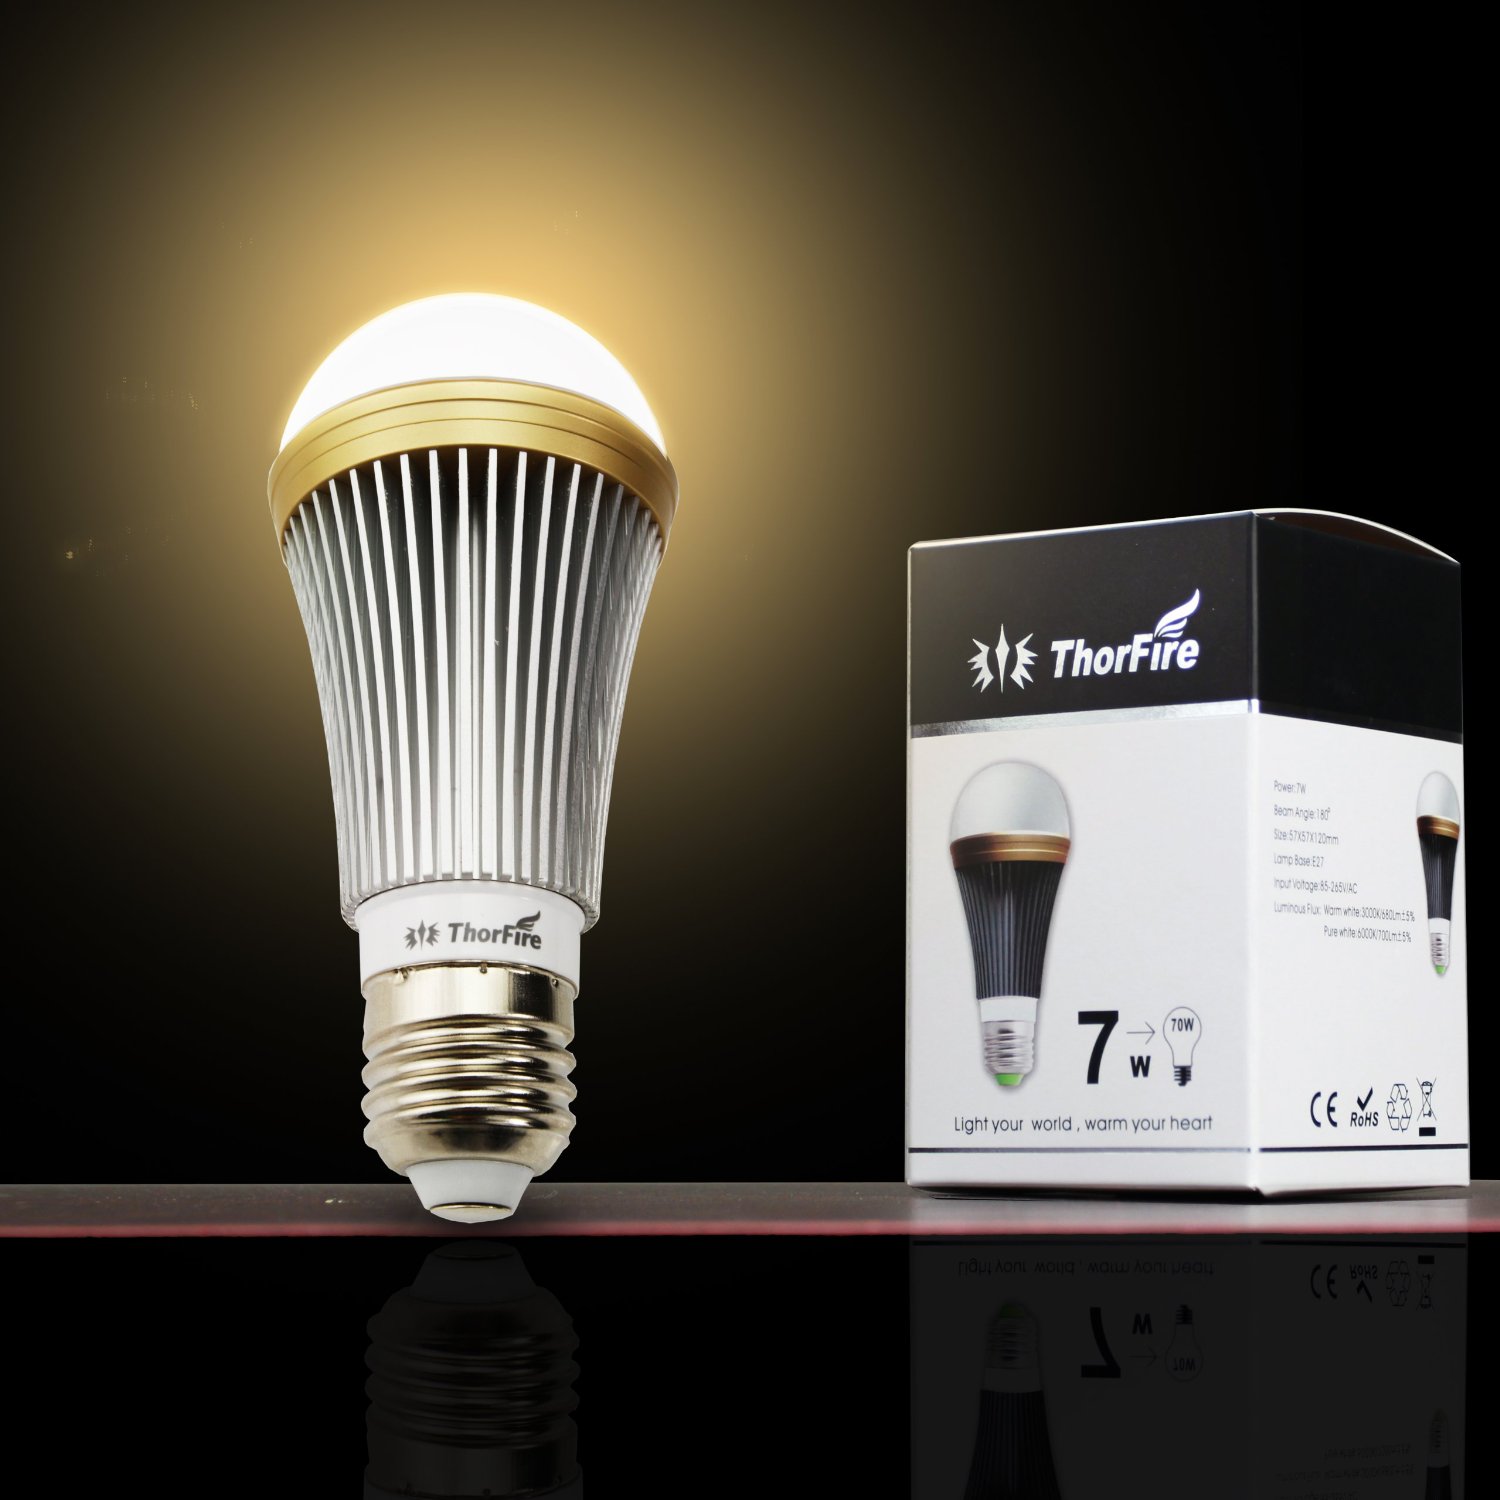
THORFIRE!!!! (via)
Of course, I was so amused by the brand name that I had to do an image search. I passed up some fiery comic book covers in favor of this image that some dear friends will appreciate.

Thor. Not on fire, but still pretty hot.
Moving on…the less divinely named SunSun Lighting offers this 40-watt equivalent bulb with a smooth, silver-tone heat sink, which would work great with chrome or nickel fixtures.
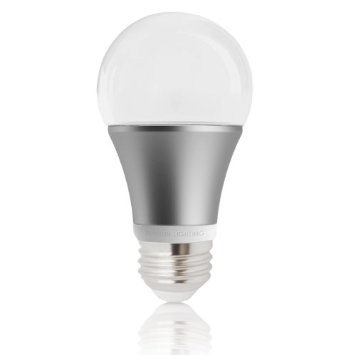
6.5W by SunSun (via)
Come back to this bulb later if you have a chrome or nickel fixture, because you’re probably still snickering at THORFIRE!!!! or thinking of Chris Hemsworth (or both), depending on your inclinations.
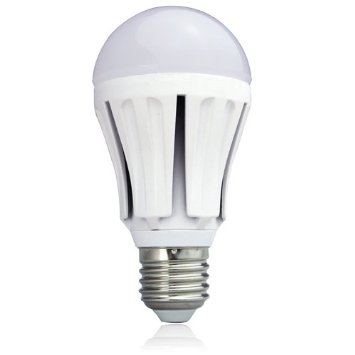
3. Globe and Edison Bulbs
It’s pretty easy to find inoffensive LED globes with frosted glass and a white heat sink cover (this one and this one, for instance). If you are interested in a clear bulb, however, check this out:
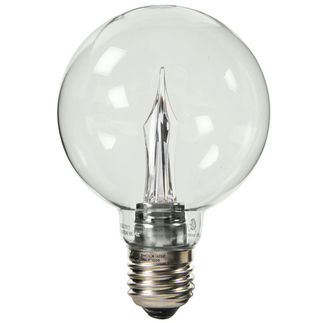
Dimmable 3w globe bulb (via)
Archipelago Lighting built this 25w equivalent with an enclosed heat sink, making the bulb more traditional-looking. They also simulated the look of a filament around the diodes. If it had some confetti in it, it could be a London Shard snowglobe.

When this bulb is lit, I imagine it is indistinguishable from a clear incandescent globe.
There’s been quite a fashion for “Edison” filament bulbs in recent years. An Australian company, Edison Light Globes, brought LEDs to this trend by adding diodes and sinks to the old-school bulb shape. They offer these and other bulbs for 110/120- and 220/240-volt systems, and they look terrific.
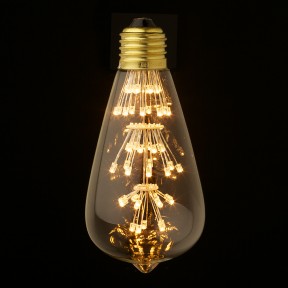
Imitation Edison bulb (via) for 220/240; also comes with a bayonet fitting for the UK
Edison Globe also has a version of this bulb for 110-volt service (although the LED array isn’t as cool-looking as in the 220/240).
4. Traditional Bulb Shape
Change averse? Maybe you just want something that looks like a dang lightbulb already?
Ok.
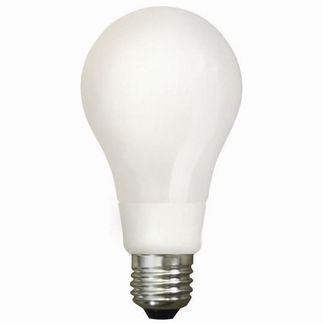
6W Omnidirectional Bulb (via)
This one from LEDshine360 is a 40w equivalent and could not look more like a regular frosted incandescent bulb. If you really want that bare-lightbulb look you remember from your first place, you’re all set!
(via)
No more excuses! There’s a good LED for just about every fixture. Follow Thor’s example.

C’mon, Carter, build us a house, you lazy bum!
– Homer Simpson
I volunteer for Habitat for Humanity for selfish reasons–it’s so much fun! I work on landscaping, from planning to planting. Habitat sources its plants from Bailey Nurseries, and they let us choose from a list of incredibly hardy plants, including a large proportion of natives. I posted selections from the list last year, including:
1. Echinacea (Coneflower)

2. Agastache (Anise Hyssop)

3. Rudbeckia (Black-Eyed Susan)

1. Physocarpus (Ninebark)
Ninebark is a very hardy shrub that comes in just about every size. Pictures of ninebark tend to focus on the spring flowering stage, and not without reason.

(via)
But while the flowers are pretty, they don’t last that long. Ninebark’s best feature is really its foliage. You can take your pick of colors.

Dart’s Gold Ninebark in autumn (starts chartreuse in spring) (via)

Center Glow Ninebark (via)
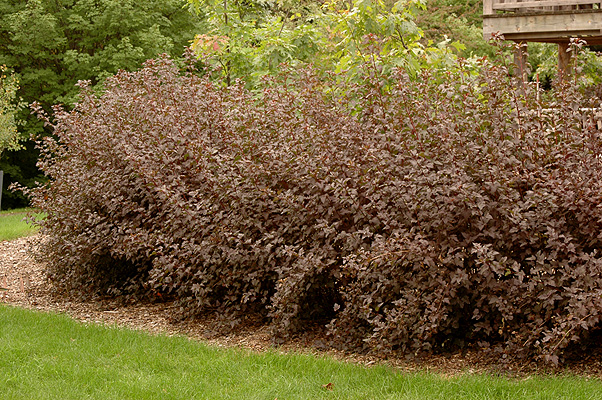
Diablo Ninebark (via)
Ninebark is a North American native, and it provides excellent habitat for songbirds. Its flowers are good early fodder for bees and butterflies. It is drought-tolerant, and will grow in a range of soil types, both in sun and part-shade. Ninebark is great as a hedge or as a feature. Pick a color, any color, and enjoy the show.
2. Asclepias Tuberosa (Butterfly Flower)
“Butterfly Flower” (also called “Butterfly Weed”) is simply a type of milkweed (asclepias). Milkweed plants host monarch butterflies, and with monarchs in serious decline, they need all the help we can offer. Planting butterfly flower–or any milkweed–is an easy way to help butterflies. Plus you end up with a good-looking, easy-care plant.
These are typically orange-flowered, but have been bred into a full spectrum. The butterflies don’t care one way or another, so choose the one you like (and plant a bunch).

Gurney’s Butterfly Flower Mix (via)
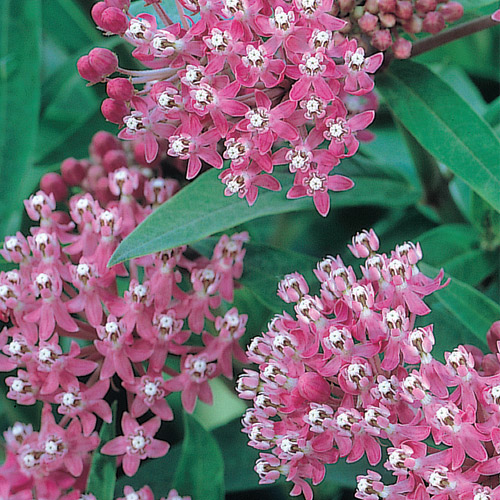
Sweet Vanilla Butterfly Flower from Michigan Bulb (via)
Butterfly Flower doesn’t like to be transplanted once it’s in place (it puts down a taproot and hates to lose it), so pick where you want it to be for the long haul.
And remember: ANY asclepias variety can host monarch butterflies, so don’t stop at Butterfly Flower. Plant milkweed with wild abandon.

Orange Butterfly Flower from Park Seed with friend (via)
This milkweed, like others, is native to the Americas, so it’s easy to grow as long as you have a sunny spot. Because it establishes a taproot, it does well in dry spells (although you should keep it well-watered during its first season). It’s hardy to zone 3, so winter is no problem.
3. Pulmonaria (Lungwort)
If you have a shade garden, you are probably somewhat tired of hostas. They are great, but don’t other things grow in the shade? Why, yes! Check out this strangely named but lovely groundcover.

(via)
An aside: I love botanical names. The Latin root pulmon- is for lungs (you’ve probably heard of pulmonary embolisms). The fancy name “pulmonaria” comes from the vernacular “lungwort” in English (lung + “wort” from the Middle English for herbaceous plants). It is so named because the leaves look like lungs, with the spots reminding early physicians of afflicted lungs. The theory was that a plant that resembled a physical problem must have medicinal effects for that problem, so lungwort was used to treat lung ailments. It doesn’t do ANYTHING for such ailments, but nevertheless.

Early doctors may have been stretching a bit in the “plants that look like things” department.
Lungwort comes in pinks and purples and blues, with some varieties bred for larger white splashes on the foliage as well. It’s at home in the shade, where it’s easy to grow. I have them under spruce where little else will grow.

Raspberry Splash Pulmonaria (via)

Roy Davidson Pulmonaria (via)
They bloom very early. Did I mention they do that in the shade? But unlike other shade plants, the flowers are vividly colored. Once they are gone, the foliage is a great counterpoint to other shade plants. The white splashes help light up darker garden spaces.

(via)
They still don’t look like lungs, though.
They spread (slowly) via rhizomes and require little effort. Moist shade is better than dry; however, like peace lilies, they droop dramatically before they are really in trouble, so they let you know if they need a drink. Since they stay low, they are perfect for lining a path. I can never have enough of them, and it’s going to be fun to use them in Habitat landscapes.
Here’s to a great 2014 planting season!
…out here, in the cheap showiness of nature.
– Rev. Lovejoy
It’s planting time! Or almost! The forsythia (always a litmus test for spring) certainly thinks it’s time to get moving.

And my winter sowing jugs are encouragingly full of seedlings.

Winter sowing is a great way to start new plants with very little effort or cost. But seedlings take a year or two to really show their stuff, and sometimes you want plants that are ready to go right now. But have you seen the prices at the garden center??
To be clear, I buy many, many plants, shrubs, and trees at nurseries. I understand that nurseries and garden centers have serious overhead necessary to produce healthy plants. The prices are generally quite fair, all things considered. If you are trying to plant a large area, though, shopping at garden centers can be cost-prohibitive. Fortunately, there are many free or cheap plant and shrub options.
1. Plant Swaps, Exchanges and Trades
Look for plant swaps in your local newspaper or in social media (the Twin Cities Perennial Exchange can be found on Facebook, for instance).

Plant swap excitement! (via)
Plant swaps can be an informal “go fish” scenarios, where group members list what they have to share and what they are looking for, or they can be events, like the one shown above. In either case, find out the exchange’s rules. Some plant trades require even or agreed trades and some events require that you bring at least one plant to swap. Others, though (including the one in my neighborhood) allow anyone to show up and take as many plants as they like, with no need to contribute.
Of course, you can also arrange your own, personal plant swap with a friend. My friend Wendy and I swap just about every year. I always get the much better end of that bargain (viva plant swap at Wendy’s!).
Plant swaps are fun and friendly, but check to make sure you know what you are getting and how to care for it for best results. People participating in swaps will be happy to tell you about what they have.
2. Community Plant Sales

Community sales can be a little hosta-heavy, but who can’t use another hosta? (via)
Spring brings all sorts of community gardening events. Look for garden sales sponsored by schools and churches — locally, over 15,000 people attended the Friends School sale last year. It’s such a big deal that they have it at the state fairgrounds! But there are many other smaller (and less crowded) events to be found.
If there’s an active Master Gardener program in your area (find out here), they throw a great sale, usually featuring plants the MGs started or brought from their own gardens. Tip: if you go late in the sale, you might find that what’s left is significantly marked down.
In every case, make sure you know what you are getting, and if it is the right plant for the right place. You’ll save money if you avoid impulse buys. That gorgeous shrub rose may be the plant of your dreams, but if your garden is mostly dry shade, the rose would not be much of a rose (by any name!).
3. Craigslist “Free” and “Farm and Garden” Sections
Good old Craig has you covered on the landscape front. If you go into the “Free” section on your local site and search for “plants” or a specific (common) plant you are seeking, you are likely to find people with extra material to share.
Often, it’s a way for the poster to get a little labor out of the deal — a couple of years ago, I dug out a large lily of the valley patch that the owner wanted to replant. For me, great, established plants; for her, free labor clearing the area.

Lily of the valley patch (via)
Some people overreach, though, and offer huge shrubs if you come dig them out. Keep in mind what’s likely to survive a move (or even fit in your car), even if you can dig it out.
Of course, folks sell plants on Craigslist as well, usually in the “Farm and Garden” section, but “Household” is another likely area to check. Some people sell plant divisions at their garage sales, so it’s worth a peek in those listings as well. Naturally, for any of these sales, you should follow normal CL safety guidelines.
4. eBay
Ok, weird lamps and used DVDs are one thing, but plants?? Yep. I buy seeds and plants on eBay every year. eBay is particularly good for buying groundcover plants in bulk.
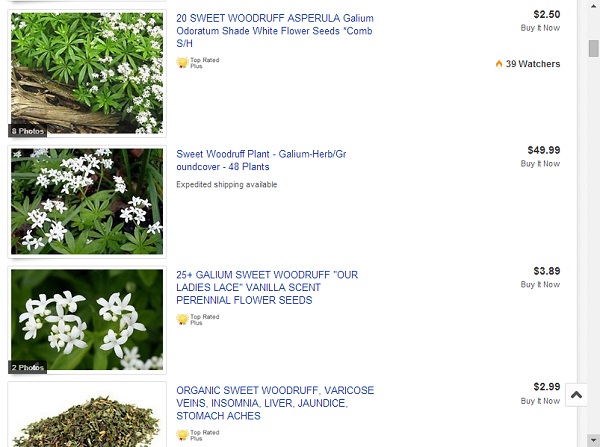
Sweet Woodruff Listings
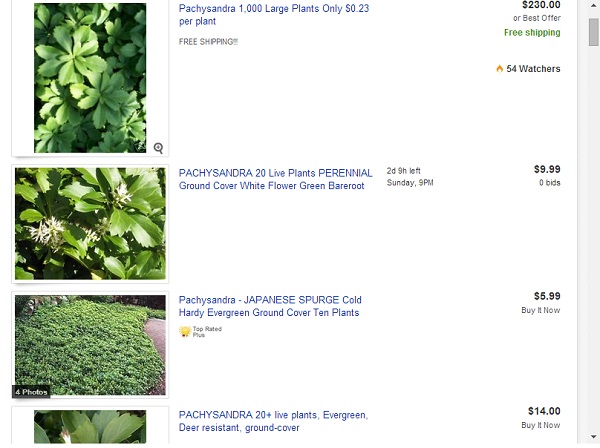
Pachysandra Listings
These types of listings are usually for bareroot plants, so be sure that you will be available and ready to hydrate and plant the little guys when they arrive.
eBay is also good for plants that are not popular enough to be carried by nurseries. I bought a crossvine a few years ago — it’s not hardy in my zone, but I grow it in a container and bring it in for the winter. It’s a noninvasive alternative to trumpet vine for attracting hummingbirds.

Gorgeous crossvine, but not mine (via)
5. Mail Order Nurseries
If “$40 FREE!!!!!!!!!!!!!!!!!!” and similar offers are familiar to you, you are already on the mail order nursery mailing list. While the bombastic offers can be tiresome, there are some good deals to be had from these sellers. Shop when they are offering their major promos and/or free shipping, and you can rack up a stack of plants for not a lot of money. Here are a few to check out:
Keep in mind that plants from the low-price nurseries are bare-root or small starts. They are better-established than winter-sowing seedlings, but they will not look like the catalog pictures when you receive them. Many customer complaints for mail order companies come from overstated expectations. Look for what you will get in the listing to avoid disappointment.

The picture is of a mature plant, because that’s where this shrub will end up. But when you buy, you will receive a 4-inch pot with a well-rooted baby plant that might not even have leaves yet. I bought one of these and it grew quickly and is beautiful now, but it was truly tiny when delivered. Be aware.
I’ve always had luck with the listed vendors. If a plant arrived in bad shape, I’ve received prompt replacements or refunds upon contacting the nursery. Not everyone agrees, however, and you may want to read up on the business before ordering. If so, the best source is Dave’s Garden’s Garden Watchdog. There, you can find reviews for mail order, catalog, and online sellers, and make a decision.
For all of these sources, in addition to knowing what the plants are and what care they need, be careful not to bring home a bully. Invasive plant lists for the U.S. are available here and here, and you can find lists for individual states here. Nurseries are generally careful not to sell problem plants, but individuals may not know or care. Wisteria is beautiful, but the Asian varieties don’t have the right pests to slow their roll in the states, and can take over an area with suckers.

Which wisteria is which? (via)
There are less aggressive wisteria varieties, but if someone at a plant swap is just calling it “wisteria” then you might take home a future problem (more on wisteria types here).
Whatever plant you are seeking, happy hunting!
Wait. I can’t start without music to inspire me. Why is Bach next to Muddy Waters? That’s my problem–I’ve got to get these CDs organized. . . . There! Finished. Now, if I win just two more games of online Boggle, I’ll be ready to start.
– Lisa Simpson
I was going to slipcover the sofa. I tested out a range of possible fabrics and I repaired the frame, so it was time to start sewing! But then I talked to my mother (a sewing genius) about the fabric choice, and re-thought the cotton duck. Mom recommended a heavier fabric with some synthetic content; it would hold its shape and color better. I ordered some more swatches of fabric and tested those, finally settling on a microsuede that doesn’t look like microsuede.

Legacy Chocolate Faux Suede (more like corduroy in person)
It was back-ordered, so I had to wait. And then I got busy with other things. But the real problem was, I was scared I was going to screw it up. I have some basic sewing skills, but nothing fancy. And honestly, even though we own the D’OH! in our blog title, it’s intimidating to have a project to be posted that might not work out well.

Once I got started, though, I felt better. And look, I have the cushions done!

They aren’t anywhere near perfect, but they are much better than I was expecting. My sewing skills are really basic, so if I can do this, so can you (assuming you, too, have basic sewing skills).
There are a number of excellent tutorials about sewing boxed and zippered cushions. I reviewed all of these (and more) while working up the nerve to start sewing.
I can’t improve on these posts from an instructional standpoint, but I can offer some tips to fellow wimpy sewers. If your skills are in the “basic” zone, here are a few things (other than working slowly and carefully) that might help you as you work through these tutorials.
1. Use pre-made piping/welting. Last thing I need is another step! Making your own piping is not that hard, but ready-to-use piping is cheap and easy (and available in a ton of colors). It’s a good option for less-fabulous sewers.

If you are replacing zippered cushions, another time and money saver is re-using the zippers that are in the old cushion covers. If you manage to zip the pull right off the end of the zipper (twice!) as I did, use one of these techniques to put it back together (I used the screwdriver method both times).
2. Use heavy-duty needles and thread. Typically, I start a sewing project with whatever needle is in the machine and with basic thread (UK: cotton). This time, I actually went out especially to pick up heavy-duty needles and thread. Because it’s upholstery! Lots of wear! Heavy fabric! It goes so much better with a needle and thread that will stand up to the task. (Also, buy more thread than you think you’re going to need. I bought five spools, and I’m going to use most of it, maybe all.)
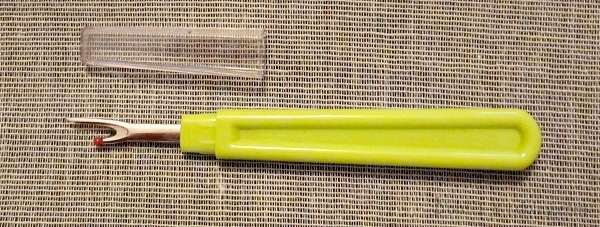
3. Buy a seam ripper. I tore down the existing sofa cushions to make patterns for the slipcovers. I’ve never had a seam ripper — I just used a razor blade or a box cutter. On a lark, I picked up a seam ripper, and it’s completely worth the two bucks. It’s just the right tool for the task.
4. Load up several bobbins before you start. Bobbins run out quicker than spools, and once you have some forward momentum, you don’t want to take time out to thread bobbins. When you first sit down, whip up three or four full bobbins that you can swap out quickly.
5. If you have to thread a bobbin after threading the needle, cheat. I hate unthreading the machine so I can thread a bobbin. Maybe technically it’s not necessary to unthread, but bobbin-winding always screws up my threading. (Remember: I’m not great at this!) Fortunately, most machines are cheatable, assuming you have multiple spools of thread. Take off the sewing spool and set it aside (carefully) without unthreading the machine. Put your bobbin-threading spool on the machine, but instead of running it through the machine to thread the bobbin, run it through your fingers.
Clear? No? Here’s a picture.
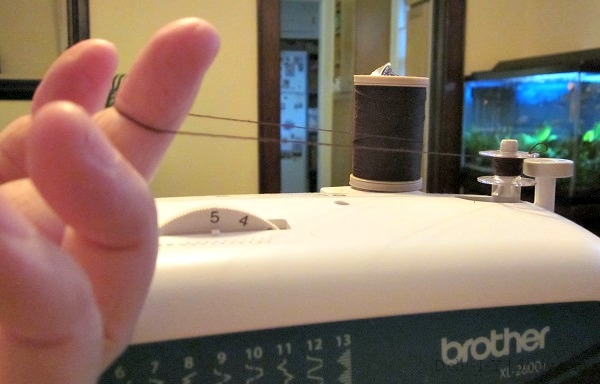
Move your fingers up and down as you thread the bobbin to keep it winding evenly (it takes very little movement). When the bobbin’s full, just switch spools again, and you’re good to go without rethreading.
6. Make a tiny paper version of your pattern pieces. I had four total cushions: two back and two seat. My sofa has “T” seat cushions and fitted back cushions, meaning that one side on each cushion has a notch out of it. I only ripped one back and one seat cushion, and turned or inverted the pieces as necessary for the remaining parts. To help keep track of where the notch was supposed to be in each case, I made a small paper reference for the finished piece I was cutting, marking which side was “out” and which side was notched. I set it alongside the fabric before cutting as a double-check so I didn’t cut wrong side up or facing the wrong direction.
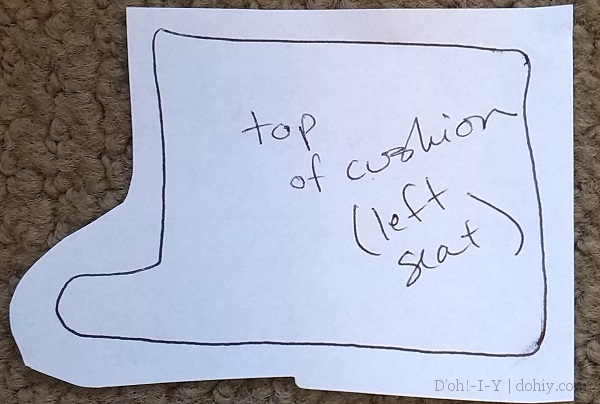
This little crutch saved me from considerable recutting (and from buying more fabric).
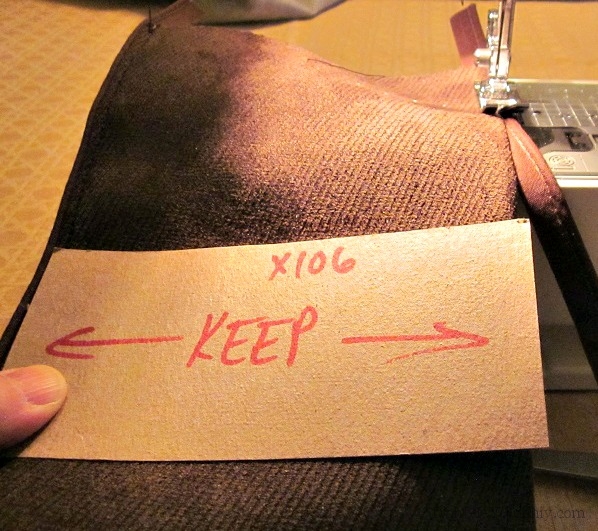
7. Make a spacer to keep your sides on track. When I was cutting out the narrow side pieces, I used the existing piece to make a true-to-size template. This piece of cardboard is the width of the existing finished piece, less the welt. (The “x 106” is the length of the piece in inches, and KEEP is so I didn’t throw it away in a neatening frenzy.)
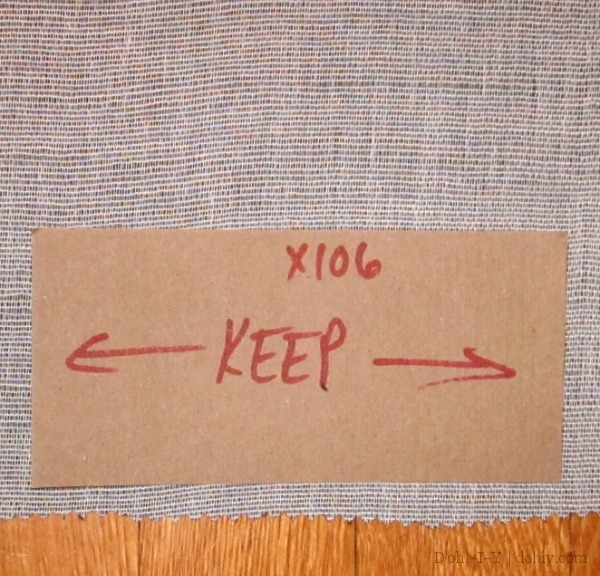
As I was attaching the piping, I used the template to check the spacing and to keep the sides parallel. This trick reduced the amount of pinning I had to do, and helped keep everything on track. In the next picture, for instance, the template showed me I needed to reduce the depth of the hem on the piped edge slightly as I sewed.
Checking the template from time to time kept me on the more or less straight and narrow.
8. Choose your battles. Not a single one of my zipper installations looks professional, but I don’t care! The zippers are functional, the seams are secure, and you can’t bloody well SEE them. On the other hand, I had trouble matching up the turns on one of the back cushions, causing puckers and general weirdness. I ripped it out and resewed it. Twice.

It was worth the extra effort because the mistake in alignment ruined the line of the cushion. The zipper? No effect on appearance, so functional is good enough.
Finally, some progress! This weekend, I hope to finish the rest of the job.