
Marge: What if something goes wrong?
Homer: What if? What if I’m taking a shower and I slip on a bar of soap? Oh my god, I’d be killed!
So, this upstairs bathroom. It has plumbing and a floor, but despite tile prep and waterproofing, we aren’t showering up there just yet pending tiling. One of the things that slowed the tile work was my decision to install and tile a niche. You know, for soap and shampoo and stuff.
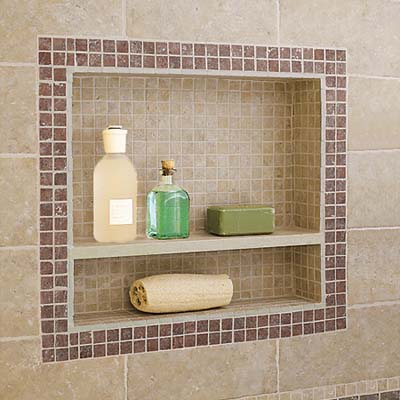
Here’s one from This Old House.
A professional tiler/blogger known as The Floor Elf has a four-part series on putting in a shower niche. His tutorial includes placement, framing, waterproofing, tiling, and a bit of a screed against hacks. The Floor Elf advises complete fabrication of shower niches. Did I follow his tutorial? Not really, no, mainly because (a) I was out of concrete board to line a niche, and (b) a preformed niche seemed more my speed.
What I did take away, though, was the importance of aligning the niche with grout lines. This niche, for instance, is randomly inserted into the middle of the tile pattern with lots of tile slivers around the edges.
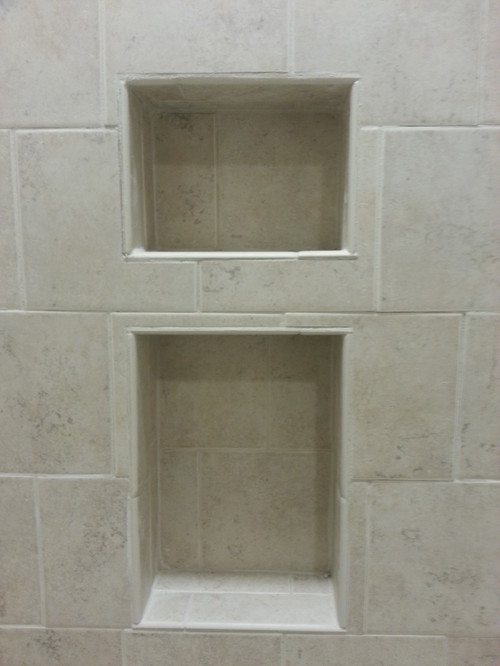
Not desirable (via Houzz user mikema0477)
The Floor Elf’s fabrication method allows the tiler to set the niche exactly in line with the tile and size the hole to fit the pattern. Here’s his example:
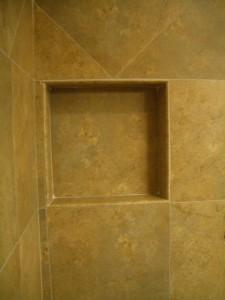
(via)
The Floor Elf’s niche is exactly within the pattern and requires no extra grout lines, so it blends right in. Fabricating the niche on site allows for this level of precision.
I’m on board with lining it up, but I also like “framed” niches, such as this one that is both framed AND lined up with the larger pattern.
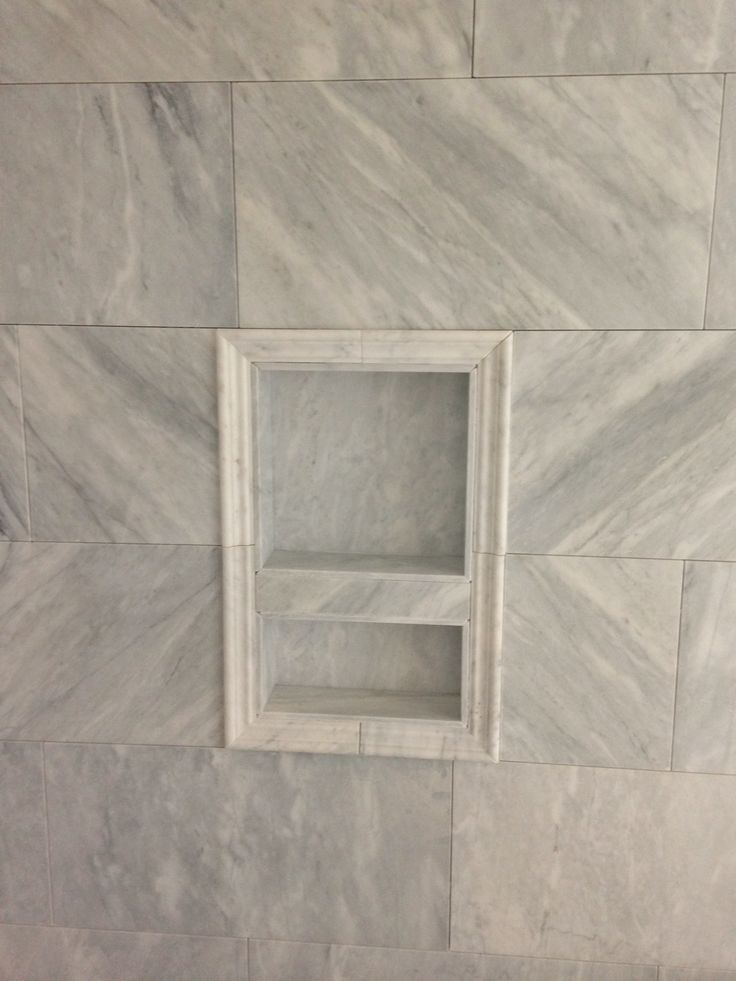
(via pinterest; source unknown)
I wanted to achieve something like the framed niche, using a pre-formed niche insert, while lining up all the tiles. No problem!

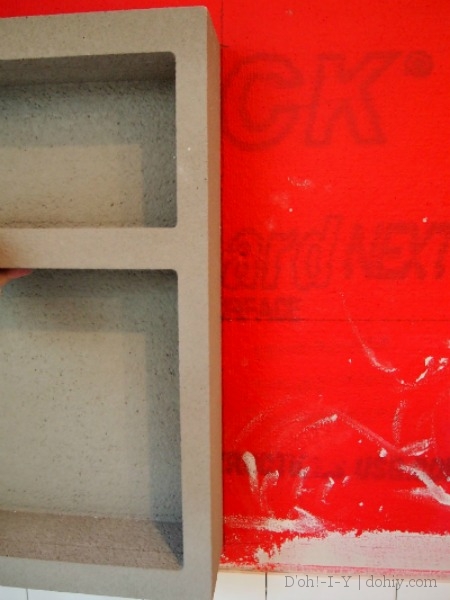
But I had to do it with my existing skill set (I laughed too). First thing, I bought a preformed niche that jibed with my tile sizes. The tiles are all sized in multiples of three inches, so I looked for inside measurements divisible by three.
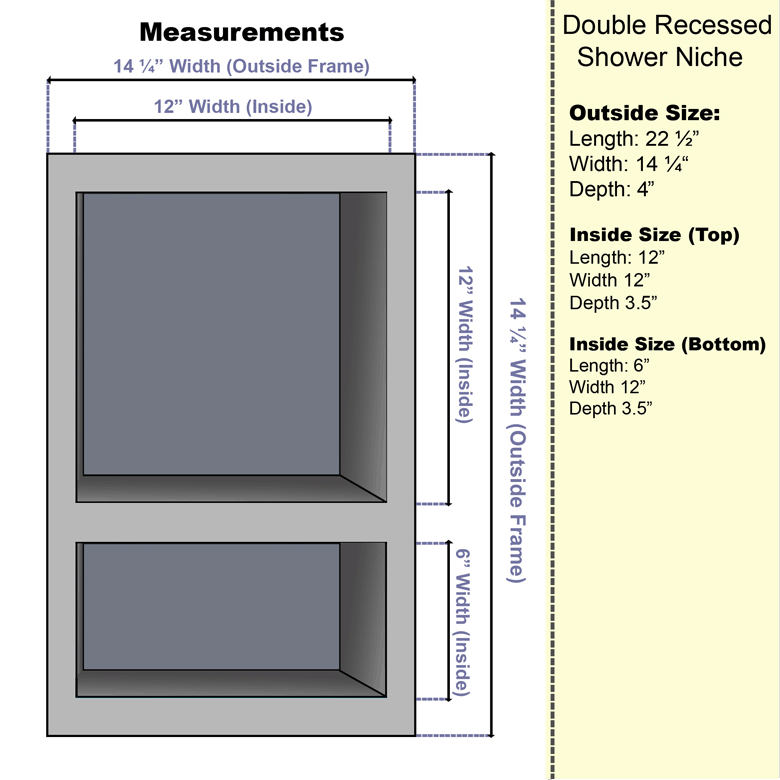
There are many niche manufacturers; I bought an Intrafoam preformed niche because it fit my measurements. It’s just extruded foam with a coating (still costs >$40). Most preformed niches are designed to fit between studs on 16″ centers.
Second thing, I marked the studs that the niche was going to fit between and started tiling the shower walls from the bottom. My BRILLIANT IDEA was that I would tile up to one or two rows below the proposed niche, THEN insert the niche when I was sure the tiles were going to align. I also started the tiles from the side wall so that there wouldn’t be slivers around the sides of the selected stud space.
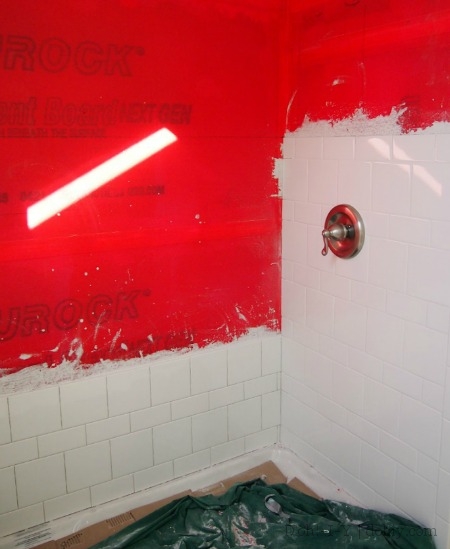
Tiling started for plumber purposes and to line up niche. That’s a sunbeam on the wall, not Kylo Ren cutting his way into the bathroom.
When I (eventually) got near the niche area, I measured, remeasured, then used masking tape to stick tiles to the wall to make SURE I knew where the niche should go. Then I traced around the niche, lining up with the studs, and cut out the space.
Tracing
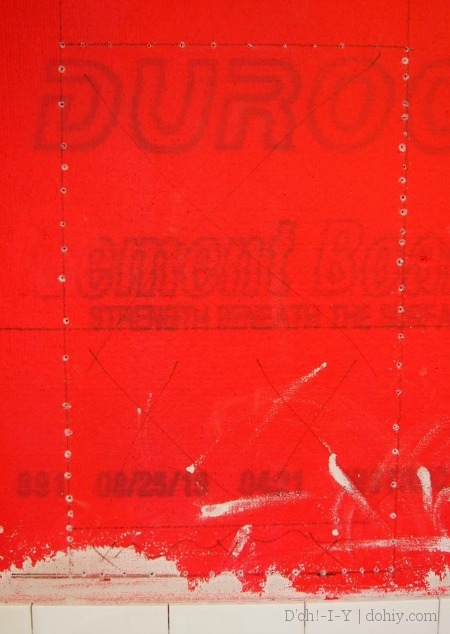
I drilled around the edge to make it easier and less dusty to cut out.
Stunningly, the hole was the perfect size! Ah, the DIY joy of something going right the first time!
When we put in the vapor barrier, we added extra plastic inside these studs so that we could drape it around the niche.
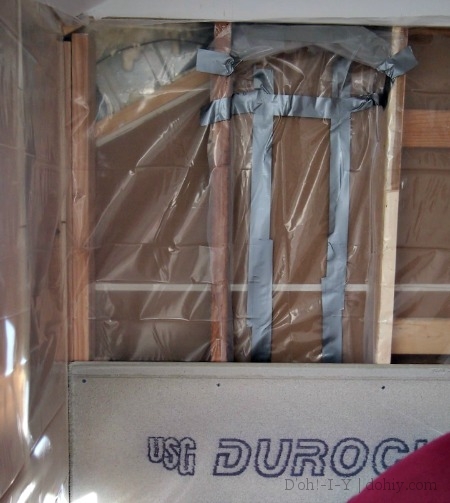
Extra vapor barrier (and duct tape)
With some trepidation, I sliced through the plastic so I could build a support for the niche inside the wall. (I later patched all the plastic together with duct tape; I know you were worried.) A support was not required by the niche’s documentation, but it’s an early step in the Floor Elf tutorial, and it seemed prudent for the shelf-made-out-of-foam to have structural back-up.
I followed the Floor Elf’s directions for adding a shelf inside the wall. I popped some blocks into the studs to hold the shelf level with the hole in the cement board. I laid the shelf in, then I stuck in the niche…and it was floating in the hole just above the shelf.
Ratfart.
Ok, but, BUT?? I had a box of 1/8″ tile spacers, so my kludge was to glue a bunch of those to the shelf supports, which raised the shelf surface enough to support the niche. Someone’s going to open up this wall someday and say, “What the…” but I’ll be gone, so I WIN!
The actual instructions for the niche say to use silicon glue to attach it to the studs, which I did after re-draping the vapor barrier, but I also popped a few finish nails through the side so it didn’t drift outwards while the glue cured.
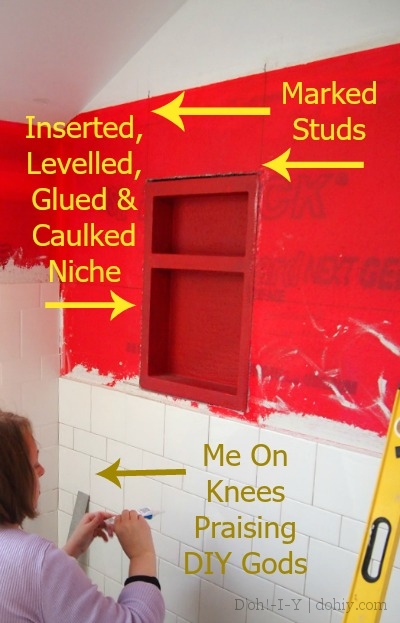
Just to be all extra-ridiculous I painted the niche with Redgard waterproofing membrane before and after install.
Then I sealed around the edges with silicon caulk and later painted all that with MORE REDGARD.
READY TO TILE! Check out Part 2.

Pingback: Tile Shower Niche Insert - 2mkNetwork