
It’s darker than a French chick’s armpit.
– Random Hoodlum
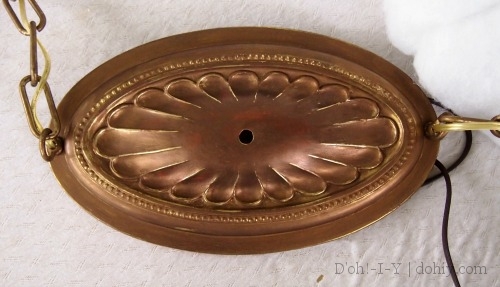
A while back, I picked up a paint-caked pan light off Craig’s List for $20. “FOR THE HALLWAY!” I told the Kev. “Of course it is!” he replied. He’s a good sport when it comes to my thing for old lights.
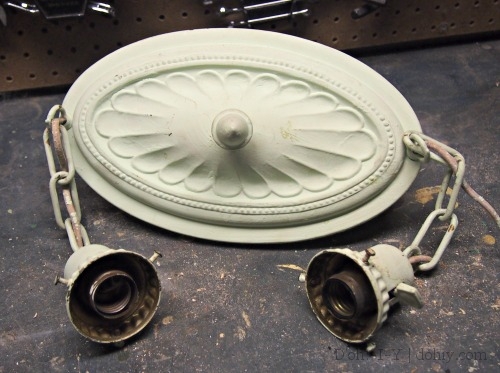
Coated in sickly green paint.
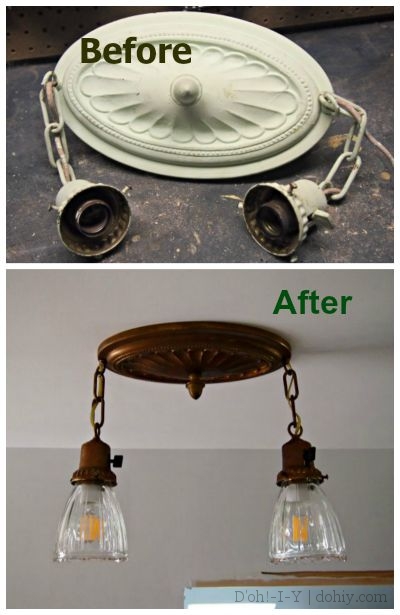
The hallway, of course, already HAS a light, but it’s a single light-bulb situation. The hallway has no direct natural light and much woodwork, so it is too dark. Or at least that’s my excuse for replacing it with this two-bulb fixture. An easier fix would be a lightbulb that isn’t 40 watts, but that wouldn’t get me a cool old fixture.
The CL seller said the fixture was “shabby chic.” When one already lives in an old house, one often finds that more shabbiness does not enhance the general level of chic. The gunky paint had to go. I used the slow cooker method and followed up with stripper on the more stubborn areas. And they were stubborn!

As God is my witness, I will never strip chain links again.
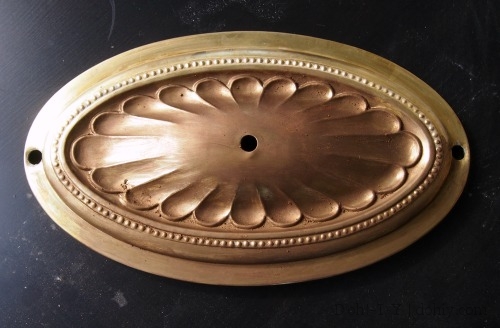
Choosing my battles, I decided to leave the painted-in shade screws in place and proceed with the generalized stripping. Eventually, I uncovered the original, weirdly shiny finish. I mean, 1991 fake-brass-chandelier shiny. I once ran across a finish like this on some unused fixtures in a vintage shop, but I thought they were reproductions. Now I realize they were new old stock, that this similarly shiny fixture was the fake brass chandelier of its era.
 This shininess was simply too dang shiny.
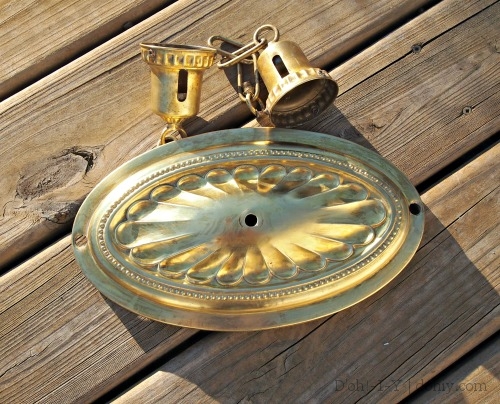
Actually shinier than this, but the camera freaked out at the glare.
Experimentally, I mixed Grecian Gold and Spanish Copper Rub-n-Buff (both on hand, figuratively and literally) and tried it on the fixture.
One layer, pre-buffing
Yeah, that’s more what I was thinking. But there were a couple of places that just would not hold the wax. I cleaned to remove oils, I applied mild abrasives, but still no sticking.

Many layers and much buffing later; bald spots remain.
Finally, I coated these spots with some copper-colored acrylic paint and then the wax stuck. I can’t explain it, but this fix worked.
I also buffed the high spots a little for contrast.
I rewired it (including reproduction “key” sockets like the original). I tested the wiring, and then tried to attach the glass shades. Remember I’d left the screws in place? I thought they would loosen up with some WD-40, but no. The threaded collars for each screw spun in place with the screws, so the screws didn’t progress, leaving no way to hang the shades.
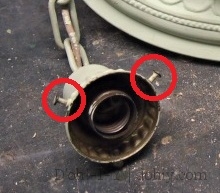
These things
Fortunately, Dad was in town. When he asked if he could help us with anything, I brought forth my dumb 98%-complete light. “Easy!” he declared, and he took it away with him. About 20 minutes later, he called and said it was fixed.

Apparently, it wasn’t paint — someone had caulked the screws in place. He held the collars still with vise grips, and unscrewed the fasteners with yet more vise grips. Then he replaced the caulked screws with others he had on hand. I should have done something of the sort earlier in the process.

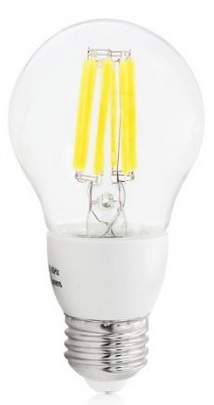
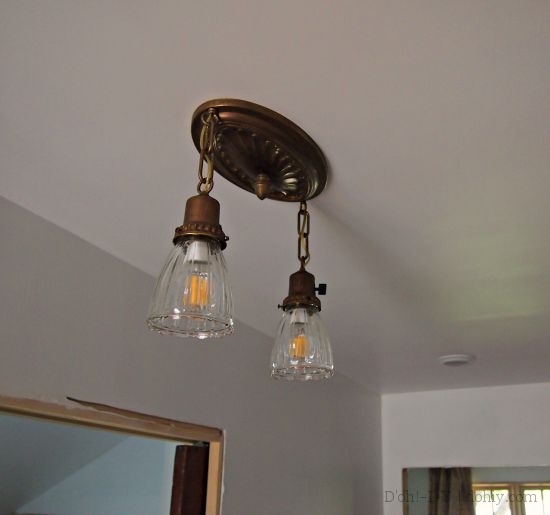
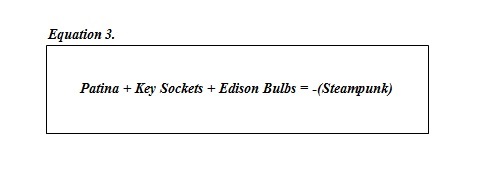
With that crisis averted, I readied the fixture for install. I wanted this fixture to nod toward a steampunk look (ergo the key sockets and the patina), so I’m using these cool Edison bulbs I found that are actually LEDs. I also bought some scalloped glass shades at the Habitat Restore for a buck each.
I got to this point and thought…maybe NOT the hallway. Maybe the new bedroom instead. Of course, I already installed a light in the new bedroom, but it seemed like that one would work better in the reading room, so we did a swap. (Having more options for where to put my obsessive lighting projects almost makes the loft remodel worth it all on its own.)
Anyway here it is:
Kev: “That’s good.”
Me: “I was going for a slightly steampunk effect.”
Kev: “Were you?”
Ok, last word: If you use reproduction key sockets for verisimilitude, remember that when you wire it and turn the lights back on, the keys are actually operational. Check that the socket switches are on before deciding there’s a bad connection and taking everything down to re-install.

3 Responses to Calculated Vintage Pan Light