Actual year may vary. Consult calendar for current year.
– Commercial Voiceover
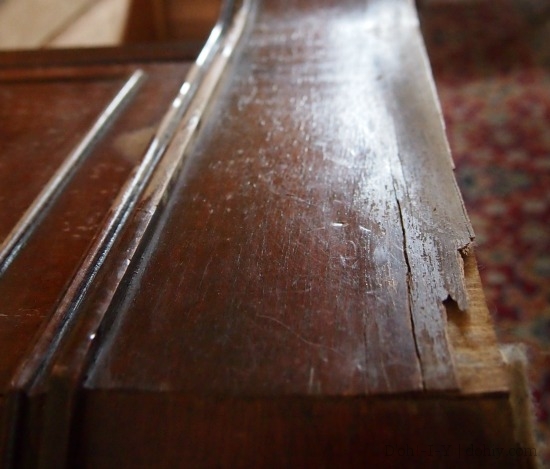
I’m working on a post about reattaching loose veneer, which would be done except the finish doesn’t want to dry during 2015. All the veneer was still there — it was just hanging off with a detached corner.
But not all loose veneer can be saved, and sometimes, veneer is just gone. While I watch gel stain dry, I decided to start on the other veneer post.
Veneer chipped? Broken? Missing entirely? Well, then, consider these options:
1. Paint It!
If you are going to paint a piece, you don’t really need to fix the veneer. Instead, you could just level off what’s there:
- Little Green Notebook used epoxy to square off chipped veneer on a desk.
- A to Z Custom Creations used Bondo on large veneer gaps to great effect (also shows how to make chipped veneer into a feature on a distressed piece).
- If the place where the veneer is broken can be replaced with MDF or new wood, that may be quicker. I replaced drawer fronts on an old chest of drawers, and Recaptured Charm fabricated a new top for a buffet — these are two of the easier items to completely swap out.
2. Patch It!
Maybe you don’t want to paint. If you want to keep the stained-wood look, here are resources on how to patch in new veneer pieces:
- Second Wind of Texas has a good tutorial on patching veneer, including stain ideas for when you are forced to use a different wood species. (She also suggests that you could replace small pieces of veneer from the same piece by removing a bit from the back of a leg or other unseen area — great idea.) The before was a real mess, so the after is remarkable:
- An alternative veneer tutorial on How Things Work includes the advice to use irregular or curved edges on patches to make it less obvious.
- Fixfurniture.com has a wordless video tutorial on veneer — sometimes, watching is better than reading.
3. Paint Part of It and Patch Part of It!
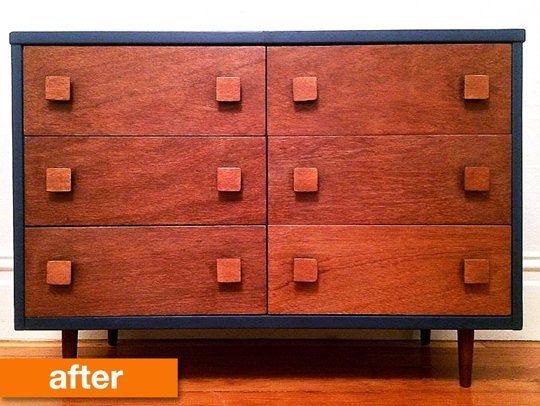
You can also do a combined approach, painting part of the piece while keeping intact areas stained. There are a variety of examples on this Apartment Therapy post, including these examples:
When done right, these pieces look terrific (I especially like the blue outline).
4. How and Where To Get It!
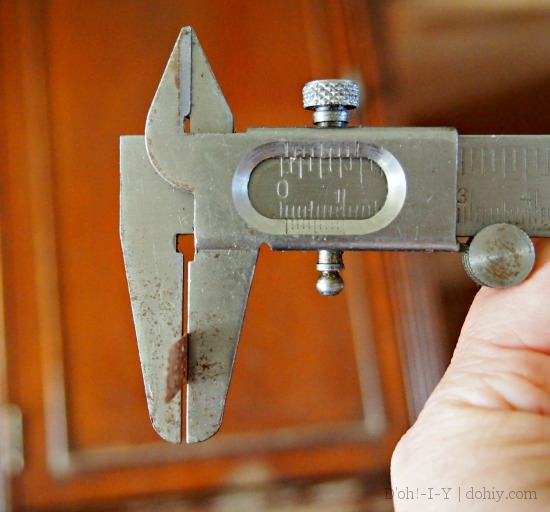
If you need to patch veneer, you need to know the thickness that you are trying to match. Ideally, use some calipers to get the thickness — if you have no calipers but do have a detached piece, you could take the piece to a big-box caliper-seller and furtively measure it. Judging by my observations of the Menards measuring area, that’s a well-known technique.
Earlier in my veneer project, I thought I would need to patch some of the veneer, so I did a little shopping. A variety of thicknesses and types are available. If your local place doesn’t have what you need, try:
- Rockler (woodworking and carpentry supplies)
- Certainly Wood (veneers for people who really know what they are doing)
- Amazon (mainly focused on adhesive edging)
If you only need a small piece, consider eBay for off-cuts and leftovers that might be plenty big for your purposes.
(Or you could buy more furniture.)


One Response to No Veneer? Have No Fear!