
My back yard makes my front yard look like an idiot.
– Homer Simpson
For some years now, I’ve been using our boulevard space (sometimes called a “hell strip” for good reason) as a place to put plants in transition. If I’m not sure where to put it, but I’m pretty sure I’ll want it later, I stick it on the boulevard.
The Kev and I made three boulevard beds for this purpose, but they haven’t fared well. We used a ditch edge, and because I was sticking plants in there all the time, I didn’t use any landscape fabric. Accordingly, it’s become a disorganized, weedy mess.
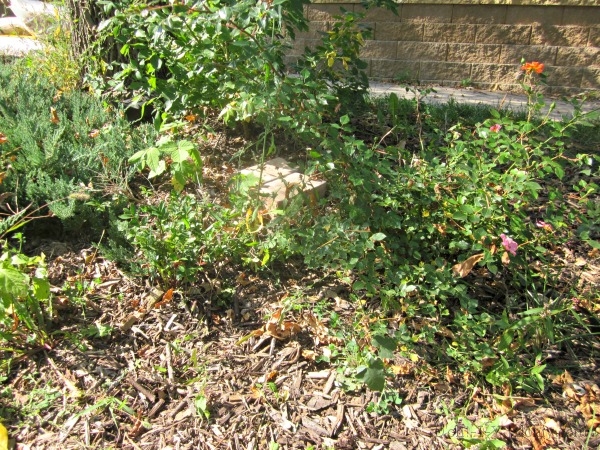
A rose…another rose…a juniper…a boxwood…weed…weed…weed…weed…
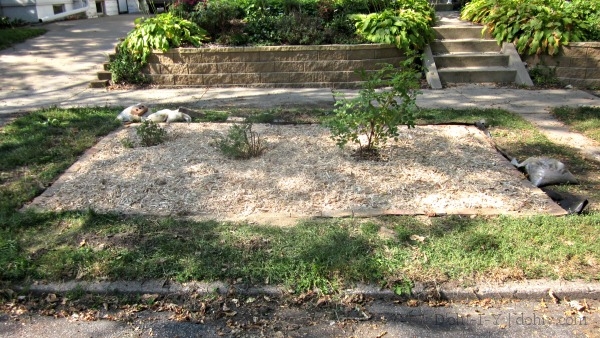
I set out this past week to edge and clean up these beds. A week later, I’ve only got one done. Well, mostly done.
Some things left to do, like weeding the dang gutter.
Last summer, Kev posted about brick edging a path, but there are some differences when edging beds, I found out to my dismay.
1. Make any changes to the height and grade of the bed before edging. The idea with this type of edging is to set the bricks so that you can mow the grass on one side and retain mulch on the other. If the bed’s soil level is close to the grass level, you’ll be able to mow the one side, but the bricks won’t hold mulch in place. Shave down the bed level before edging, or it will complicate the next step.
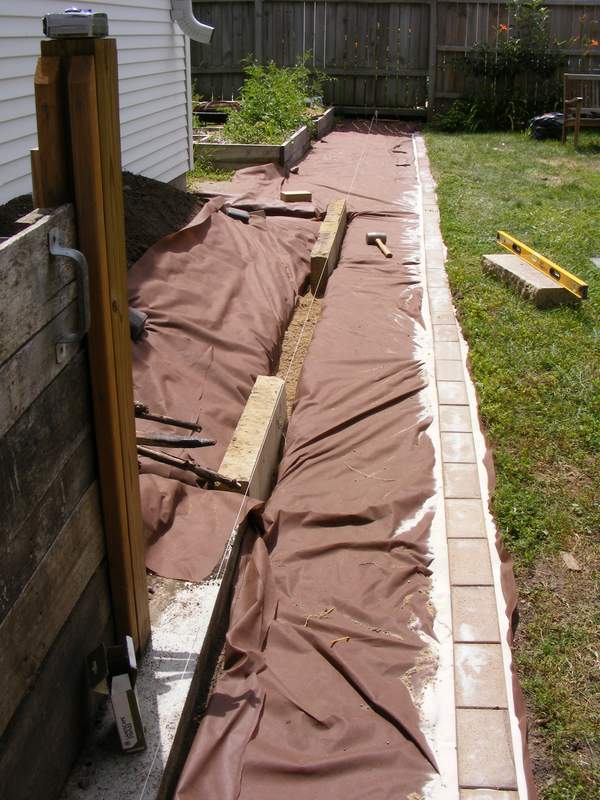
2. Dig out a trench just slightly wider and about an inch deeper than the bricks.
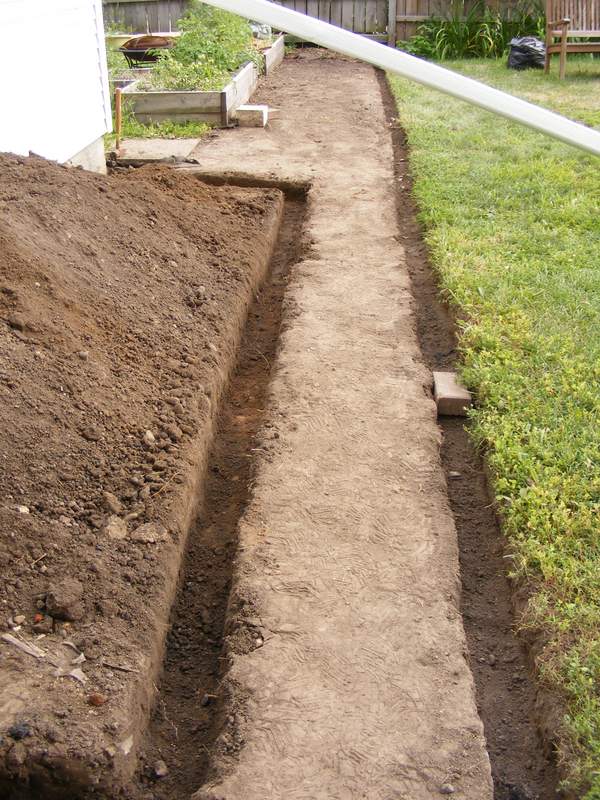
Picture from Kev’s path in progress, 2013.
You will want to use a string line or straight edge to give you a line to follow when you are trenching. I like to measure from a reference point (in this case, the edge of the sidewalk) and paint in the line on the grass with left-over spray paint.
Use an edger/trencher tool if you have access to one — it gives a nice, straight line. A square shovel also works well, but requires more work.
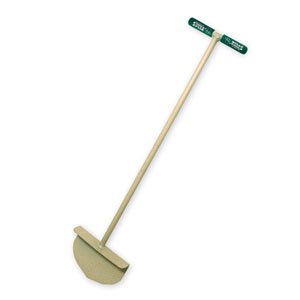
Edger/trencher (via): just line it up and step on it.
Obviously, you will have had utility lines marked before you started digging! In the states, just call 811. Everything’s supposed to be deeper than this, but our cable line is only about four inches deep in places, and I doubt our yard is the only place someone took a shortcut. A trencher can cut or rupture things that shouldn’t be cut or ruptured.
Once I’d cut both sides of the trench, I dug out the center using a hoe and a spade. Don’t go crazy! I dug way too deep in spots and had to use additional sand to bring the bricks up. About an inch lower that where you want the brick to end should do it for a garden bed. Note this is why you want to have leveled the bed first — I didn’t, and that left the back of my trench unsupportive and overly wide. Dealing with the bed grading before trenching gives you a straight back to the trench, which helps keep the bricks in place.
I had a d’oh moment with one side of the first bed — I thought I cut the trench straight, but without realizing it, I actually bowed it out to go around some plants that were still in the bed. Once the trench was dug, I noticed that it wasn’t straight. Fairly big hassle to straighten it out, so measure, mark clearly, and tie back anything that might get in your way.
3. Line the trench with landscape fabric and sand.
Use high-quality landscape fabric; it’s more expensive, but it’s worth it. The non-woven “five year” variety just doesn’t hold up–you’ll have weeds coming through it in a year. Take one piece of the fabric and start at the grass side of the trench, bringing the fabric level with where the grass starts. Then, line the trench and carry the fabric on across the bed. I also tuck newspaper under the fabric across the bed, which is a secondary way to keep down weeds. You can cut the fabric (and newspaper) around plants you are keeping, or cut through it later to plant new ones.
This is a path picture, but it shows the lining technique.
Put paver leveling sand (roughly the same as sandbox sand) in the trench so that there’s roughly enough in there to bring the bricks up to where you want them. Compact the sand by banging on it with something flat or by walking on it.
4. Set the bricks!
Starting at a corner, stick a brick in the trench! Wiggle it around in the sand (possibly taking it up and throwing some more sand underneath it in the process) until it’s straight, flat and lined up with the grass line. Tap it with a rubber hammer to make sure it is in there. It’s not going to be like it’s set in concrete, but you want it to be stable.
As you add bricks, keep checking that you are keeping the line straight and that the bricks are at a consistent enough height to be able to mow over them (so you don’t have to do more grass control than necessary in future). Snuggle them up close to each other–after you’ve done the initial brick-wiggle, you can lift the new brick and brush away any sand that was trapped between the new and the prior brick in the wiggling process. This bit of housekeeping will keep the edging tighter.
After everything’s in, fill in any gaps in the trench wall (on the soil side of the fabric, either side of the bricks), then use locking sand to firm up the joints. Locking sand is extremely fine sand mixed with polymers that you dust over the finished bricks and brush into the cracks. The fine grains lock together and help keep everything in place.
5. Almost Finished
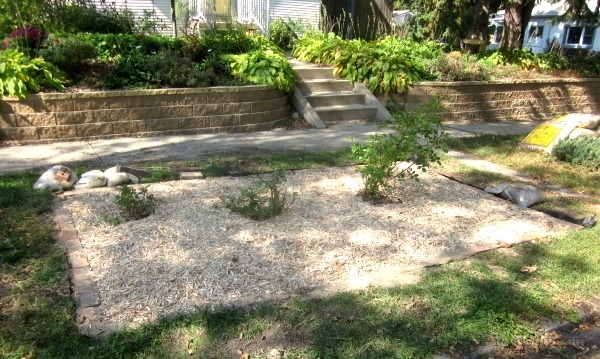
Pin down your landscape fabric and dump in the mulch. Et voila.
Need to trim up the excess fabric on the right side and finish the locking sand. And weed/re-seed the grass areas.
Only three lonely roses left in this bed. I’m going to re-design this one in the spring, but I know the roses are staying on the boulevard somewhere. No point in moving them until I know for sure.
I’m using this cheap mulch from Menards that they say is recycled, but which is actually (as far as I can tell) chipped from bad lumber. Good idea, but it’s just not what people usually think of as “recycling”! Anyhoo, it looks bright and slightly silly like this for about a month, then ends up looking like any natural wood mulch.
I’ve counted up the bricks we have and measured the beds that are left, and of course we’re gonna need more bricks. Off to Craigslist!
