
I don’t mind being called a liar when I’m lying, or about to lie, or just finished lying. But not when I’m telling the truth!
– Homer Simpson
No, it’s true! The slipcover is done!
A good thing, too, because this is how much thread I had left:

Quite some time ago, I posted about how I made the slipcover pattern, and generally, I followed that plan.
I learned–shock!–that old sheets are more flexible than upholstery fabric! Most of the pattern pieces were fine, but a few of them needed to be simplified to work better with the final material (in the picture, you can see things being way over-complicated in the top right corner, for instance). As a result, the final slipcover was not as tight as my pattern. But it’s a slipcover, it’s ok!
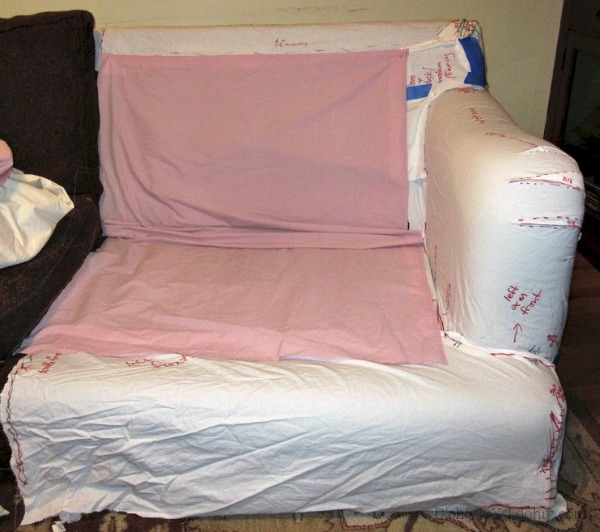
We had a one-piece slipcover that we had been using as a stopgap. I intended to use part of it as the panel for the back (this sofa is up against the wall), but I ended up using it as a base for much of the slipcover for the body of the piece (I did cut off the arms). I attached pieces to the one-piece cover, and ran it as the continuous piece under the cushions. It was a great way to help keep things straight (pinning them to the one-piece first), and provided the needed fabric with elastic for the cushion underlay.
Here it is in process. The old slipcover/new undercushion piece is comparatively very, very purple.
After patterning and even while I was merrily cutting and sewing together pieces of upholstery fabric, I wasn’t completely sure how the cover was going to attach to the sofa. In the end, I went for a model somewhere between an Ikea slipcover and a Rube Goldberg machine. The arms of the slipcover are attached to the back of the cover. They “hinge” and attach last.
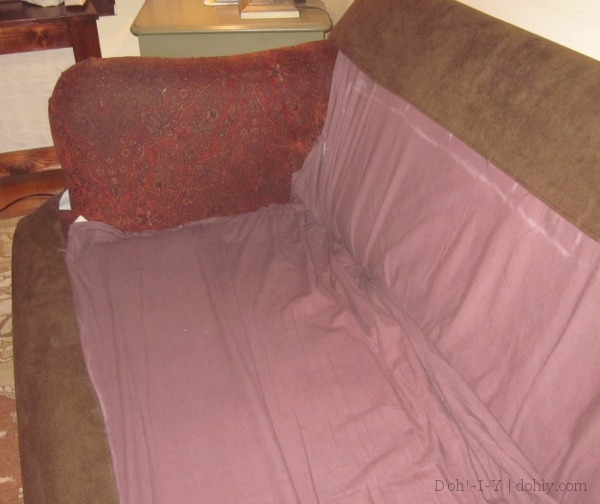
The main body is covered first, with the arm covers flapping around on the sides.
Basically, the cover goes over the back and down the front so that the main body is all covered. Then the sides of the front wrap around and attach with velcro.
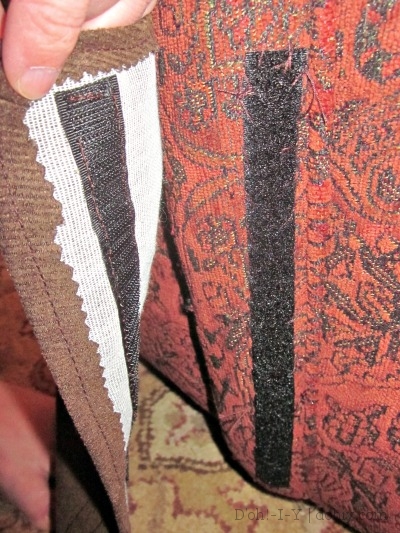
The front “apron” of the slipcover pulls around each side and attaches with velcro sewn to the sofa itself.
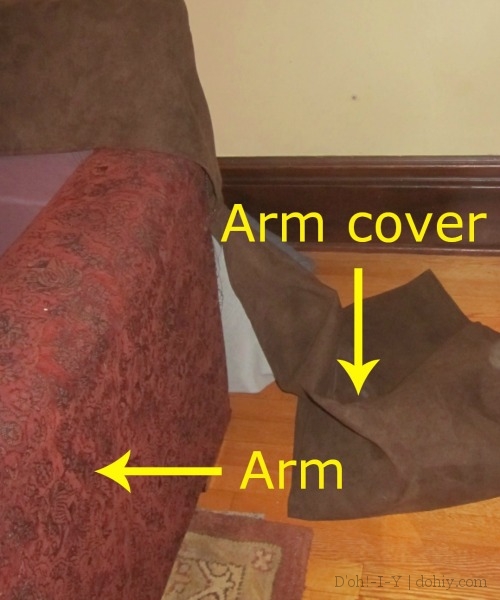
As shown above, the arm covers are attached to the back, so they are just hanging out (literally) while all of this is happening. In due course, they are pulled around and over the arms.

Arm cover on but not yet tucked.
There are hooks and eyes that attach the hanging part of the arm to the front piece that is velcroed to the side, then there’s a flap on the inside of the arm piece that tucks into the sofa between the arm and the springs to tighten it all up.
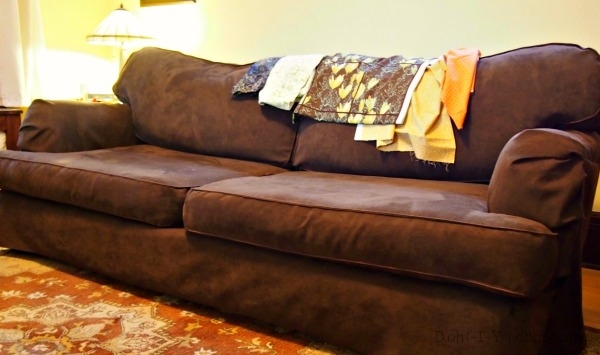
It’s now a very brown sofa. I recently hit the S.R. Harris fabric warehouse and picked up a bunch of remnant pieces. I’ll turn these into throw pillows to brighten this thing up. I might also put taller feet on this piece too, but that’s a low priority for another day.
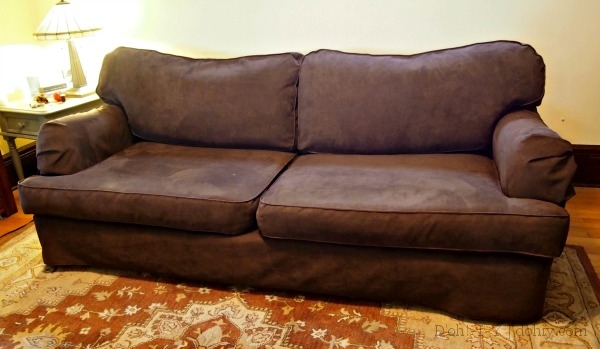
And that’s my Rube Goldberg slipcover. Emphasis on the “rube”! Here’s the before:
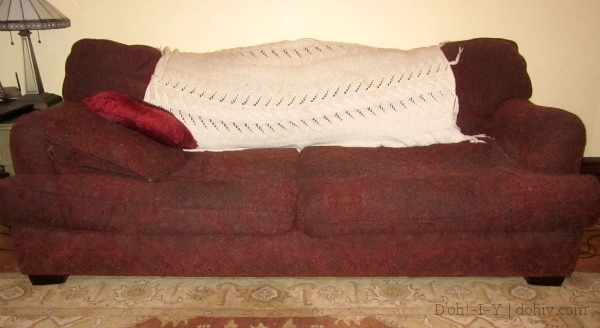
It actually looks much better in this picture than it did in person.
And the after (with various possible cushion covers):
My January project is finished! It’s faaaaaaaar from perfect, but done is good. For more on fixing up and slipcovering a sofa, here are links to the other parts of the “This Old Couch” series:
How to Decide if a Couch is Worth Saving
How to Make a Slipcover Pattern
How to Make Welted and Zippered Cushion Covers

4 Responses to This Old Couch: Done is Good