A Sesquicebloggial Special!

Happy anniversary, baby!

– Homer Simpson

Today is our first blogiversary, and this is our 150th post, so you know what that means: IT’S SESQUICEBLOGGIAL TIME!

Sesquicewhatial? Well, back in 1986, Texas celebrated its sesquicentennial–its 150th anniversary of just plain being Texas, first as its own country and then as a state. My Texan grandmother spoke of little else for the 18 months leading up to and encompassing the year in question. IT WAS A BIG OL’ DEAL!

Texas Sesquicentennial Buckle

BIG OL’ SESQUICENTENNIAL BELT BUCKLE

It made quite an impression on my young and vulnerable mind (apparently). So at the intersection of one year and 150 posts, here’s a look back at a year of D’oh (and what’s next).

Our Most Popular Posts

The post with the most hits is my ode to screw-ups, These are a Few of My Favorite D’ohs. But those hits were clustered around a linked comment I made on Apartment Therapy, so it’s more of a sprinter than a marathoner. The top posts that reliably go the distance are:

Storage Bed in Progress

Double bracket close-up

afterwidetext

drain

By the way, that post’s title is a reference to Miller Lite ads from the 1970s — here’s one featuring a man named Bubba:


Our Favorite Post

But our favorite posts are not the most trafficked. One thing we love about sharing the blog is writing posts that we know will make each other laugh (if no one else). When I asked the Kev for his personal favorite of our posts, I was delighted that he was thinking of the same one I was: This-n-That.

DSCF9937

Kev put that post together one day when I was out, and when he showed it to me, it cracked me up — the old-school signage with the Tab A/Slot B descriptions just fractured me. That post got almost no views, and there’s no reason it should have done — it’s got no search terms to speak of. But it’s like this blog — we just enjoy it so much.

Our Nebulous Plans 

Keep DIYing. Keep blogging. Keep being completely amused by the concept of blogging about DIY. That’s the plan!

Thanks for coming around and hanging out with us. The more the merrier!

Posted in D'oh!, Romance | Tagged , , | 2 Comments

Porch Fest 2013: Door > Floor

Helloooo? I’m cold and there are wolves after me.

– Abe Simpson

Given our unexpectedly lengthy search for a way to strip the porch floor AND the suddenly-very-impending winter, the Kev and I agreed that replacing the porch door was our most pressing mission. Enclosing the living space is important up here in the tundra. (We are, though, still looking for floor-stripping hints, particularly if you know what to use on battleship paint.)

The front door that actually leads into the house proper is inside the porch. The original door was gone when we got here, but we replaced an inappropriate mid-century door with this reproduction a few years back. (And quite a job that was! I’ll say more about that another time.)

Front Door

Our actual front door inside the porch

A screened porch runs along the whole front of the house, and it currently sports a vinyl combination storm door that has seen better days. This is a rock-bottom, super-cheapo model with rusty screws, bent hardware, and a shredded screen. It was here when we got here! It’s been so long now, though, that that’s not much of an excuse.

Door of Infinite Tattiness

We could have bought another vinyl or PVC door, but I was looking for a wooden (or wood-look fiberglass) door. Why?

  • Well, just look at the tatty vinyl door we have! Yikes.
  • Wood looks more appropriate for this house.
  • I want a paintable door (it’s going to be bright yellow to start).
  • We want an in-swinging door, and most storm doors here are designed to  swing out. This always ends up sweeping people off the top step, which is particularly unfortunate at Halloween. Costumed toddlers seeking candy have No Interest Whatsoever in backing up slightly so you can open the door for them.
  • We want to fit a keyed lock to the door so we can come in through the front of the house! The current door has a thumb lock that can’t be opened from the outside. We keep it locked so it doesn’t end up accidentally unlatched, which could lead to a Great Cat Escape.

I bought a vintage storm door to use as a replacement, then found a better one on Craigslist. Here it is in a test fit on the porch.

Tatty door is in place on the other side of the frame.

Tatty door is still in place on the other side of the frame.

The Kev is mortising the hinges as I type. Once it’s fitted properly, we’ll finish it (bright yellow!), and then install. But painting isn’t all there is to it — I’ve also been shopping for hardware to finish it off.

Door Hardware

So what have we got here?

1.  POST mail slot and back plate (Signature Hardware)

Vintage slots are very small, so we went with a sized-up reproduction so our post-person can put magazines and small packages through to us. I really loved this one when I first saw it, but I still wonder if I have no sense of proportion regarding mail flaps. Maybe it’s too preciously precious? But since we don’t have scads of super-twee stuff, I figured it would be ok.

I like vintage mail flaps, and especially those bearing words. When I started this quest, I showed the Kev about six reproduction mail slots. He said they were all “fine” and looked alike to him. I chose this one because I like that it says “POST” instead of “MAIL” — in England, the Royal Mail delivers the post, while here, the Postal Service delivers the mail. In the absence of Kevin-input (Kevinput? Kevput?), Mom ratified my decision to go POSTal (thanks, Mom!). 

2. Salvaged brass door knobs (ebay)

I picked up these salvaged knobs from an ebay seller. I was looking for small knobs to accommodate our lock set-up, and these are only 1.5 inches across. We took them with us to Guilded Salvage the other day to find a rosette and a keyhole escutcheon. “Your house is from the early 1930s,” the owner said when he saw the knob. So it’s a little out of the original zone, but that’s pretty dang close. And I really like these patina-ed knobs.

The knobs came with a spindle, which we can cut down if it’s too long. And we did find a rosette and escutcheon, by the way — they were still in the slow cooker when I took these pictures. They are very simple brass pieces.

3. Rim lock (Yale)

A rim lock mounts on the back of the door and the bolt goes into a housing on the back of the door frame. This is an alternative to mortised locks (mounted inside the door to go into a hole in the frame) that made sense with a one-inch-deep door. I don’t even know if you can mortise something that skinny!

This Yale rim lock was produced for the British market and has a big ol’ round skeleton key (shown in the photo) that makes my day. I had this kind of key almost everywhere I lived in England, so it will be nice to have one in my pocket again.

If you are thinking, “OMG, SKELETON KEY!! How NOT secure is THAT!?”, keep in mind that we’re just looking to keep the door locked enough to keep cats on the porch. This isn’t a high-security endeavor. They aren’t Super-Ninja-Opposable-Thumb-Lock-Picking Cats of Advanced Intelligence. They haven’t even figured out that the latch to the the dry food hopper has been broken since spring. They could just nudge it off! But they are oblivious to their power to have a dry-food orgy on their own timetable. In terms of exterior criminals, did I mention this is a screened porch? The door isn’t even an issue.

ANYHOO, back to the lock — the knob and the lock are next to each other in this particular set-up, which is why the small knobs come in handy. On the front of the door, there will be a knob next to a skeleton keyhole, and the brass rim lock body will be on the back.

Door fitting underway…door jewelry purchased…we might have this wood in the hole before trick-or-treaters arrive!

Posted in American vs English, Porch, Salvage, Windows & Doors | Tagged , , , , , , | 3 Comments

Stripping on the Front Porch: The Continuing Saga

We are still trying to strip the porch floor. Last time, we detailed a bunch of paint stripping products and techniques, none of which had really worked against the original layer. After that long line of failures and some research, we went in search of new options.

Marie from Random Musings suggested we try a heat gun. We have a heat gun, but hadn’t tried it because of the lead in the base layer (heating up lead paint can release toxic vapors). The Kev decided to give it a very brief and well-ventilated go.

Curse you, military surplus!

Curse you, military surplus!

The heat was very effective on the green paint. JUST LIKE EVERYTHING ELSE! But the green paint is not the problem. The gray layer, though, just turned a bit brown and most of it refused to move. So…no. Which is discouraging because we are considering the infrared option, which heats the paint to a lower temperature than a heat gun. If a heat gun won’t budge it, is there any hope for a ridiculously expensive IR gadget? It bears further musing.

I brought up the issue at a family birthday party. (There’s only so long you can talk about cake. I’m a conversational saviour!) My dad, who is a private pilot and has restored a vintage airplane, spoke of paint stripper for aircraft and automotive applications. I looked into that and was surprised to find that said stripper could be purchased from regular retailers (in small quantities).

Aircraft RemoverFriday night found us at Menards — date night! — in the paint section. After a while, you start to know who among the staff is particularly knowledgeable. One of the paint department managers is a true Knower of Paint, and when she approached us in the stripping aisle, I had great hopes. I turned to her holding a can of Aircraft Remover and said, “We’re looking for a stripper that will take off lead-based military surplus paint from 1922.”

She paused, then laughed nervously.

“Well, THAT might do it,” she said, indicating the toxin in my hand. “But you would need to be REALLY CAREFUL with that stuff.” Another pause. “Really careful.”

Then she backed away.

product-peelaway7Which was semi-alarming. So we put off that purchase, and instead went in search of Peel Away, recommended by Little House on the Corner. We can find it locally, but problem is, it’s always in the Huge Barrel size. That’s expensive, and since we don’t know if it will work, we’ll need to order the Small Tub size online to see if we have a winner.

In the meantime, we tried another recommendation, aerosolized methylene chloride. I went in search of one product, but found the Klean Strip version on sale. I reasoned that one aerosolized methylene chloride is as good as another, and picked up the cheap can.

I also picked up a pair of gloves. Methylene chloride is awful stuff, and there wasn’t a glove available that was recommended for use with it. So I just bought some thick rubber gloves and hoped for the best.

Glove Warnings

I applied as directed. There was some quick, gratifying blistering, but once I scraped, the base coat remained largely unbudged.

Klean Strip

Stripper when first applied

I reapplied, waited the full processing time, and scraped again. A bit more gray came off, but there was still a sludgey and immovable  mass coating the wood. A third application got a bit more off, but still left a bunch.

Klean Strip stripped

We just can’t reapply to every square inch fifteen times. That’s under the category Life’s Too Short. Actually, this whole endeavor is tending that direction! Next up, Aircraft Remover and/or Peel Away. Unless anyone’s got another idea — and if so, please let us know!

Posted in D'oh!, Porch, Salvage, Walls & Floors | Tagged , , | 9 Comments

Relaxing on the Front Porch: We’re Doing it Wrong

Lisa: I’ll do whatever it takes.
Bart: Then welcome to the nether regions of the soul.

-The Simpsons

The green paint on our porch floor is flaking off. Something has to be done! We really want to go for the natural wood look, but that means stripping the paint.

Flaky paint on porch floor

Flaky paint on porch floor

Stripping the areas where the paint is flaking off is not a problem, but other parts of the floor are not flaky. In fact, they’re so not flaky that we’re thinking about abandoning the natural wood idea.

At this point, we have tried a few different paint stripping methods without success. The green, top layer comes off pretty easily. Under the green paint there’s a gray layer, which is extremely well-adhered to the floor boards.

Apart from the porch floor, every wooden surface in our basement is painted with the same gray. It’s also one of the layers on the window frames. It appears the original owner was in possession of a consignment of paint that might, if it hadn’t been attached to our house, have seen action in the Pacific Theater of WWII. Suffice it to say, it’s very good at being paint.

As I said, we have tried a few different paint removal methods. Here’s the story so far:

Hand Scraper

This was the first idea. Looking at the flaking paint, it occurred to me that I could strip the whole thing by hand. So, I got to work. Well, the flaky bits do come off quite easily. Unfortunately, the non-flaky bits don’t come off at all.

Next!

Power Scraper

One day, Stacey surprised me with this Craigslist purchase.

Power tool for removing paint

Power tool for removing paint

This kind of tool was new to me. Seemed like a good idea though. So, I set about the porch floor with it. It does quite well, but doesn’t get all the paint off.

Part of the porch floor that was 'stripped' using the power scraper

Part of the porch floor that was ‘stripped’ using the power scraper

I think the problem is that the floor is not perfectly flat. The tool has a very small cutting depth, less than 0.3 mm. It is held to that depth by the base of the tool, so it removes paint from the high points, but can’t reach into the low bits. I could increase the depth of the cut, but that would mean taking out big chunks of wood from the high points of the floor.

Next!

Chemical Paint Removers

Mechanical methods were really falling down on the job. Time for chemistry!

Since we have cats and a sense of environmental responsibility, we try to only use chemicals that are harmful to neither. Or, at least, that’s how we begin. We tried each of the chemical methods on both mechanically ‘stripped’ and untreated areas.

Mild Citrus Paint Remover

We began with a mild citrus paint remover.

the result of using the mild paint stripper

The results of using Zinsser Magic Strip Citrus-Action paint stripper on stripped (left), and unstripped (right) floor boards.

After being left on for 24 hours, the citrus stripper was pretty good at taking off the green paint, but didn’t touch the gray.

Slightly Caustic Paint Remover

We also tried a slightly more cat and environment unfriendly stripper.

The results of using Zinsser Magic Strip on stripped (right), and unstripped (left) floor boards.

The results of using Zinsser Magic Strip on stripped (right), and unstripped (left) floor boards.

Again, after 24 hours, the green came off pretty well. Zinsser Magic Strip also took off some of the gray paint, but not enough to call this test a success.

Extremely Caustic Paint Remover

So, after the failure of the cat and environment friendly options, we went for the nuclear option.

Caustic stripper on unstripped floor board

The result of using Klean-Strip Stripper on an unstripped floor board.

The Klean-Strip Stripper easily removed the green paint. But, even after two applications, it didn’t take off all the gray paint. We also tried Klean-Strip Stripper on a Metabo-stripped area.

The result of using Klean-Strip Stripper on stripped floor boards

The result of using Klean-Strip Stripper on stripped floor boards

But that really wasn’t any better at removing the gray.

Our options are dwindling. On the chemical front, Christine at Little House on the Corner recommended Peel Away (she used it successfully on a detailed fireplace), so we will give that a try as soon as we can pick it up. But if that doesn’t work, we are already stalking ebay for one of these:

Silent Paint Remover

That is an infrared paint remover and its various included tools. There are a few different tools like this on the market (this one is the “Silent Paint Remover”), and they use an infrared lamp to heat paint hot enough to quit sticking, but not so hot that it emits lead vapour. It’s all upside except for the price (ergo ebay).

If all else fails, or we just decide that it’s way more work than it needs to be, we may just repaint the whole floor, assuming we can achieve some level of smoothness. But that option is a few d’ohs away yet. (Update: further d’ohs on this topic here!)

As always, if you have any suggestions that might help us take off stubborn paint, we would be more than grateful to hear them.

Posted in Before & After, D'oh!, Porch, Salvage, Walls & Floors | Tagged , , , | 4 Comments

You’re Using Coconuts! Making a Coconut Bird Feeder

Homer: You put the beer in the coconut and drink it all up. You put the beer in the coconut and throw the can away.
Ned: Homer!
Homer: You throw the can away.
Ned: I said, Homer!
Homer: You throw the can away.

Many of the plants in our garden are chosen because they attract wildlife. We also put out seeds, nuts and berries in feeders for the birds.

Squirrel proof bird feeders

Our squirrel-proof bird feeders

Attracting birds to the garden is something I have always enjoyed. In England, when I was young, we put out table scraps for the birds. We would also hang up peanuts in their shells that we had threaded onto twine. Blue tits would hang on them, and peck through the shells to get at the nuts. I put out a string of peanuts here once, thinking the chickadees would enjoy them. Perhaps they would have, if a squirrel hadn’t immediately broken the string and eaten all the nuts.

Another thing we liked to do was to hang up half a coconut and watch birds eat the flesh from the inside of the shell. I thought perhaps that would be something the birds here would enjoy. So the other day I bought a coconut.

A coconut with two holes

A coconut with holes poked in it.

The first thing to do with a coconut is drain off the liquid. Locate the three dents at one end of the coconut. These are weak points where you can poke holes through the shell with a screwdriver or similar tool. Now you can pour out and drink the yummy liquid from inside the coconut.

The next thing to decide is how you want to cut open your coconut. Previously, I have just broken it in half by repeatedly hitting it around its equator with a metal object. But this time, I wanted to try something different. I secured it in the vise.

coconut in a vice

A coconut in a vise awaiting its fate.

Using a coping saw, I cut out a wedge from the coconut.

Cutting a wedge out of a coconut with a coping saw.

Cutting a wedge out of a coconut with a coping saw.

This leaves a hole with a ledge for birds to land on.

Coconut bird feeder ready to string up.

Coconut bird feeder ready to string up.

Those holes now come in handy again for attaching twine to hang up the coconut.

Coconut bird feeder open for business

Our coconut bird feeder open for business.

So there it is. Now to wait and see if we get any customers. And if we don’t, we can always throw some seeds in there and give it another try.

Have any ideas for homemade bird feeders? What brings the birds to your garden? Let us know your techniques in the comments.

Posted in Before & After, Yard & Garden | Tagged , , , | Leave a comment

Winterizing Your Yard and Garden

Lisa: What a perfect outing for a beautiful autumn day.
Marge: I feel sorry for everyone who’s cooped up inside watching the seventh game of the World Series.

 – The Simpsons

I love fall! (And when in the UK, I love autumn.) I’m also quite fond of gardening, so it’s great that there is gardening to do right up until winter. Keeps me off the streets.

If you’re less attached to gardening, you might think, “Enough already!” once summer ends. Even if you look forward to snow, some basic fall maintenance will protect your lawn and garden beds, while promoting bigger, healthier plants next year. (And if you’re in a lovely temperate place where you can garden all dang year…may we come visit in January??)

Fall is here!

Fall is here! Time to garden.

Flower Gardens

Winterizing your flower beds mainly involves cleaning up dead plant matter around your flowers…and then covering everything up with different dead plant matter.

Wait, what? Yes, that’s right. When plants die, their foliage may contain latent diseases, fungi or bugs. In the spring, those baddies could wake up and cause problems. If you remove dead leaves and then insulate the plant with a different mulch, such as straw or tree leaves, the likelihood of spring issues is reduced. Just like you can’t get your dog’s cold, your flowers aren’t as susceptible to the things that bother grasses and trees.

After the first big freeze kills off foliage, trim back your perennials. If you planted any annuals, such as marigolds or petunias, pull them up as the weather turns cold. You can take all your fall clean-up plant matter to a community compost site or throw them in your own compost pile if you have one. (You can add to your compost pile all winter, as long as you can battle through the drifts to get to it!)

Bales of straw for winter mulch can be picked up at garden retailers.

Bales of straw for winter mulch are available at garden centers.

Unless the weather has been wet, give your flower beds a good soak before the ground freezes. Then, after a good ground frost has set in, cover your perennials with four or more inches of mulch.

Some roses and flower bulbs are not hardy and require special treatment over the cold winters; if you are in zone 5 or farther north, look into rose tipping and bulb storage techniques. But hardy shrub roses will get by fine if you pile up mulch or soil over their bases and then cover heavily with straw or leaves. I also do this with my hydrangeas and buddleia.

Another tip for pre-winter flower beds: sketch a plant map. My autumn guide helps me identify new growth in the spring for transplant. Some annuals (Sweet William and cleome, for instance) will readily self-seed, so marking those areas prevents me from accidental overplanting and major confusion.

Trees and Shrubs

As winter wears on, ready food sources become scarce and animals turn to emergency rations. Unfortunately, young trees are on the menu. Rabbits and other understandably hungry marauders chew through the bark to the softer stuff underneath, often killing the tree in the process.

Trunk protection on a newly planted crabapple.

Trunk protection on a newly planted crabapple.

To protect your trees, wrap the trunks with flexible tree wrap, working the material beneath the soil line and wrapping upwards well above the expected snow line. Flexible tubing is another good option – many nurseries even sell saplings with tubing already in place. These protective coats also prevent trees from becoming confused during warm winter days and waking up too early, which can lead to “sun scald” and other growth problems. Tasty shrubs can be defended with chicken wire fences or chemical repellents (not poisons).

Vegetable Beds

Vegetable gardens keep rewarding you well into fall, but when they are done, they’re done. If you grow vegetables, remove and compost any spent plants (leaving any perennials such as asparagus).  Over the winter, combat cabin fever by planning next year’s garden menu. Remember that crop rotation is not just for farmers – even in a small vegetable bed, rotate your veggies annually to avoid plant diseases that may develop in the soil.

Lawn

Many gardeners hate grass lawns, conveniently forgetting that a lawn is made of plants. And the plants that make up your lawn also need attention before winter. Unlike other parts of your garden, though, most pre-winter turf maintenance is just an extension of your regular routine.

Keep mowing your grass until it stops growing. Depending on where you are, your lawn may keep going quite late in the year. Remove fallen leaves so the grass can keep gathering energy as long as possible. (Fortunately, leaves are an ideal mulch for your perennials – just move them from grass to garden.) If you have a mulching blade on your lawnmower, you can make light leaf cover into lawn fertilizer just by running over the leaves, but thick mulch layers will not benefit your lawn. The last time you mow, take the grass a little shorter than usual. This removes the juiciest new growth, which might otherwise promote fungal infections.

new_Turf_Builder_WinterGuard_stdSurprisingly, it’s a good idea to fertilize your lawn in the fall. Fertilizing late in the season (late October/early November here in the tundra) gives the lawn a chance to absorb nutrients before going to sleep for the winter. In the spring, it will be ready and raring to go. Follow fertilizer instructions carefully, paying particular attention to application rates – too much of a good thing can kill your grass.


If this all sounds like too much work, it really doesn’t take all that long, and it’s a good way to enjoy a nice fall day (or two). And it pays off in the spring with an easy start to the growing season.

Posted in American vs English, Yard & Garden | Tagged , , | Leave a comment

Organize This! Choosing an Online To-Do List

Dumb Things I Gotta Do Today

1. Make list

2. Eat a hearty breakfast

– Homer Simpson

We have a rather happy-go-lucky, some may say feckless, approach to keeping track of our DIY projects. On the whole, the ‘system’ works. I mean, we have done home improvement projects. If this blog does nothing else, I would hope it convinces you of that. But there are limitations to our current ‘system’.

So, what is our to-do list M.O.? Well, it’s usually around the turning of a season that we come up with a wish list of projects. With pen and paper in hand, we brainstorm all possible projects. Then we go through the list and prioritize projects that we deem, for whatever reason, most urgent. And away we go, home improving hither and yon.

Months later, we may take time to assess our progress. After a long (and sometimes futile) search for the original to-do list, we often find that our endeavors did not match our aspirations. One of the main reasons for not doing items is that we spent time working on tasks that weren’t on the list! The next step is to write a new, revised list, so the process can begin all over again.

Our revised 2013 To-Do list

Our revised 2013 to-do list

It occurred to me that an online to-do list might help. A list that we could both access and update might be worth trying. If we use an online to-do list, I reasoned:

  • we would never lose it,
  • we could both easily update it, and
  • we would be less likely to go off-list.

Even given all that, I don’t think Stacey was convinced that this was something we really needed.

Anyway, last weekend I spent some time on the interwebs looking for an online to-do list. I wanted a list with a tree structure, so top-level tasks could have sub-tasks, and those sub-tasks could have their own sub-tasks. I also wanted a list that both Stacey and I could access and update.

After searching for a while, I learnt that there are lots and lots of online to-do lists, and most of them have free and paid versions. The free versions typically have less functionality. Often, sub-tasks and the ability to collaborate have to be paid for. Here are some of the most popular to-do list websites that offer both free and paid versions:

  • Todoist – This is a very clean looking to-do list. If I was looking for a to-do list just for me, I would probably use Todoist. But collaborating with anyone costs $29 a year.
todoist screen shot

Todoist has a clean look that appeals to me.

  • Wedoist – From the people who brought you Todoist. Unfortunately, Wedoist does not give you the opportunity to create sub-tasks. Tasks can be shared among three people without cost, or among an unlimited number of people for $24 a month.
wedoist screen shot

A screen shot from Wedoist

  • Toodledo – This fell short of my criteria in a number of ways, and has disadvantages I didn’t even know could exist. To begin with, both sharing and sub-tasks are a subscription features. Also, quite bizarrely, in the free version, tasks disappear after six months.  They have a number of subscription options: $14.99, $29.99, or $89.99 a year. The different levels are based on things like storage size, how many tasks you can have, and how long it will remember your tasks.
toodledo screen shot

A screen shot from Toodledo

  •  Cozi – We almost went with Cozi. It’s much more than a to-do list. It is intended to organize your whole family, which is really more than we need. Just using it as a to-do list is possible, but since it’s not really designed for that it takes more clicks to manage stuff than the dedicated to-do list sites. The Cozi to-do list has one layer of sub-tasks. You can upgrade for $29.99 a year, but that doesn’t seem to make the to-do list any easier to use.
cozi screen shot

Screen shot from Cozi. The to-do list is in the right column.

  • Remember the Milk – This is a very popular list site. The top layer of tasks are shown as tabs under the cow’s face, sub-tasks are viewed by clicking on the tab. I found this made it a bit too clunky to be a serious contender. A $25-a-year subscription gets you more functionality, but I don’t think it’s any less clunky.
remember the milk screen shot

A screen shot from Remember the Milk

  • Wunderlist – This is another very popular list site. Wunderlist allows for one layer of sub-tasks. If you want to collaborate with anyone, you’ll have to buy a subscription for $4.99 a month.
wunderlist screen shot

Screen shot from Wunderlist

Now, I have no objection to paying for services we need. But I don’t know if we need an online to-do list. Most sites have free trials of their paid version, which usually last a couple of weeks or a month. But that isn’t much of a test when our to-do list covers many months. I had reached an impasse.

What happened next was that Stacey, persuaded by my logic (and not because she was sick of hearing me whine about not finding a free list that met my exacting standards), did some searching. She succeeded where I had failed. We are now trying out Producteev, which we both enjoy pronouncing with many more ‘e’s than it actually has.

producteev screen shot

Screen shot of Producteev

Producteev has many features that add functionality to our to-do list. For instance, there is only one layer of sub-tasks, but this is offset by the ability to both organize tasks by project, and add labels to tasks. With Producteev we can:

  • Organize tasks by project.
  • Add one layer of sub-tasks, which is enough for most projects.
  • Add labels to top-level tasks.
  • View all tasks with the same label.
  • Assign tasks to one or more people.
  • Add notes to a top-level task.
  • Set priorities and due dates.
  • Sort the list by all the aforementioned criteria.

So, we found an online to-do list that seems to fit our needs. Now to find out whether it lives up to our expectations, or if we will return to the pen and paper method. What physical or virtual methods do you use to keep track of projects around your home? Please let us know — we’d love to learn about them.

Posted in D'oh!, Organization, Repair & Maintenance | Tagged , , , | Leave a comment

Happy Birthday, Ben: Oatmeal Fudge Bars

Leonardo whats-his-name, Herman Munster motorcade, birthday party, Cheet-ohs, pogo sticks and lemonade, idiotic stupid jerk…that’s right, Flanders, I’m talking about you.

– Homer Simpson (singing along to R.E.M.)

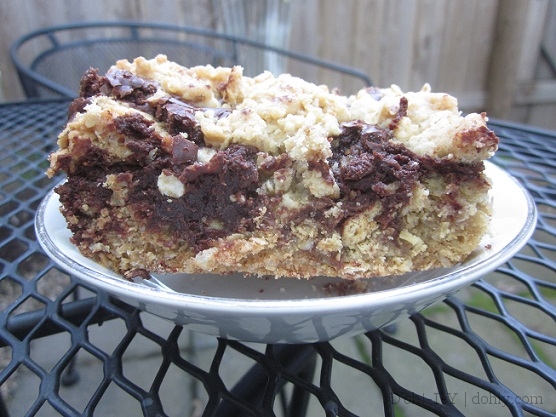
Now that Ben has his own kitchen, I had the idea that I could start converting some US recipes for him. I wanted to start with a family favorite, Chocolate Crunch Bars (more aptly called Oatmeal Fudge Bars, seeing as they do not crunch). These have a soft oatmeal cookie base and with a fudge layer on top, and they are made of yum.

I had the brilliant idea that I could convert this first recipe by Ben’s birthday. Well, talk about in under the wire: HAPPY BIRTHDAY, BEN!

Sweep says happy birthday, too!

Sweep says happy birthday, too!

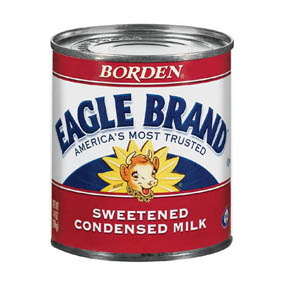
Converting a US recipe for use in the UK mainly means switching over to metric and changing volume quantities to weights. But I also wanted to make the recipe using ingredients easily obtained there. Most of these changes were pretty simple, but I ran into a roadblock with sweetened condensed milk. Condensed milk is a well-recognized ingredient here, often referred to by brand name — my handwritten version simply calls for “a can of Eagle Brand”. But I know Eagle Brand isn’t in every shop in England, so I started seeking a substitute.

eagle-brand-sweetened-condensed-milk

My first go replaced Eagle Brand with an egg-sugar concoction. It worked just fine, but the texture didn’t match the original. The chocolate layer was gooey rather than fudgy.

I took a batch to work. Co-workers reported back all day. “OMG, CHOCOLATE GOO GOOOOOOOD” read one email. Other people stopped by. “You have these down to an art,” my boss mumbled through a mouthful.

“Thanks, but they aren’t exactly like the base recipe,” I said. “I’m trying to replicate the recipe for Ben using British ingredients and metric measurements.”

“Then what will he need you for?”

Demerara sugar -- now available in the US!

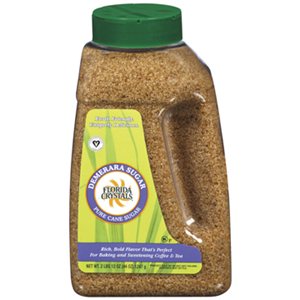
Demerara sugar — a type of brown sugar now available in the US.

Sigh. Back to the food science lab! The second go-around, I used evaporated milk, demerara sugar and flour. I think I threw in an egg as well. Even though evap and condensed milk both have about 60% of the water content removed and both are full-fat dairy products, the evaporated milk mix was very runny. The chocolate topping ran down the sides of the oatmeal base. It set up ok in the oven, but the finished product had a new middle layer of oatmeal/chocolate. The whole confection was moist but crumbly, rather than being a unified slab.

These went to the office as well. A colleague declared, “These are nice, but not nearly as good as last time.”

“Yes, this phase of the experiment wasn’t very successful,” I said.

“What experiment?”

Back at home, I did some research for another substitution recipe, and found a page on US/UK conversions that included a powdered-milk-based option. Third try…

…success! So here it is in both versions (and if you want the gooey version, replace the powdered milk/sugar or sweetened condensed milk with the eggy mixture found here; melt everything separately and then stir in the egg stuff).

———————————————————————————————————–

Oatmeal Fudge Bars (UK)

85 g powdered milk
120 ml hot water
125 g demerara sugar

Mix together the milk and hot water until liquid; add the sugar and stir a lot. Set aside.

225 g butter, softened
275 g demerara sugar
225 g caster sugar
2 eggs
5 ml spoonful (4 g) bicarbonate of soda
5 ml spoonful (6 g) salt
400 g plain white flour
270 g quick oatmeal

Cream the butter and sugars. Add eggs and stir until blended. Add bicarb, salt and flour and stir until blended. Add oatmeal and stir until blended, which will not be super easy, but persevere. Reserve a big handful of the mixture, and spread/press the rest into a big rectangular pan that I would call a 9×13 pan. Something you’d cook a lasagne in, perhaps.

340 g plain (or dark) chocolate chips
Milk and sugar mixture from earlier (stir it again before using)
dash salt
10 ml vanilla
28 g butter

Throw all this stuff in a bowl and melt it in the microwave (about a minute). Stir until completely blended, and pour over the oatmeal base. Crumble the reserved oatmeal stuff over the top. Bake at 175C for about 30 minutes or until the crumbled parts are golden brown.

———————————————————————————————————–

Oatmeal Fudge Bars (US)

1 cup butter, softened
1 cup brown sugar
1 cup white sugar
2 eggs
1 tsp baking soda
1 tsp salt
2-1/2 cups plain flour
3 cups quick oats

Cream the butter and sugars. Add eggs and stir until blended. Add soda, salt and flour and stir until blended. Add oats and stir until blended, which will not be super easy, but persevere. Reserve a big handful of the mixture, and spread/press the rest into a 9×13 pan.

12 oz. semisweet chocolate chips
1 can Eagle Brand
dash salt
2 tsp vanilla
2 T butter

Throw all this stuff in a bowl and melt it in the microwave (about a minute). Stir until completely blended, and pour over the oatmeal base. Crumble the reserved oatmeal stuff over the top. Bake at 350 for about 30 minutes or until the crumbled parts are golden brown.

———————————————————————————————————–

Oatmeal Fudge Bar on the breakfast patio

These are great for sharing because, thing one, you really shouldn’t eat the whole tray yourself, and thing two, they always go over well. And they are pretty easy to throw together. (And in case you were wondering, we also sent Ben pressies — we’re not actually expecting him to make his own treats for his birthday!)

Posted in American vs English, Family, Food & Drink | Tagged , , , | Leave a comment

You Should Seek Professional Help: Interior Designers (Part 2)

What can happen with bad design.

What can happen with bad design.

Last time on D’oh, I talked about what an interior designer does and how one can help plan your project. We hired an interior designer to help us with our upstairs loft space. Once we have a plan, a range of other things will fall into place — most immediately, the amount of attic insulation to install before it gets stupidly cold outside.

We had our first meeting with the designer this week, and discussed our goals, preferences and budget — all things you should be prepared to discuss when you bring in a designer. This time, I want to talk more about the basics of the relationship.

(Looking for designers to try? Ask friends for referrals. Look for work you like on Houzz or other sites. Or the American Society of Interior Designers has a “find a designer” tool.)

1. Is This The One?

The first part of the relationship is pretty subjective — do you click with the designer? You’re not looking for a BFF, but do you communicate well? Does he or she understand what you want to accomplish? How comfortable do you feel?

And how comfortable will the designer make you feel?

And how comfortable will they make you feel?

We didn’t have to talk to lots of designers — we were referred to our designer, and we liked her — but don’t feel shy about talking to a few different people. Just let each one know that you are looking for someone for the job, and don’t sign up for services (in writing or in principle) until you find someone you feel you can work with well.

When you are checking in with designers, look at their portfolios. I like our designer’s portfolio because it shows before-and-afters of various rooms, all with improved function but with a huge range of decors. The finished decors clearly reflected the individual tastes of the owners rather than the designer’s preferences, but the rooms themselves flowed better regardless of the style decisions. You may feel more in tune with someone who specializes in a certain type of room or decor. It’s up to you!

Adjustable seating anyone?

Adjustable seating anyone?

But don’t get too subjective — also find out about the designer’s qualifications. Is he or she licensed or accredited? Currently? Where did the designer train? Does he or she have references you can check? You can also look at reviews or issues on Angie’s List or at the Better Business Bureau, among other sites.

This interior designer for this facility didn't include any safety railings in violation of code.

The designer for this facility didn’t include any safety railings! Total code violation.

2. Project Scope 

There are so many things a designer can do for you! Do you want a consultation? A completed floorplan with elevations? Assistance with sourcing furniture and fixtures from “to the trade” sellers? Total project management, including working with a contractor? An interior designer can do any or all of those things, or some combination thereof. Since there are so many options, though, be clear about what it is you want.

YES, I said I wanted it to seem bigger on the inside, but I did NOT ask for embedded neon flooring or portals to other dimensions for that matter.

YES, I said I wanted it to be bigger on the inside, but I did NOT ask for embedded neon flooring or wormhole access. That’s WAY outside the specs.

In our case, the designer is prepping a floorplan with a few different options. She will include a few elevations (technical drawings of the space as designed). Then we’ll have an extended consultation to discuss the plan. If that consultation triggers new ideas for us, we may ask her to do some further related work, but otherwise, we’ll be done. Then we can take the plan and figure out how to pursue it on our own or with a contractor. Of course, we could always go back to her later and ask for more services if we get into a pickle.

3.  Design (and Project) Budget

Once you have the scope of the project nailed down, think through the budget piece. Besides being able to do a bunch of different things, interior designers can also bill in a variety of ways. They can charge:

  • Hourly, starting around $50 and going up from there (sometimes dramatically!). Be aware that this may include the designer’s travel time. Hourly work can be very affordable, but find out what’s included under any proposed hourly model.
  • A flat fee covering all services defined for a specific project.
  • A percentage of what you end up paying for fixtures and construction services.
  • Cost-plus, where the designer buys all the materials and furnishings for your project at wholesale and then charges you retail and keeps the difference. (If you go this route, make sure that difference is fully disclosed.)

Under any of these models, you need to know how expenses will be dealt with, and which ones are separately billable to you. A flat fee isn’t very flat if there are a load of expense billings on top. Thinking through these items in advance can prevent unpleasant surprises.

I said I wanted television and a big window in the bedroom, but this is overkill.

I said I wanted television and a big window in the bedroom, but this is overkill.

The scope of your project (and your pocketbook) drives billing. Cost-plus makes no sense if the designer isn’t sourcing anything for you! To be fair to your designer, be clear about your budget, both for the design and for the project at large. They don’t want to design something you can’t afford, and they do count on getting paid, so don’t be coy! In our case, we’re proceeding hourly, but we have an estimate on the total number of hours and a not-to-exceed amount.

Designer/client miscommunication about the need for bookcases.

Designer/client disconnect about the need for bookcases.

3. Making it Official

You loooove your designer! Your designer looooves your project! So seal the deal! Get a written contract.

For some reason, people hate to ask for things in writing, so let me reach across into one of my other incarnations: I deal with contracts in my day job. Every day. So trust me and my long, sad experience: when it comes to a disagreement or billing issue, folks never remember an oral agreement the same way. Plus, a handshake deal never has the details — stuff like expenses and timeline.

Fortunately, a professional designer will (or should) have a standard form that he or she uses that summarizes terms and conditions for the relationship — check to see how it defines the fee structure, expenses and deadlines. If there’s anything you are unsure about, ask if you can write it in before signing. Make sure you get a copy! Don’t pay for anything or allow work to start until you have the project documented.

You may want to specify how the designer will present your plan.

You may want to specify how the designer will present your plan.

Make sure the project at hand is well-defined in the agreement, as well as your hot-button issues (specific deadlines for the designer if you need plans by a certain date, for instance). We’re not talking about a super-involved document — just something that gets everyone on the same page.

A final word from my day job experience: If a problem comes up later, don’t immediately go to the dark side! You clicked with this person originally, right? And most people are basically reasonable. Go back to the designer with an open mind and ask what the hell they were thinking! constructively tell them how and why you are concerned or confused. Then let the designer respond. It’ll be fine! Probably!

Do you have other tips for working with an interior designer or any home improvement vendor? Other movie or television stills of weird design issues? Please share your knowledge in the comments!

(Did you miss Part 1? Check it out here. And UPDATE! See what the designer came up with in Part 3!)

Posted in Construction, Decor, Organization | Tagged , , , | 2 Comments

You Should Seek Professional Help: Interior Designers (Part 1)

We could dress it up a bit. We can bring in a fern, and a folding chair from the garage, and the most decorative thing of all — the truth!

– Marge Simpson

The other day, the Kev and I confronted our to-do list for 2013.

  1. Bedroom closet. DONE. WOOOOOOOOOOOOOOOOO!
  2. Sofa slipcover….hmmm. Sort of? More on this another time.
  3. New countertops. Done nothing.
  4. Fix up the porch. We bought a door! And a mail slot! And…that’s it.
  5. Make a plan for the upstairs.

Basically, we’re about 28% done. Sigh. We’ve done lots of other good stuff this year, but we didn’t put those things on the list! Today, though, we made a move on #5. We met with an interior designer to talk about our terribly neglected upstairs area.

Loft

Loft 2

Right now, we use this space as an office/sewing room/spare bedroom, but fundamentally, it’s one big room where things that need to be organized go to die. We needed a plan to determine how to use it better, and whether we would need to add a dormer to do so. We’ve sketched, measured, researched and conferred.  But those efforts were all preliminary, because we knew we’d eventually hire an interior designer to refine our thinking.

An interior designer is not a decorator, although the terms are often confused. As the National Council for Interior Design Qualification clarifies:

Interior design is the art and science of understanding people’s behavior to create functional spaces within a building. Decoration is the furnishing or adorning of a space with fashionable or beautiful things. In short, interior designers may decorate, but decorators do not design.

Designers are educated on structural issues and infrastructure, as well as building code requirements. They understand ergonomic issues, building materials and architectural principles. In addition to formal training, designers are generally required to be licensed (in the US, anyway). They can assist in a variety of ways, from simply developing plans to ushering through an entire remodel including decor.

We’ve used an interior designer before — the same one, in fact. The first time, we needed help with our kitchen remodel. Our kitchen is really small, and it didn’t function very well. Despite its miniature size, the room has four — FOUR — doors. It was basically a hallway! But each door had a good reason for being there given the house’s floorplan. We were stymied. When the designer came to see us, we threw ourselves on her mercy.

We're not worthy!

We’re not worthy!

We liked her right away. She made us feel creative and collaborative rather than pitiful and confused. She led us through the process, asking questions we hadn’t considered and giving us some time to talk through things when we had varying opinions. It was like having a friend’s sister stop by to chat about the space — someone comfortable but not too familiar, with a fresh perspective.

For the kitchen, the designer drew up a floor plan and elevations, including cabinetry lay-out. The major changes were moving the stove and one of the doorways. The doorway shift in particular was a brilliant insight. We never would have thought of it, but by moving a door to the other end of a wall, we maintained all the communication between rooms that the original floor plan had, but kept the traffic from moving through the space. (She also managed to include a window seat!)

Kitchen before Kitchen after

I hope my rudimentary drawings (Microsoft Paint brings the smackdown!) show how the door/stove change helped concentrate all the “through” traffic to one end of the room. Before, people would come in the back door and wander through the kitchen, but now, folks can head into the house (or hang out on the window seat) without crossing through the main workspace. It makes a world of difference.

Our first designer experience helped us be better-prepared this time. Earlier this week, we defined our goals and preferences so we could give the designer good direction. (Budget was also part of this conversation.)

Notes

Goals, preferences and ideas.

We want to wring a small master suite and office space out of the loft, and we want a view. You may ask what we expect to see out of a Midwestern bedroom window. Sydney Opera House, perhaps? The Hanging Gardens of Babylon? Herds of wildebeest sweeping majestically across the plain? Ideally, all of those! But we would settle for looking out to the horizon in some direction. Right now, there are only two small windows up there. We’d like to have a bright, welcoming space.

In Part 2, we cover more on the designer-client relationship from the client perspective, including contracting, fees and expectations. Check it out here. And then in Part 3, we show you what the designer came up with!

Related Posts Plugin for WordPress, Blogger...
Posted in Before & After, Construction, Kitchen, Organization, Walls & Floors, Windows & Doors | Tagged , , , | 2 Comments