Draft Dodging

Arrrriairar!!

– Eleanor Abernathy (Crazy Cat Lady)

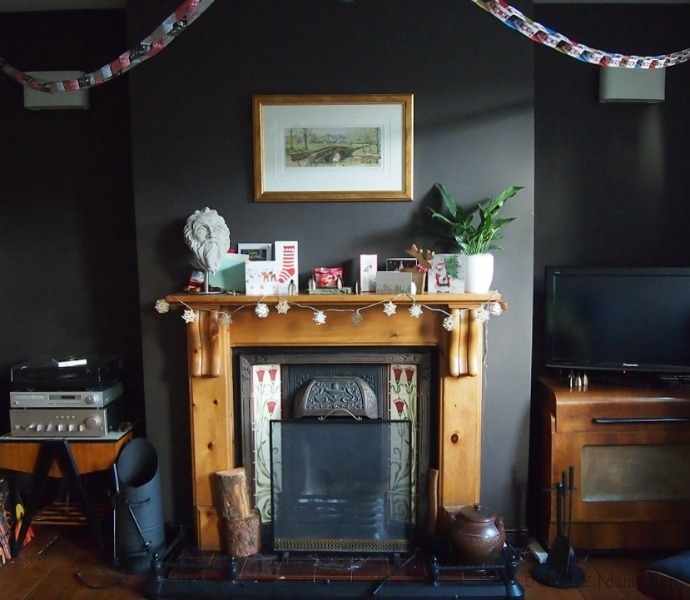
With the threat of polar vortices hanging over our head, it is extremely important that we take all possible measures to protect ourselves. We decided that one of those measures would be to try to make the front door a bit less draughty.

A couple of years ago, our house was vacuum tested. The results showed that our house was surprisingly tight for its age, but still leakier than a rusty bucket. Since then, we’ve taken steps to improve the thermal efficiency of the house. For instance, we replaced the exterior doors at the front and rear. The front door, which leads onto the porch, was the first to be replaced.

The new front door came with integral insulation between the door and the frame. Unfortunately, the effectiveness of that insulation has been reduced by the cats trying to get back in off the porch. It seems they thought clawing the insulation on the opening side of the door would open it. From the cats’ perspective, this actually worked; the door always swung open. When it did, it was invariably accompanied by one of the food givers issuing a loud animated greeting.

Cat modified door insulation

Cat modified door insulation.

Eventually, we want to replace the chewed-up insulation with a close approximation of the original. But, our priority here was to stop the draughts (US: drafts). The answer, we decided, was nail-on weatherstrip.

This pack contains enough weatherstrip for one door.

This pack contains enough weatherstrip for one door.

This kind of insulation is not the most elegant, but it is cheap and it does do the job well. I was a little reluctant to hammer nails into the door frame at first, but then decided that the frame needs some work anyway. So the nail holes will be filled in due course.

Profile view of weatherstrip

Profile view of weatherstrip.

There’s not too much to say about fitting it. Cut a piece to length, close the door and nail the weatherstrip to the frame. To ensure a good seal, the round part of the insulation should be slightly squashed up against the door. But if the weatherstrip pushes against the door too much, it will make the door difficult to close.

Weatherstrip in position.

Weatherstrip in position.

Probably the most interesting part is where two pieces join in a corner. The instructions on the pack suggested cutting each piece at an angle. But I just cut one piece to butt up against the other, which seems to work well.

End of weatherstrip cut to fit in corner.

End of weatherstrip cut to fit in corner.

Two pieces of weatherstrip coming together in a corner.

Two pieces of weatherstrip coming together in a corner.

So, that’s it. The front door is, once again, draught-free. This little project was surprisingly satisfying, even if it is only a temporary fix.

Posted in American vs English, D'oh!, Energy, Porch, Repair & Maintenance, Windows & Doors | Tagged , , , | 2 Comments

This Old Couch: Frame Repair

Learn Carpentry with the Beatles!

– Book in Ned Flanders’ library

After deciding that our couch was worth recovering, the first thing on the couch agenda was fixing the cracked frame member. (Assuming you have a wood-framed sofa, this can be a worthwhile repair–or even reinforcement–regardless of whether you intend to reupholster.)

Hey, couch. Don't make it bad. Take a cracked part, and make it better.

Hey, couch. Don’t make it bad. Take a cracked part and make it better.

Eleanor_Abernathy

Actually, the very first thing was ordering fabric samples. I did that on the Day of Ultimate Coldness (Monday). My original plan was to go to S.R. Harris and Mill End Textiles, but when you’re suffering the effects of a POLAR VORTEX!!, leaving the house is not appealing. I ordered fabric swatches from Fabric.com and Decorative Fabrics Direct while sitting in front of the fire beneath three blankets and two cats. Basically, if either of us is home and it’s a POLAR VORTEX!! we’re going to be draped in cats.

So on to the second thing! I drilled three pilot holes through the bottom of the frame member, then screwed through the crack to bring it back into shape. (Ben in the comments noted that wood glue should be part of this step, which is an excellent point — stick some wood glue in there!)

Fixin' a hole. Well, a crack anyway. This Beatles thing is rapidly breaking down.

Fixin’ a hole. Well, a crack anyway. This Beatles thing is breaking down rapidly.

I drew lines on either side of the piece to remind me where the screws were inside the wood.

Beatles lyric

Help! I need some lines to heeeeeelp me.

Most people can just keep track of this, but I’ve tried to drill through a screw before (d’oh!), so now I give myself a little reminder. Plus, when it gets to bolting time, I’ll be dodging the screws and the crack in the wood, so this information will be useful.

Next, I cut my sister piece out of some scrap wood and clamped it up. Then I marked roughly where the bolts would go through, avoiding the screws I just added and the cracked part of the original piece. Bolts shouldn’t be all in a line or they will decrease the strength of the wood, so my marks were at different heights.

Approximate bolt location circled, arrows show the screws and the knot, and the green line shows roughly where the crack is in the other piece. Lots of stuff to avoid!

We can work it out. Bolt spot selected to avoid screws, the knot, the crack, and the kitchen sink.

Then I drilled pilot holes. Or at least I did until the battery ran out on the drill. I’d left the battery charger unplugged and one remedial hour of charging is not long enough. You know what that means? It’s HAMMER DRILL TIME!

I (carefully) used the hammer drill to put through the bolt holes–the hammer drill makes short work of boring through multiple pieces (should’ve started with it, really). Bolt holes should be just big enough to tap the bolt through, and they should be squarer to the wood than I drilled them.

I went rooting around in the basement and found three random bolts of approximately the right length with nuts and some random washers. They weren’t perfect, but they were going to have to do–I was not going out into the POLAR VORTEX!! for three bolts.

You can check drill bit size against a bolt by putting the threaded end of the bolt in line with the shaft of the bit (the smooth part that goes into the drill). Better yet, your bolts and bits are in containers that tell you their sizes (as mine were not). Stick your washers on, insert the bolt, add more washers and finger-tighten your nut. Then, hold the nut in place with a vise grip or wrench (UK: spanner) while you tighten up the bolt.

sdfsdf

Getting better all the time.

I popped a couple of nails through the frame and into each end of the sister piece to hold everything together, and voila: FRANKENSOFA!

asdfa

All together now! (There’s no good reason why one of the bolts is going the opposite direction.)

I’m now on the sofa trying to decide if it feels more rigid. Maybe it does? Or maybe it’s just because I know it could now take a direct strike that it feels more structured? It’s late as I write this, so my personal rigidity and judgment are not to be trusted. I couldn’t even be bothered to push the sofa back to the wall. Which is ok, because check out the resulting televisual alignment!

sdf

Lady repairman, lying on the couch.

This is the life!

Posted in American vs English, Furniture, Repair & Maintenance | Tagged , , , , | 5 Comments

This Old Couch: The Verdict

FOX's "The Simpsons" - Season Twenty Four

The Mission: Determine whether our comfy and right-sized but beat-up sofa is worth recovering.

The Research: Hello, internet! Unfortunately, most advice concerns whether a piece is worth paying an upholsterer to refinish. That work can be as expensive as a new, mid-quality couch, so the sofa in question better be up to snuff. Upholsterers, I love ya, but this is going to be an inside job! This couch doesn’t need to be tip-top quality to make it worth the effort.

Convinced that there had to be a middle ground, I did some more research and created a three-item checklist for whether an otherwise likeable couch is worth DIY reupholstering or slipcovering.

The Checklist:

  1. Frame Construction–is the frame made of actual wood and/or steel? How is it fastened together? Are the joints tight?
  2. Frame State–when you use the piece, does the frame sag? If you shake the arms, can you make it wobble? Are the framing members secured fastened and square to one another? Does the frame squeak or groan when you use the sofa?
  3. Spring Quality–does it even have springs? Are they coiled or flat? Are they resilient? Are they uniformly tight against their under-cushion covering? Are they connected to the frame? Are the ties intact and tight?

The Investigation:

With my checklist in hand, I tackled our couch (much to the consternation of the cats). First, I grabbed each arm and shook it violently. Nothing wobbled (and I already know that flopping on the thing doesn’t make it shake). So far so good — solid and quiet.

Next, I checked the level on the floor — not much in the house is square, so it wouldn’t be fair to fault the couch for not being level if it were sitting on a slanty floor. Floor was not bad, quelle surprise! So I checked the level for the back and the front apron. Those were both fine.

Sofa back with level

Next, I flipped the couch up and removed the dust sheet covering the undercarriage, which was surprisingly intact. The cats thought I’d opened a portal to another dimension.

Sofa dust cover coming off

I looked closely at the construction. Turns out it is all substantial wood, but it’s mainly glued/stapled together.

Sofa staples

Despite the cheesy stapling, though, the frame is still tight and the pieces are still square to one another. There’s only one big issue with the frame: one of the pieces is cracked around a knot in the wood. (I spotted this before our feline inspector got there.)

Sofa Frame with Crack

Despite the crack, the top of the flawed framing piece is still straight and square, and the frame doesn’t give. If we were to sister up another piece with this part of the frame and bolt through them both, that would fix it.

That takes care of the framing items on the checklist. On to springs! This sofa has flat springs, which aren’t as fancy as coils, but they are a pretty big gauge and still resilient. They are attached to the frame via a hook arrangement that appears to be in good shape.

Sofa frame spring hook

The springs themselves are unbroken and evenly spaced and arched. The springs are also smooth against their cover on the cushion side.

Sofa spring cover

So I’d say the springs are ok.

I didn’t include anything about cushions in the checklist because cushions can be replaced. But I did check the sofa’s existing cushions to see how they were doing, using the highly technical Bounceback Squeeze Test.

Sofa Cushion Squeeze 2

These cushions are a down/foam combo. The foam is high-density and doesn’t seem to have lost its body. The down could be springier in places, but I have some down on hand so I could add some fluff. I’ll also vacuum and steam the cushions to revitalize them.

Regrettably, the back cushions are sewn to the cover. In order to slipcover the cushions individually (and to cover the sofa itself), I’ll have to cut the covers away. On the plus side, there are cushions zipped inside these capsules, so I won’t have to rebuild them.

The Verdict:

It’s a bit of a mixed bag. The frame is stapled…but it’s solid and square. It uses flat springs…but they are still springy. There’s a cracked frame member…but it’s an easy fix. To be honest, I held out a small hope that the thing would be a disaster underneath because buying a sofa is hella easier than recovering one! But this one is in good shape.

Let the recovering begin! Yaaaaaaaaay.

Posted in Decor, Furniture, Repair & Maintenance | Tagged , , , , , , | Leave a comment

Resolutions, Schmezolutions: Cheating on Sofa Reupholstery

Well, I say cheating is the gift man gives himself!

– Mr. Burns

You know all those last-minute cleaning tips where they recommend keeping the lights low? They are on to something. When we first turned on the ceiling light we added to our living room, it made such a huge difference that I shouted:

“Wow, how did we live in the dark so long!?”

followed rapidly by

“Our sofa looks terrible!”

We bought said sofa last century, and it has a well-deserved reputation for extreme comfort, if not any particular stylishness. The new light made me realize that it was pretty threadbare and wallowed out. Still comfy though.

Sofa Before

I have only marginal sewing skills, but I resolved that I was going to reupholster or slipcover that puppy during 2013. Did that happen? Hell no! What did happen was I bought a Sure Fit slipcover, an over-confidently named, semi-contoured, drape arrangement. My intentions were two-fold:

  1. Kick the slipcovering can down the road.
  2. See if we were the type of folks who could gracefully manage white slipcovers.

Success? I guess? Insofar as we determined we are not the white-slipcover type. Here’s the initial test fit (pre-ironing, obviously):

Sofa with Slipcover

I did later iron it. I DID!

Some tips for slipcovers of this type.

  • If you have “T” cushions as we do (the front of the seat cushions extend out in front of the arms),  make sure to order a slipcover for a “T” cushion couch. The regular slipcover won’t have an allowance for the cushion’s extra bit in the front, and it won’t work.
  • There are instructions and tags included with the cover. These actually help, so don’t discard them out of hand! Centering the tags sewed into the flip side of the cover is really important for getting this to work.
  • TUCK TUCK TUCK. It takes a LOT of tucking. Eventually, it will look relatively neat. Use cheap pipe insulators down the back of the seat cushions to help keep things in place (less than $2).

As the year wore on and I still hadn’t slipcovered the sofa, I decided that I would dye the Surefit and see if we wanted a dark brown slipcover, should I ever get around to sewing. Two pots of Rit “Dark Brown” and a washer load later, and the answer was “Maybe, but certainly not this dark purply brown.”

Sofa with Brown Slipcover

I’d actually like a coppery brown, something like this one (from Hom Furniture):

Hom Furniture Darby Sofa

That’s already slipcovered, by the way. It’s taking most of my willpower not to just go buy it and have it delivered! This one is not the peak of chic either, but Chez D’oh, sofas are for cozy lounging.

Since my willpower is working (so far), the revised plan is that I’m going to slipcover the sofa over this dark, cold January (this one right now). Actually, we’re first going to flip the sofa over and see if the structure is worth the effort, and if so, I’m going to slipcover it. By the end of January. 2014. Which I’m considering a grace period for 2013 resolutions.

This sort of thing is why we have no resolutions for 2014.

Posted in D'oh!, Decor, Furniture, Repair & Maintenance | Tagged , , , | Leave a comment

Contractors: The Profession That Time Forgot

Carl: Didn’t you get the email?
Homer: What’s an email?
Lenny: It’s a computer thing, like an electric letter…
Carl: …or a quiet phone call.

– The Simpsons

We are trying to get a few bids on our possible loft project. Actually, we have been trying to do so since early November, and having now semi-emerged from the festive season, I’m revisiting the effort.

Typically, I am the one who contacts tradespeople for quotes, but (also typically) I work during the business day. For me, the option to email a potential contractor after hours and hear back from them later (by email or phone) is very convenient. I imagine it’s more convenient for the builder to be able to pick a time to respond, rather than having me call when he or she is busy. And I like that I can put down the project basics so that the company has some background to start with. That all seems efficient and civilized, yes?

If you agree, then please allow me a tiny rant.

CONTRACTORS/BUILDERS! HEAR ME NOW!

I come not to praise email, but to bear witness that YOU PUT EMAIL ON YOUR WEBSITE. If you don’t want to use email, don’t do that! If you put an email form or address on your website, could you please monitor it? Check your spam filters once in a while? Get email on your phone? Give the first flying furball that I’m looking to give you money?

This isn’t freakin’ Brigadoon, people. We’re 20 years into widespread email use.

People using email in 1993. You can tell it's 1993 because it's in black and white. (via)

People using email in 1993. You can tell it’s 1993 because it’s in black and white. (via)

A special shout-out to the ONE GUY out of eight since the beginning of November who responded to email from a website offering an email option. If he didn’t think that the dormer should be braced with carbon fiber and painted with the tears of the righteous, I’d probably give him the work just for keeping up with email.

/rant

Posted in American vs English, Construction, D'oh! | Tagged , , | 2 Comments

Resolved: No Resolutions for 2014. Except These.

On the other hand, who’s to say what’s right these days, what with all our modern ideas and products?

– Homer Simpson

Yesterday, I said we weren’t going to have any New Year’s resolutions for the house, given our pathetic completion record for 2013.

Ok, but we do have priorities. Those aren’t really resolutions, right? Priorities speak to the most basic issues with the property–making it more energy-efficient, organized, and secure. They are:

  1. Window Repair: I took a class on how to make old windows weather-tight. That was in 2012. It’s time to prioritize making some of the most decrepit windows a bit more efficient.
  2. Organization: We need to clear out some of the junk we’ve accumulated upstairs and in the basement in order to take on some bigger projects.
  3. Fence Repair: Part of our privacy fence suffered frost heave several years ago. We really need to fix it.

None of these are exciting, but all of them are necessary. Priorities aren’t really a night out on the town, are they? Boo! The not-so-secret secret of DIY (and DIY blogging) is that it’s not all dramatic overnight transformations. It involves a lot of mundane maintenance, planning, and budgeting.

Still, like resolutions, priorities can change or slip. Tune in this time next year to find out which ones were deprioritized. My money’s on organization drifting down the list!

Fortunately, the Kev makes even boring stuff fun. Bring it, 2014!

Posted in D'oh!, Organization | Tagged , | 1 Comment

2014: Resolving Not to Resolve

 I resolve to lose 10 pounds, and then gain it back by Valentine’s Day.

– Homer Simpson

A year ago, we posted our 2013 DIY resolutions.

Huge mistake!

homer-doh

We got lots of projects done over the last year, but not necessarily the ones we set out to do. Our list:

1. Enlarge the bedroom closet.

Status: COMPLETE. And we threw in a total bedroom overhaul while we were doing that, including popular posts on our storage bed and our floating nightstand project. If I can ever get the curtains done, I’ll post a before & after.

2. New kitchen countertops.

Status: NOT EVEN STARTED! I suppose we need to decide on the material as a first step. Sigh.

3. Develop a plan for the upstairs.

Status: PROGRESS. We have some direction, and we are filling in the details as we speak with contractors. Contractors are hard to speak to, insofar as they don’t want to come to one’s house or answer one’s calls (at least not when one is me).

4. Reupholster the sofa.

Status: DELAYED. I intend to do that in January. We’ll see!

5. Fix up the front porch.

Status: PROGRESS. We replaced the front door, and we figured out how to strip the world’s toughest floor paint. We talked about replacing the railings on the front steps, and have a working concept for that. I also have an idea about flower boxes that I haven’t put to the Kev yet. (Hi, honey!)

Basically, with the exception of the bedroom closet, the Venn diagram of what-we-got-done versus what-we-resolved-to-do looks a lot like this one:

meatloaf

We would do anything for this house. But we didn’t do THAT (where THAT = anything we resolved to do).

The thing is, though, home improvement is hard to schedule for homeowners. Emergencies happen. You start a project and expand it–or run into complicating factors. It’s all part of the experience, and there’s no use in getting stressed about it (if possible).

So New Year, new concept: no resolutions! I’d quite like to finish the porch project and reupholster the sofa, but formalizing intentions as resolutions doesn’t seem to get ‘er done.

D’oh!

Hope your 2013 was better-structured than ours!

Posted in Before & After, D'oh! | Tagged , | Leave a comment

Happy Christmas!

Bart: We are happy, we are merry.
Army: We are happy, we are merry.
Bart: We got a rhyming dictionary.
Army: We got a rhyming dictionary.

– The Simpsons

Holy blog-appropriate gifts, Batman!

Simpsons Christmas

A very merry Christmas to you and yours!


Posted in D'oh!, Family | Tagged , | 2 Comments

Got Wine? Got a Printer? You’ve Got a Gift!

Homer: Remember when I took that home wine-making course and forgot how to drive? 
Marge: That’s because you were drunk!

– The Simpsons

Luckily, our shopping is done, but there have been many years where we were stuck for a gift at the last minute. There’s no holiday panic quite so special as realizing you are a gift short!

You can always give wine, of course — whoever thought up those wine-bottle gift bags is raking it in! But maybe you want to be a little more personal. One last-minute trick I’ve used is customizing wine on hand. It doesn’t need to be fancy-pants wine, and recipients are always pleased by the extra effort (assuming they are wine-positive folks).

Frosty Wine Label

It’s easy and fun! Here’s how to do it:

1. Take the label off a bottle of wine. You can use Goo Gone, but soap and water work as well. I scuff up the label, soap it up, and then submerge the label area. A little elbow grease and some subsequent soakings and the label will come off neatly.

2. Print a new label. Create a 3-inch wide by 4-inch tall text box (this works for most bottles, but check yours and adjust accordingly) in Word and play around. Once you are happy with what you have, print it on regular paper.

The Best Wines Label

3. Cut out the label and carefully attach. I have used both glue sticks and spray adhesive. The spray adhesive is a little better — it leaves less goo on the bottle and you can reposition if you get it a bit wrong. To get the label straight, I line up one side lengthwise so it’s running straight up and down and smooth the label around the front. If it goes horribly wrong, take it off and print another one!

4. Short on time? I’ve put the labels shown in this post into a Word document for you to customize and use! These are really basic, so they are easy to change up for wording, or even for colors and lay-out.

Dohiy.com Printable Wine Labels 2013

Santa Wine Label

Happy holidays, y’all!

Posted in D'oh!, Food & Drink | Tagged , , , , | Leave a comment

Before and After: Lois and Ben’s Living Room

This tree reminds me of your father. Round in the middle, thinning up top and your hands get sticky when you touch him.

– Marge Simpson

Remember Ben (and sweetheart Lois) moved into a house this year? This was the front room as shown in the property listing:

house living room

Ben and Lois decided the striped wallpaper had to go. And the carpet. And the lighting. Well, it’s only a few months later, and check the progress!

Fireplace dark accent wall

I would never have been so brave with the accent wall, but it is gorgeous! Lois gets all the credit for color bravery, as she talked Ben into it. The color is “Tailored” by Crown Paint (UK), and depending on the light, it can be deep brown to smoky grey to deepest plum. I love how the wood stands out against it (as well as the Christmas decorations).

Christmas Mantel Lights

Aren’t the penguins cute? Here are a few in front of the telly.

OLYMPUS DIGITAL CAMERA

The fireplace wall is the most striking change, but they also sanded and refinished the wood floor, and added a wall of bookshelves.

Christmas tree by bookshelves

That diorama-ed duck on the top shelf is a bit of a family legend. The animal theme is carried through to the ornaments.

OLYMPUS DIGITAL CAMERA

Only three more sleeps ’til Christmas! But this room isn’t all about Christmas. Ben and Lois have added some great furniture. I love this green sofa, especially considering the accent wall.

Green Retro Sofa

This photo also shows a corner of their cool live-edge coffee table and sheepskin rug in front of the fire.

It’s such a cozy, stylish room — well done, Ben and Lois!

Related Posts Plugin for WordPress, Blogger...
Posted in Before & After, Decor, Family, Furniture, Walls & Floors | Tagged , , , , , | Leave a comment