Call 1-600-DOCTORB. The B is for Bargain!
– Dr. Nick Riviera

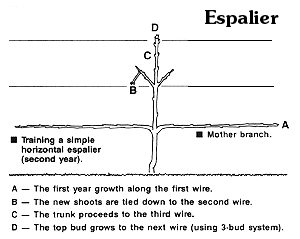
Shoes I bought on clearance in Dec. 2013
Back in college, I had a status-conscious boyfriend. One time, I was bragging about some shoes I’d bought on clearance, and he said, sadly, “You never pay retail for anything, do you?” To which I replied, “You say that like it’s a bad thing!”
I still buy shoes on sale, but I’ve also carried my love of a good deal over into DIY. When it comes to house fixtures or appliances, I don’t want to buy cheap stuff cheap–I want to find excellent prices on good-quality items. Doing that takes a little planning and research, but can pay off handsomely. Plus, if you treat it as a game, it can be fun. True story!
Start well in advance of a project with research and measurements, and figure out what you need and want. (This methodology is not for the time your water heater explodes at 3am!) I find it’s best to have specs in mind, but not necessarily specific model numbers, although you can do either or both.
1. Local Research. As part of your research, take a look around the local big box places and outlets. We’ve been shopping for a new kitchen sink and a faucet, so we looked at DIY places and visited a nearby builder’s outlet to gain an idea of pricing, appearance, and quality. You might also check Craigslist–while it’s hard to find the exact thing there, sometimes you will be pleasantly surprised.
2. Potential Deals. You may find exactly what you want locally, but if it’s not on sale and staff don’t know about any upcoming events, check what you can find online. The big box places often have specials online, or may place printable coupons onsite. Joining an email list may yield 10% or more off your next purchase.
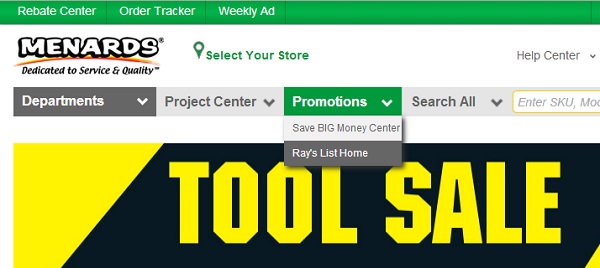
It’s worth checking what’s available online from a known store. That’s how I found “Ray’s List” at Menards.com. Ray’s List is an index of discounted and clearance merchandise outside of regular store stock. You enter your location, and it lists items in stores near you, which you can search and sort.
To find the list, use the pulldown from “Promotions” on the Menards home page.
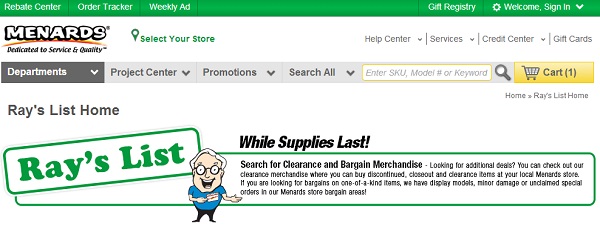
 At the Ray’s List page, you can sort locations and departments to see what’s on hand. When you see something you want, you can take the SKU number to the store with the item and pick it up.
 Since you see the item in person, you can check its condition and suitability for your project before taking it home. Remember, you can also use rebate credit and 11% off gift cards to bring down even a discounted price.
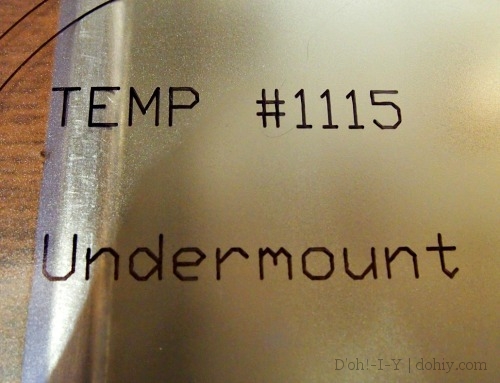
Be aware that Ray’s List items sell quickly, but they don’t seem to update the index as promptly. On our quest, I found one of two sink models we were considering available at a store eight miles away. It was a new-condition returned item, and a great deal. We didn’t call ahead, and there was some confusion among the staff over whether it was still in the store (and if so, where). It was eventually located, and for now, it lives in the corner of our dining room. It’s as if we don’t even have a basement!
3. Online Research. I have a set of tried-and-true places to look online. All of these sites are well-known, but there are ways to make a good deal even better. Plus, these spots may also lead to helpful niche sellers (for instance, when searching for a new tap, I was led to efaucets.com) that might have precisely what you are seeking.
Hit each of these to double-check options and to find the best pricing:
Google Shopping. Run a Google search for the brand name and model number, then click on “Shopping” to retrieve a linked pricing index for that item. It’s a good idea to save the search so you can go back and re-run it periodically to check for sales.
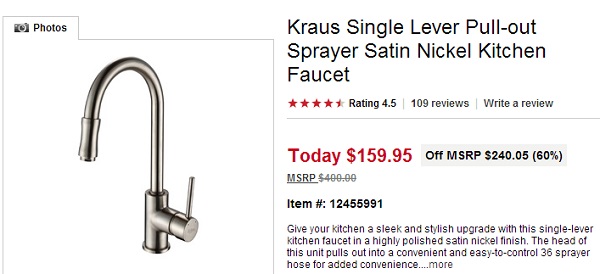
Here, I searched for “Delta 9159-AR-DST” (the brand and model for a particular kitchen faucet, which lists at over $450, but can generally be found around $300). You can either switch to shopping at the top of the page (click “Shopping” from the search results) or click in the box to the right of the results. This shopping box usually shows up for brand/model searches.
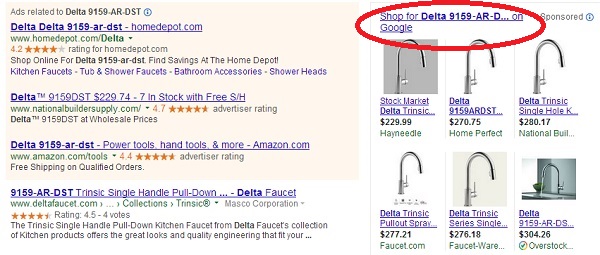
When you review the shopping results, Google will list the best price: for this faucet, $230, versus the usual $300 retail. Remember that this may or may not include shipping, tax, and coupon or promo code options (check Retail Me Not for promo codes for most commercial sites). You can sort results using tools on the left of the screen.
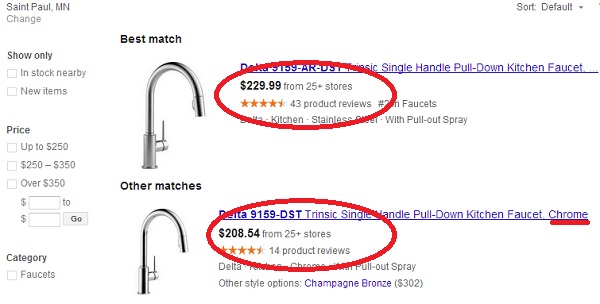
This Google Shopping results page shows an exact match and “other” matches. The “other” result is a better price, but notice that it’s for a chrome finish. When you shop online, check to make sure you are buying the options you want.
Amazon. I ran the same brand/model search on Amazon. The main listing is for $276.

If your item shows up on Amazon, also bookmark the product page so you can check back later. Check if there is a “More buying choices” box over on the right side of the screen. The box looks like this:
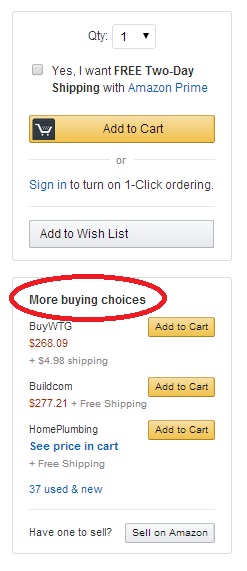
Other vendors may have item returns, display models, or close-outs offered through Amazon; you complete your transaction on Amazon.com, but the other seller sends the item to you. You have an extra layer of buyer protection versus just buying straight from a website, because Amazon will intervene with any vendors who don’t live up to their obligations.
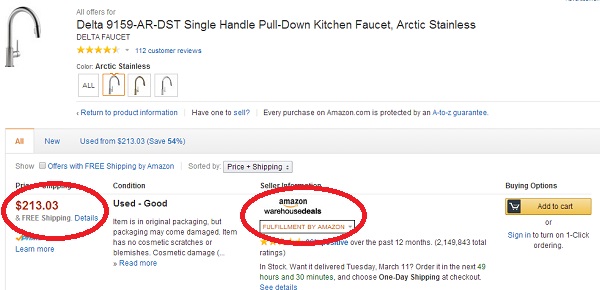
One of the best secondary sellers on Amazon, though, is Amazon–or more specifically, the Amazon warehouse, which sells open box, returned, and overstocked items from the “more buying options” index. These may be marked “used” but the exact condition of the item is described, and you have full return rights.
For this faucet, buying a return with a slightly damaged box would save over $60 on the regular Amazon price.
I bought our new bathroom tap (more info here) as an “open box” unit from Amazon Warehouse Deals, saving over 50%.
Overstock. Check Overstock.com as well. If an item is on Overstock, you can set a price alert to receive an email if the price drops. It’s also worth being on their mailing list; they send “surprise” coupons and other specials, typically for 10-15% off.
Overstock didn’t have the Delta faucet.

But it did have over 1,000 kitchen faucets to browse through!
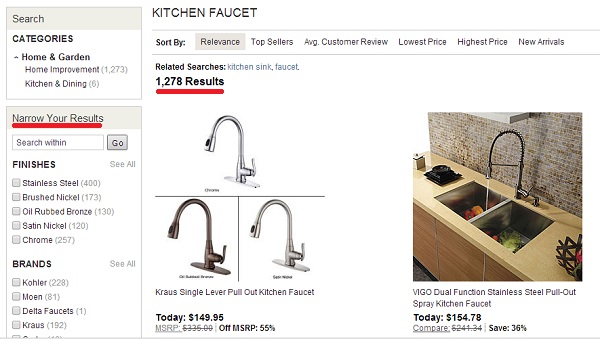
Overstock does have the similar-looking tap below for only $160. If it’s mainly the look you were going for, you may have just found a deal.
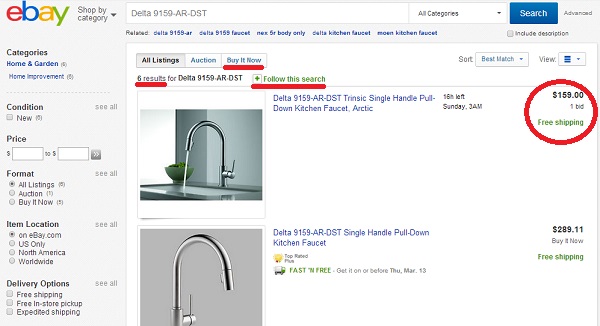
eBay. You never know what’s going to be on eBay! Like Amazon vendors, eBay has a customer service model that will intervene if you have a problem with a seller. Vendor feedback is also useful for seeing a seller’s track record. However, of all the options given here, eBay is the one you need to be most careful about when looking at an item’s condition and completeness.
When I searched for the Delta example, six results came back, and the first had a very attractive price, plus free shipping. That item is an auction, and one bid was already in. If you don’t want to mess around with an auction, click the Buy It Now tab (underlined below) to see set-price listings. If you don’t like what you see, you can choose to save the search (“Follow this search” underlined below) and receive emails about new listings for your search.
eBay is where I found our new kitchen faucet. It’s a completely new item in its unopened packaging. A builder bought it for a project, but the customer changed his mind. The transaction had free shipping and no tax; UPS is bringing it to our door on Tuesday.
My results for the most recent shopping mission:
- Stainless undermount sink: 51% off list price, 44% off available retail price (what we could have paid multiple places)
- Kitchen faucet: 62% off list price, 45% off available retail price
- Total savings: Over $300
- Final outcome: VICTORY!

Please let us know your best tips for home improvement shopping in the comments (and your purchasing triumphs!). Happy shopping!