
I bet Einstein turned himself all sorts of colors before he invented the light bulb.
– Homer Simpson
Over the last few months, I’ve had a few rewiring projects on lamps and small appliances. I’ve mainly been replacing switches and plugs, typically following catastrophic failures of the original equipment. Not that I didn’t have warning in most cases. The Exploding Rheostat Incident is spoken of only in whispers now, but none dare speak of the earlier Hot Pedal Foot Episode. So, yeah, I did know the sewing machine control was about to go out of commission, but I was just! finishing! this! one! seam!!!! (*bang*)
Small electrical stuff is a nice change from working on hard wiring, what with all the ladder-standing and neck-craning. I got to feeling a little self-congratulatory, and even branched out from repairs, making a jar into a hanging lamp for the alcove in the kitchen. Like so many bloggers before me!

Alcove light fixture made from a mason jar.
Mason jars are having a moment, but there’s other glassware that could be made into lights. Perrier hanging lamps. Wine bottle lights. A friend reminded me of the fabulous Grain Belt chandelier at the now-defunct Harry’s in Minneapolis. But it’s highly validating to see the same sort of thing going for about $150 over materials cost at someplace au courant.

Mason jar light with Ikea high-efficiency bulb
People, this light can be yours for $9 in materials + a smug sense of accomplishment!

New light fixture illuminating the alcove.
I originally had a blue jar on this fixture, but the light was too…blue for the alcove. Since this was a light for light’s sake, rather than just for cuteness, the clear version worked better for us.
A few things about small wiring projects – first, they are SMALL, which is great. But second, they are SMALL, which means you often have to deal with that multistrand small-gauge wire. I hate that stuff because I often find that tightening up connections just ends up with the dang thing fraying out all over the place. If you give it a twist or two first, though, you end up with something much easier to work with. Also, if you need to hook this type of thing (or, really, any wire) under a screw to make the connection, make the “hook” face right. As you tighten the screw (“righty-tighty”), you won’t be working against the wire.

Like this! Not the other way ’round.
On lamp cord and similar, it’s not perfectly obvious which wire would be black or white in sheathed cable. You strip lamp cord, and you have two bits of weenified copper that look exactly alike. How do you choose a side for neutral or hot, and how do you keep track of it over the length of the cord? I will admit to using markers and tape to track one side of lamp cord to maintain polarity. Turns out, manufacturers anticipated this problem, but they didn’t send me the memo. If you look closely at the outside of the lamp cord, the wire that would be white and that would go to the silver side (neutral) has ridges running length-wise down the outside of that side of the cord, as indicated by the arrow below.
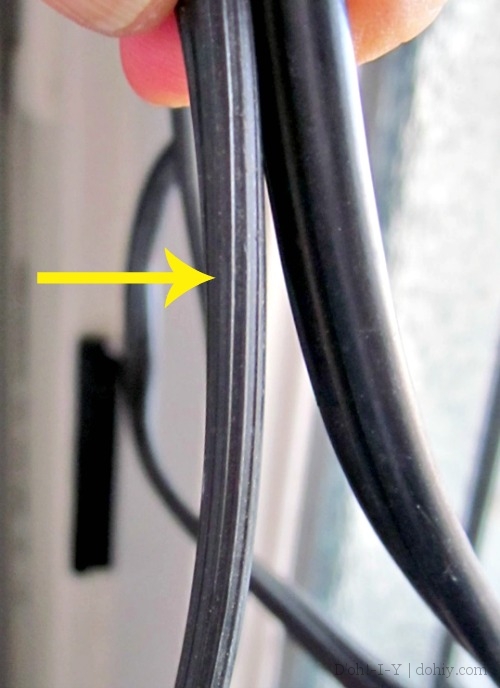
Same cord, looped around to show both sides
The other, unridged side goes to the brass screw. This is true for most flat lamp and small appliance cord – check it out! This makes swapping plugs and stuff really simple. “Silver Ridge” is easy to remember, too – no one’s beating down the trademark office door to register “BRASS Ridge.”

Mnemonics Anonymous
via 365corks.com, used by permission
If you would like to make your own jar light, all you need is a lidded jar, some lamp cord, a plug, and an adaptor kit. Avoid overheating with compact, low-power bulbs and some holes in the lid. Pop the adaptor kit through the lid and screw it on. Easy-peasy!
I wanted to operate the light with a switch, so I also bought an electronic light switch. I ran the cord from the light along the ceiling and down alongside the molding to an outlet.
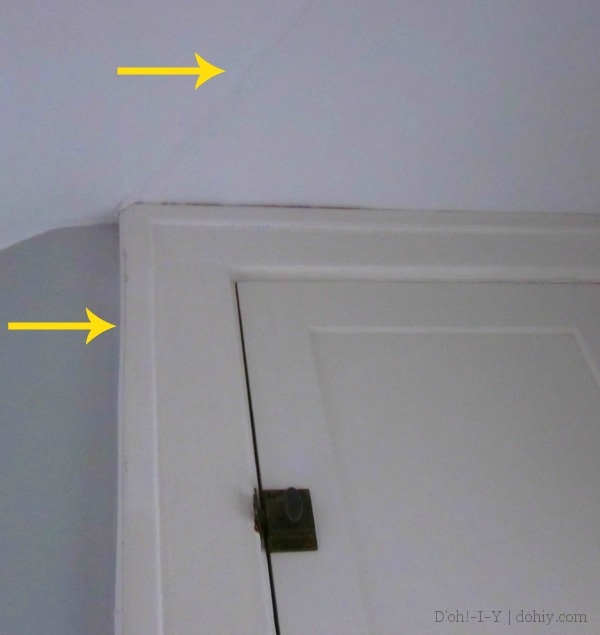
Note the wire running along the ceiling and down the side of the cabinet.
To use the switch, plug the light cord into a small receiver unit, and then stick that into the wall. In this alcove, the power is behind the fridge, so I waved the camera behind there to show you the receiver plugged into a power strip I hung on the wall.
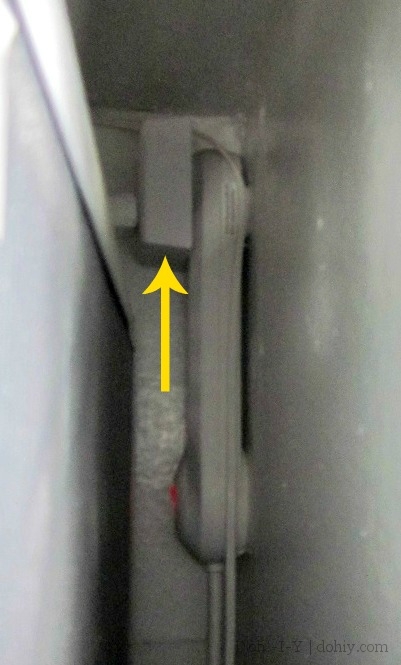
There it is!
A remote that looks and acts like a light switch sends a signal to the receiver unit to turn on the power. There’s a tiny delay when you throw the switch before the light responds, but that’s no big deal. The only other issue with it is that it protrudes from the wall slightly to accommodate the electronics for the remote. Like this:
Feels slightly cheesy, but I can live with it.
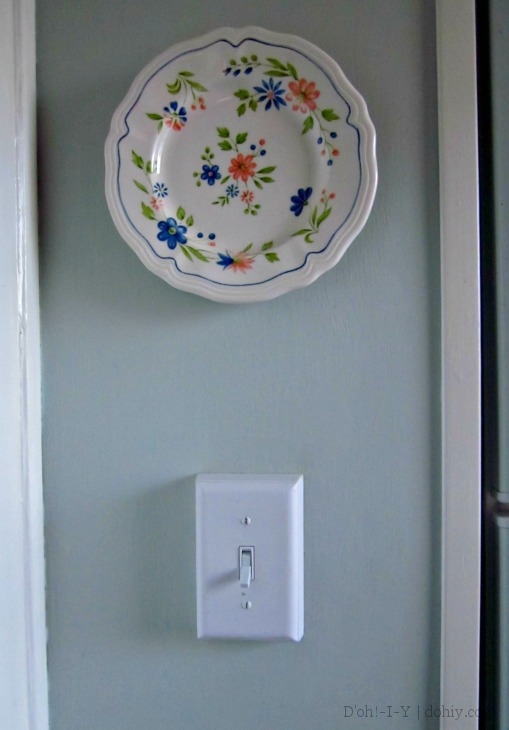
The alcove in question is a tiny bump off the back of the kitchen where the fridge lives. It also houses an exterior entrance and the door to the basement. There is a lot going on in this corner, but it had no light for any of it. Here’s the whole alcove (or as much as I can fit into a photo of it) with the light and the switch.
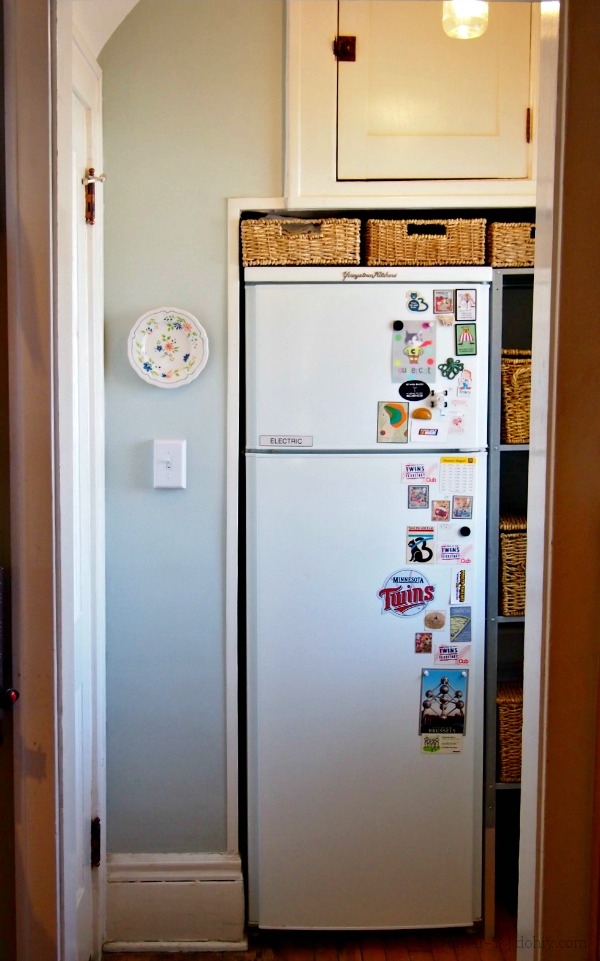
Much less fumbling around in the alcove now! And I can read all our fridge magnets. Clearly, we’ve got our priorities straight.
