Previously on D’oh…we removed our old concrete steps and started the base for the new steps. This time, the focus is on building the platform for the top of the deck.
Building a platform is about making sure everything is well-supported. Think it through from the top layer down. The platform surface is 1″ x 4″ cedar deck boards. The deck boards are supported by 2″ x 6″ treated lumber joists. And so on down to the center of the earth (or at least down into the fully cured concrete piers holding the uprights).
By the way, that board size system seems backwards to me. In England, the bigger dimension goes first, so it would be a 4 x 2. But then, I’ve gotten used to putting the month before the day, listing the home sports team second, and using the word ‘gotten.’ So putting the smaller dimension first is fine. By which I mean, it’s wrong but I can work with it. But I digress.
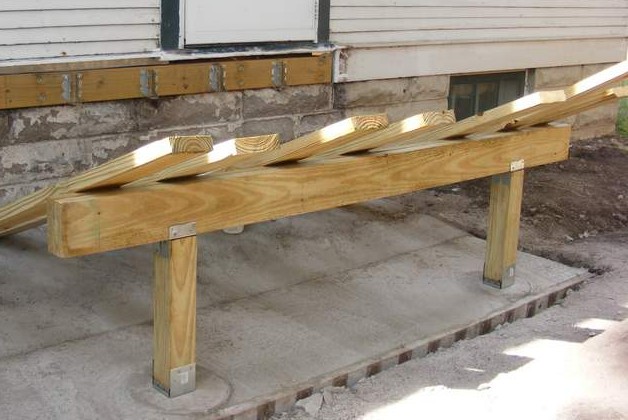
Back to the steps. The joists are supported by a beam, held up by posts at one end, and a ledger board (the board attached securely to the house) at the other. The joists are connected to the ledger board with joist hangers.
You need to make sure that the platform is square, with each corner measuring 90º. This is best done by first fastening together the outside joists into a square or rectangle. The joists should be attached loosely, with just one nail or screw, so that the corner angle can be adjusted. Fit the two outside joists into the joist hangers, and attach the header joist to the ends of the outside joists.
Then, measure corner to corner diagonally across the frame (this goes better with two people). When you measure the diagonals, it doesn’t matter which part of the corner you measure to, as long as you do it the same on both sides. When both diagonals have the same measurement, the frame is square. Now, fasten the corners securely, so the frame doesn’t move out of square.
Once the frame is square, mark the position of the rest of the joists on the header joist. Pre-drill the header joist for the nails. Put nails through the joists into the joist hangers, diagonally in the top of the beam, and through the header joist into the ends of each joist.

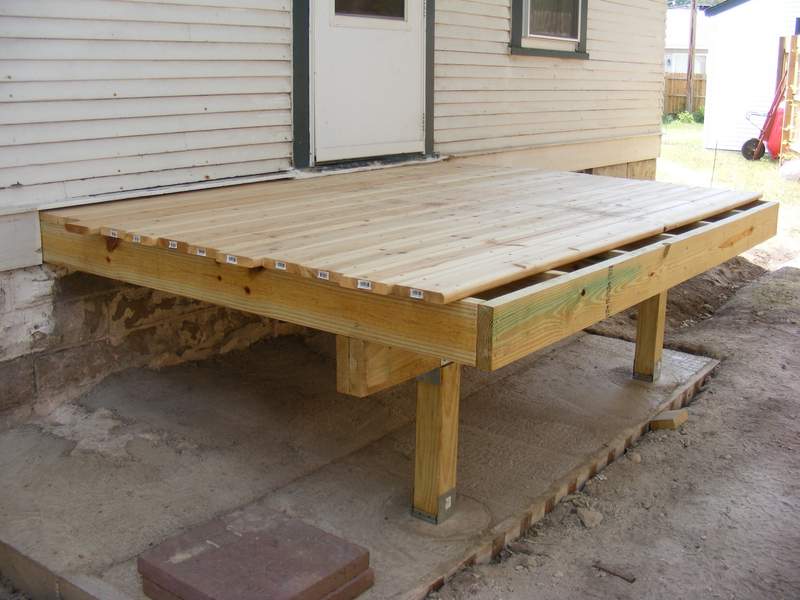
When you’ve finished fitting the joists, you’ll have something like this, only attached to your house.
With the joists in place, it’s time to fit the deck boards. You can use nails or screws. I prefer screws, but I don’t have a good reason. (Others do.) Chances are, you’ll have to rip the last deck board lengthwise to fit the space that’s left. Let the deck boards overhang at each end. When they’re all connected, use a Skilsaw to trim them up.
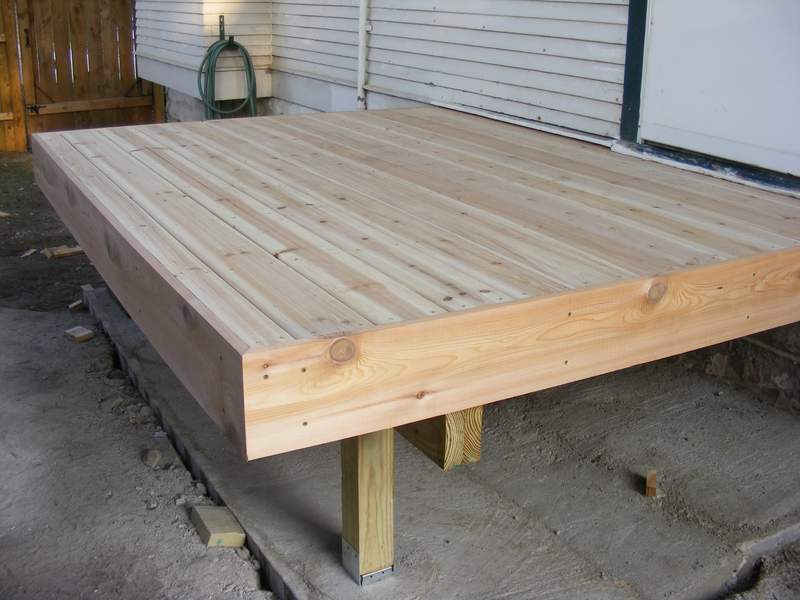
Having made the frame with treated lumber and the top of cedar, I finished it off by attaching pieces of 1″ x 8″ cedar around the frame. Mitering the corners makes it neat because there aren’t any raw edges exposed. It’s not necessary, but finishes it off nicely.
Now we have a platform that means we can walk straight out of our side door. Progress! Of course, we’re still left with a very big step down to the ground. Next time: what I did about that.


