Keeping the Kitchen Old School

When Virginia Woolf wrote every woman needs a room of
one’s own, she must have been talking about the kitchen.

– Marge Simpson

come intoOur kitchen is 102 square feet/9.5 square meters — I kid you not! Since we changed the layout some time back, it has worked for us extremely well. We cook, bake, pickle, and even brew beer in here, and it’s only very occasionally that I get annoyed about the room’s size. Despite being small (but, as I always point out, perfectly formed!), it has good traffic flow and plenty of storage.

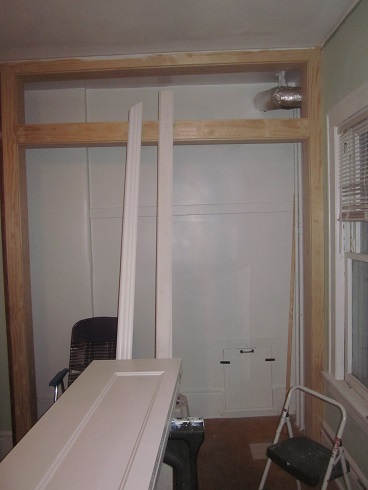
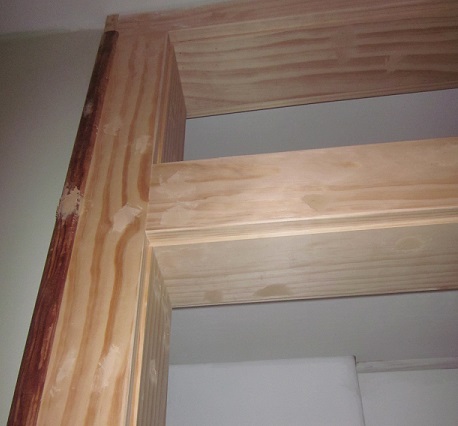
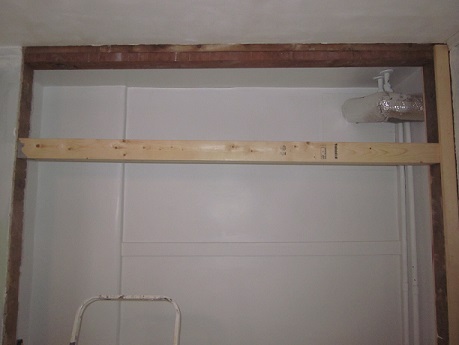
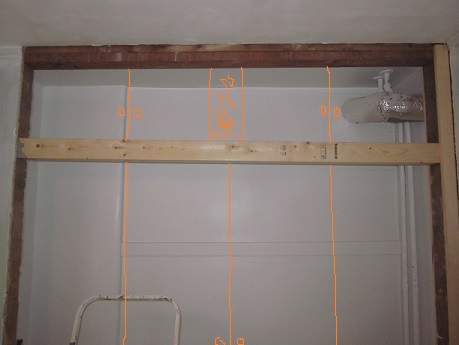
When we moved in, there was a pass-through window between the kitchen and the dining room, which had been added at some point. It wasn’t appropriate to the house’s style, it wasn’t centered on the wall or on anything logical in the kitchen (like the sink), and it was trimmed out with construction-grade plywood sheathing. Awesome it was not.

When we redid the kitchen, filling in the pass-through was a priority because we wanted the wall for cabinet storage. But it wasn’t a compromise, and it wasn’t in anticipation of eventually knocking through into the dining room. Weirdly enough, both the Kev and I like having a separate kitchen.

  • If we knocked through to the dining room, we would lose a lot of storage, and in a kitchen this size, we need all we can get.
  • It’s a galley kitchen, so knocking through wouldn’t gain us extra island space.
  • The dining room isn’t huge either, so we couldn’t carve out extra storage by losing the wall.
  • When there’s a wall in the way, we don’t have to look at dirty dishes while we’re eating!
  • It actually seems to facilitate a nice conversational-group dynamic when entertaining.

We do like open plan spaces in other people’s houses — this is not a “you’re doing it wrong!!” post by any means! Kevin’s sister’s house is open plan now, and knocking through there was a brilliant improvement to their home (before, there were two doors and a quick u-turn to navigate between the kitchen and sitting room — now, it’s one airy space). A distinct kitchen area just really works for us.

We're mid-canning right now and all my kitchen pictures look like crime scenes, so instead, here's Barbie's Townhouse, with elevator and separate kitchen!

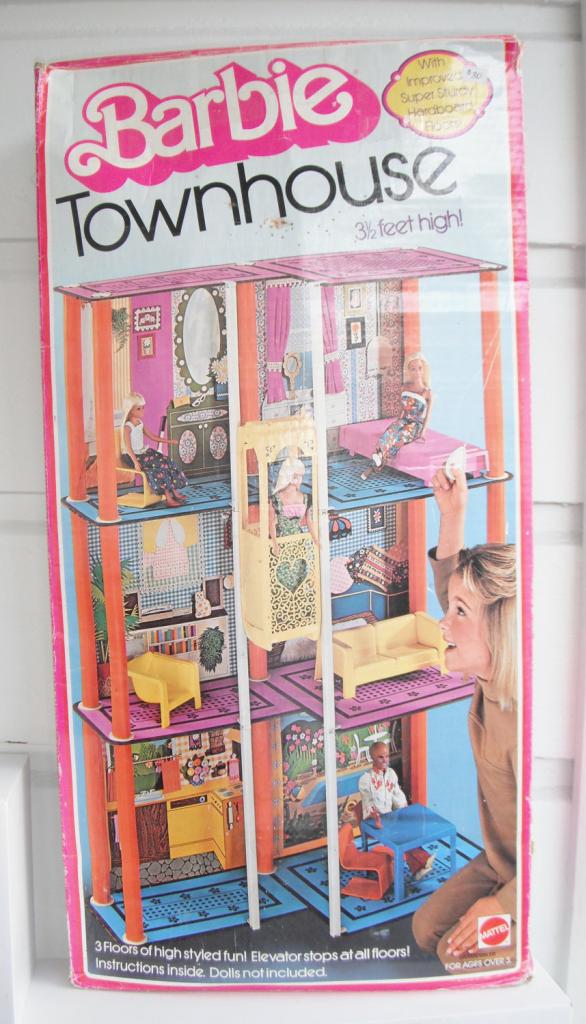
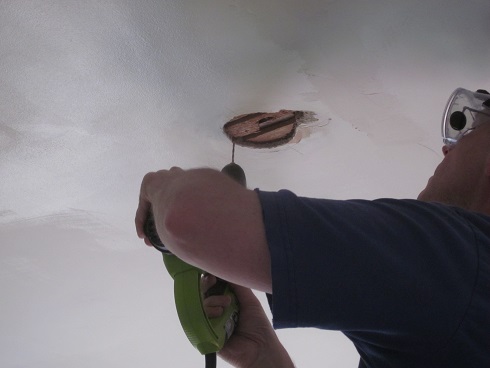
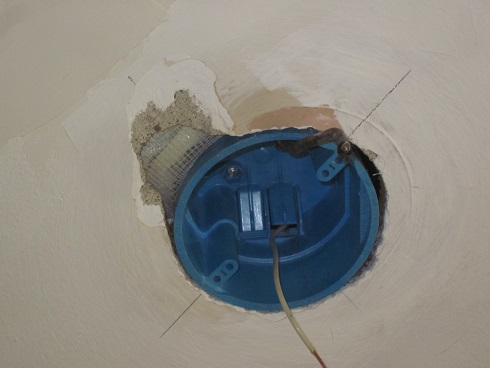
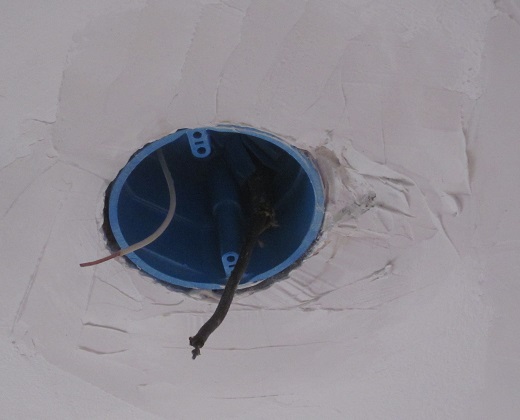
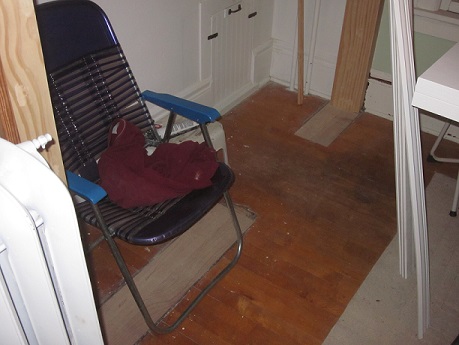
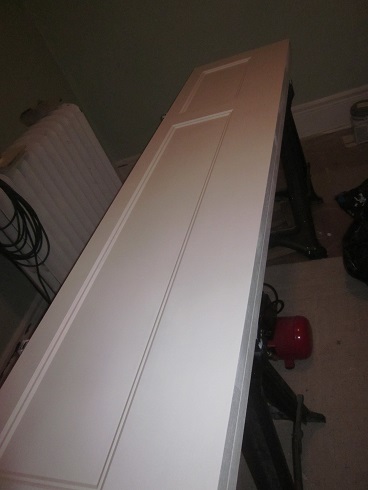
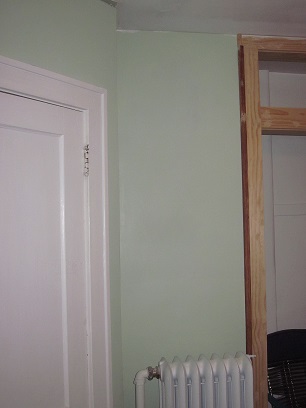
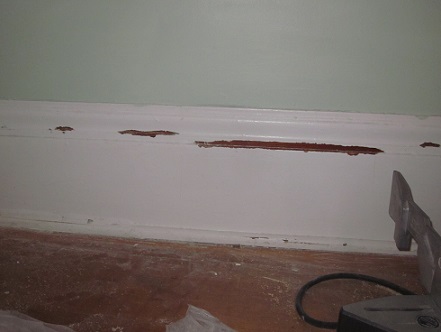
We’re mid-project so all my kitchen pictures look like crime scenes; instead, here’s Barbie’s Townhouse, with elevator and separate kitchen!

I suspect that a lot of people would like a distinct kitchen if they tried it. But it’s getting harder and harder to find a house that isn’t open plan, so how would they know? If you have an enclosed kitchen, maybe live with it for a while and see what you think. Can you move between areas easily, or is it a hassle? Would you lose needed storage space? Are you better about doing the washing up promptly than we are? Open plan is probably the way to go if it’s what you are dreaming of. But maybe your house might be one of the places, like ours, where a separate kitchen just works.

But take all that with a grain of salt — we apparently have a total inability to bow to the prevailing taste consensus!

Posted in Construction, Kitchen, Organization, Walls & Floors | Tagged | Leave a comment

There Are Cute Babies, and Then There are Robin Babies

Marge: Every father thinks his daughter is the cutest.
Homer: Well, now there’s a way to prove it.

– The Simpsons

We mentioned that we are hosting robins on our stoop for the second year running. Here are the pre-robins:

Unbelievable color!

Unbelievable color!

And here are the robin chicks as of a few days ago:

Robins often lay an unfertilized egg, so the four/three mismatch doesn't necessarily mean someone didn't make it.

Check out their enormous googly eyes!

They are so cool, but they ain’t all that cute! Robins have “altricial” young, which means that when they hatch, they aren’t done yet. The parents feed them and keep them warm and protect them while they pull it together. These kinds of birds typically nest off the ground for obvious reasons. Ground nesters like geese and ducks are “precocial” — their young hatch all fluffy and all ready to run around attacking bugs and stuff. (You can geek out about the details over at NestWatch.)

By the way, American Robins often lay an unfertilized egg, so the four/three mismatch doesn’t necessarily mean someone didn’t make it. It’s also possible these three are sprawled on top of Sibling Four!

This is one of my favorite before and afters!

Update: As of 18 June, all three robins were fully fledged and out in the big wide world! Good lucky, Larry, Moe and Curly!

Posted in Before & After, Porch, Yard & Garden | Tagged , | Leave a comment

So, This Blog Has Some Sort of Simpsons Theme?

Krusty Doll: The Kinks? The Stones? Sounds like my last physical!
Bart: Ha, references.

– The Simpsons

Someone recently asked, “What’s with all the Simpsons stuff?” Well, we love DIY and we love The Simpsons. Like Shakespeare or Dickens, if you have something on your mind, The Simpsons probably has timeless and relevant words of comfort and guidance.  It’s also a fun framing theme.

Why “D’oh!”?

It’s so perfect. I picked it up when I first started watching the show because it’s the shortest way to express a certain type of self-inflicted exasperation without swearing. And when we bought this house, we suddenly had a lot more of that type of exasperation.

(c) Fox

(c) Fox

Where do you get all the quotes?

My mom originally thought we must have photographic memories for the spoken word, which was very flattering but untrue. If anyone could remember all quotes from the show, it would be my brother (a/k/a Angry Dad), who can kick my butt all around the room in a Simpsons trivia contest. To which I say, everyone’s gotta be good at something!

Sometimes, we do remember part of a quote, or we at least remember that there was an episode that touched on a particular issue, and we start there. Other times, we just search for a relevant quote. If I’m just watching the show, I usually have pen and paper handy in case something is said that might be useful blog-wise.

What are some good Simpsons-themed sites?

Two of the best all-round Simpsons sites: The Simpsons Archive and Simpson Crazy, both created and maintained by fans. Synopses, commentary, quotes, news — they are terrific! There is also a Simpsons Wiki, and an official site with clips and full episodes. And a trivia quiz, so I should go check that out before my next rematch with Angry Dad. IMDb has a ton of stuff on the show, with all the standard IMDb features and info. There is also just tons of ad hoc stuff out there — people’s top ten favorite episodes, continuity errors, scholarly commentary (really!), etc. — just awaiting a search.

A great source for quotes is the Simpsons area on wikiquote. Beyond blog use, I find that Simpsons’ quotes really jazz up a PowerPoint, and come a close second to the utility of the Underpants Gnomes in any corporate context.

When did you start watching the show?

When it was on Tracey Ullman back in the ’80s. But before that, I was a Life in Hell fan, so Mr. Groening and me, we go back a long way.  I do love me some affectionate satire.

Who’s your favorite character?

For me, it’s Lou, hands-down! But for main characters, I’d have to say it’s a toss-up between Homer and Lisa. The Kev votes for Ralph.

Favorite episode?

Couldn’t possibly pick, but we both love Homer3 from Treehouse of Horror VI.

The Kev is British — how did he get into it?

They play it there, too. They play it just about everywhere. It’s dubbed into lots of languages, including Swedish and Punjabi.

Mmmm, Punjabi.

Posted in D'oh! | Tagged | 2 Comments

Knobs: Their Care and Placement

Focus Group Manager: You each have a knob in front of you. When you like what you see, turn the knob to the right. When you don’t like what you see, turn it left.
Ralph: My knob tastes funny.
Focus Group Manager: Please refrain from tasting the knob.

– The Simpsons

The closet doors are up! WOO! And now they need knobs. Which I already bought:

We have glass door knobs throughout the house, and these knobs continue that thing on the closet. But where should they be placed on the door?

Well, color me surprised, but there are quite a few people online with strongly held opinions about knob placement. And, really, they are all fine options! What a weird thing to get het up about. There’s probably a conspiracy theory in there somewhere about the internet being a huge distraction, causing us to bicker about meaningless trivia so we don’t notice our new zombie overlords … until it’s Too Late. (That one’s for you, Dad!)

Anyhoo, the two main camps want knobs either near the hinge or placed symmetrically near the center. Putting the knobs near the hinge works better with the door function (and apparently, some bifold door manufacturers recommend it) because you are pulling with the direction the door will fold anyway.

I like this one because they added escutcheons below the knobs to make them look more completely door-like.


I love the word “escutcheon.” Here’s another example, without escutcheons:


Here’s one using a pull instead of a knob, which looks great in this room:


But some people don’t like the asymmetry of the hinge placement, and plump for a centered option on the middle panels.


The hinge-area supporters say this centered placement makes the doors harder to open, but bifolds aren’t exactly medieval oak portals. This placement is pretty much exactly how the knobs were on the closets I grew up with, and I don’t recall any difficulties. But if you have wrist problems, it is pointed out online, this might not be as comfortable as the other option. The symmetry is nice, though:


If only there were a way to harmonize symmetry and good wrist health!


Now we’re talking! This is the option we’re going for, using four knobs to achieve a “paired door” symmetrical look while still taking advantage of the near-hinge location.

Definitely one of the stranger things I’ve seen debated on the internet! If you are putting in bifold doors, I hope this summary of the major knob position arguments helps you.

Posted in Construction, Decor, Windows & Doors | Tagged | 4 Comments

Getting Boxed In

Spider pig, spider pig,
Does whatever a spider pig does.
Can he swing from a web?
No, he can’t — he’s a pig.
Look out! Here comes the spider pig.

– Homer Simpson

This weekend, I decided instead of just touching up the baseboards, I’d strip the particularly goopy spots before repainting them. This morphed into an unexpectedly long bad time. Stripping is Not Fun, especially when you are using environmentally sensitive chemicals. Next time, atomic weaponry.

Like this one from Home Depot.

Like this one at Home Depot.

But! We finally had something go easier than expected! We needed to add an electrical box for the overhead light in the bedroom. Old knob and tube wiring tends to enter a fixture through a framing member — in other words, above the light fixture, there are two holes in a piece of wood that wires poke through. This rather fails to meet modern requirements, which reasonably ask for wire connections to be isolated in a box. And if you want to put in a ceiling fan at any point, said box needs to be attached to a brace that spans two joists to avoid … well, I don’t know what it avoids exactly. Something about vibrations. I suppose it also helps support the extra weight. Anyway, you need a ceiling fan box if you ever intend to install a fan, which we might.

To get to the wiring, we went up into the loft above the bedroom and started pulling up the appropriate floorboards. After we pulled up the two that had obviously been moved before, we realized we needed the one in between them. SAWZALL TO THE RESCUE!

Peekaboo

Peekaboo! Obviously we’d turned off the power before licking all this stuff.

Someone’s been in here before to wire in the wall switch; originally, the bedroom light would have been on a pullchain from the fixture. Judging from the sheathed wiring, that change happened maybe in the 1980s. Way to hold out, former owners! Convenience is so overrated.

But despite upping the convenience factor, this work looks like it was done by a lobotomized gibbon. There’s a completely unnecessary splice and all connections are simply floating between the floorboards. We eliminated the splice by pulling the sheathed wire into the box, and we’ll install a box to house the other connection until we get around to completely replacing the older wiring.

attic 2

But the good news is … the current light location is already between the joists! We don’t have to make a new hole! Or patch the old one. Or move the wiring. Such a relief!

So next step was to pull out the wires and then mark where the box will go.

attic 3

Ok, tangent: see that formerly hidden color? That’s the original color of the room. It’s sort of pink, sort of brown, sort of yuck. The woodwork was originally a red-brown finish. So pinky brown and red woodwork. Some folks insist that you should restore the original colors that the All-Wise and All-Tasteful Homebuilder selected. In this case, dude was color blind.

Back to the matter at hand: the Kev drilled a series of holes around the edge so we could chip out the plaster, and then perforated the lathes as well.

attic 4

Kevin (while working on the ceiling): “This is when being Spiderman would really come in handy.”

Me: “Yes, home improvement is the primary thing I would focus on if I were Spiderman.”

Once the hole was clear, we fitted the box and Kev screwed the brace to the joists. We had a little extra plaster come out, so I stapled down a couple of layers of mesh joint tape to back the plaster repair.

attic 5

And after the first layer of plaster repair (from a different angle):

attic 6

And that was that! Finished in dozens of minutes rather than dozens of longer time units. The tide is turning!

Posted in Construction, D'oh!, Electrical, Walls & Floors | Tagged | 2 Comments

High and Mitered

The brain is so stupid.

– Homer Simpson

I’ve been installing the crown molding in the bedroom. We put the same kind of molding in the other ground floor bedroom last year. Incidentally, it’s called coving in the UK. So, another one for the UK versus US terminology list.

Putting up crown molding can be a fun, satisfying project. It can also be frustrating. Frustration may come from walls that aren’t straight or corners that are somewhat irregular. But most of my frustration comes from within. I find that, unless I give the project my full attention, it’s easy to make stupid mistakes.

There’s an old adage that I keep in mind when working on projects. Measure twice. Cut once. Unfortunately, I forgot it yesterday.

Crown Molding at a Ninety Degree Internal Corner

Crown Molding at a Ninety Degree Internal Corner

I’d mitered one end of the molding for an internal 90° angle. I wanted to cut the other end off square. So I measured the distance from the wall to the point where the top of the new molding met the already installed piece. Then I measured off that length on the new piece and cut it off square.

Did you spot the mistake?

With an internal corner, the bottom of the miter is longer than the top. So, I had cut my new piece 1½” too short.

I tried patching in a piece, but then decided that it would forever annoy me. So, I went to Menards and bought another length.

It really pays to think carefully about every cut.

Another potential source of error is cutting the miter angle. I think the simplest method is to pretend that the bottom part of the miter saw is the ceiling, and that the vertical fence part of the saw is the wall.

Upside-Down Molding Ready to be Sawn

Upside-Down Molding Ready to be Sawn

Position the molding upside-down at the same angle as it would be when in position on the wall. Then, simply set the saw to whatever angle you require.

I have read of another method where the molding is held flat and the saw blade is angled in two directions. But that just seems way to complex and fraught with danger for simple guy like me.

Useful Tools for Crown Molding

Miter Saw

You don’t have to use a miter saw, the same methods apply with a hand saw. But, a miter saw is a jolly handy thing to have. It will create cuts that are straight and accurate.

Nail Gun

Another thing you don’t need, but makes the job much easier is a nail gun. Especially if you are doing this job alone, the one handed operation of a nail gun helps with fast, accurate fixing of molding.

A couple of years ago, we bought a cheap 18 gauge brad nail gun from Harbor Freight for about $15. Well, the other day it decided that we’d had our money’s worth and gave up the ghost. So, we went up market a bit and spend $80 on an Hitachi. So far, it’s been awesome. Much better than the cheap one ever was.

Adjusty Angle Thing

It’s probably got a proper name, but I don’t know it. It looks like this:

Adjustable Tool for Recording Angles

Adjustable Tool for Recording Angles

If you are creating joints at angles other than ninety degrees, measure the angle with an angle measuring tool. The angle for the miter will be half the total angle.

So, those are a few of the things I’ve learned about installing crown molding. Essentially, power tools can make the job easier, but paying attention will save the most time and money.

Posted in American vs English, Construction, D'oh!, Walls & Floors | Tagged , | Leave a comment

The Bedroom Project Marches On

Donde esta mi tequila?

– Pedro the Bumblebee Man

We’re still sleeping in Ben’s room. Meanwhile, next door…

1.  Closet Framing, Floor and Doors

The closet opening is all framed in and trimmed.

bed progress 6

The nail holes have been filled, but need to be sanded, then it’s priming/painting time.

bed progress 5

Hey, also? I just remembered that the shelf between the closet and the cabinets is in! You can see the underside in the picture above (primed, but still needs painting).

And the floor has been patched.

bed progress 1

I think the lawn chair is a good addition!

We are halfway through deciding whether to proceed with floor refinishing now or later. We had been going to do just this room for now, but it probably makes more sense to do both bedrooms and the hallway in one fell swoop. After reading about the fun they are having with floor sanding at Little House on the Corner, I’m thinking maybe that job could wait.

The doors are almost completely painted — just one more coat with the foam roller.

bed progress 7

More on installing the doors soon. (Update: read about it here.)

2.  Walls and Woodwork

I finished patching and priming the walls and the first coat of Benjamin Moore Hollingsworth Green is up!

bed progress 2

I also finished patching most of the ceiling (leaving the middle so I can patch the HUGE HOLE that will be left when we move the light fixture at the same time), and I primed and painted around the outer edge … to facilitate moulding installation.

bed progress 3

I’ve also scraped the bad bits of paint on the base/skirting boards, so next is cleaning that up and priming. And painting.

bed progress 4

I was thinking that I would also pop out our original windows and restore them. You know, just pop them out and completely restore them, as you do. No biggie! Like the floor, that might end up waiting. They’re still going to be there later.

3.  Furniture and Fixtures

I mentioned the bed is pretty much done, and I’ve started installing the drawer glides. I’m also updating a vanity table and making a floating bedside table. I bought curtain fabric, as well as black-out lining for Roman shades — just gotta make those now.

I’m restoring an old ceiling fixture, which will either be for this room or another, but either way, we need to move the box for the ceiling light, so hopefully we’ll get on that this week. I was going to add a couple of new sockets to the room, but as with the floor refinishing and the windows, that might have to wait until later.

Can’t have all the fun at once!

Posted in Construction, Decor, Walls & Floors, Windows & Doors | Tagged | 2 Comments

It’s Curtains for Us!

John Waters: I’ve got the exact same curtains, only in my bathroom. Didn’t you just die when you found them?
Marge: Not really. They just had corn on them.

– The Simpsons

I have trouble taking any sort of textile-related risk. I go to the fabric place all excited, looking to add color and texture to our home. I waft in the door at Joann Etc. with every good and creative intention.

“Maybe we can do something bright in the living room and dining room!”

Or something relatively muted.

Or something relatively muted.

“With the lighter walls in the kitchen, maybe we could do something funky on the window!”

Or a plain cellular blind would maximize the light.

Or a plain cellular blind would maximize the light.

“Oooh, upholstered headboard … I could make a bunch of covers for it and try some different things!”

Umm, at least I got something with some texture?

Umm, at least I got something with some texture?

Now, I did and do like all of these choices — they work with other things we have going on, and we do have a fair bit of color in the house with accessories and paint. But I’m a bit impatient with my textile timidity, which might explain this:

Bedroom curtain fabric

Bedroom curtain fabric

I want the bedroom to be a really happy room, and those freaky birds are making me happy. The pattern is Richloom’s Whippoorwill, and I got it on super-clearance at Mill End Textiles for under six bucks a yard. SCORE! If you like freaky birds, that is.

There are two great fabric discounters in Minneapolis/St. Paul — Mill End Textiles as mentioned and the locally legendary S.R. Harris. Mill End has several smaller stores, with inventory varying among them. S.R. Harris is a single warehouse in a business park, and it is an overwhelming experience. There’s just So Much Fabric, and it’s in racks and stacks and miles of piles. This is just a tiny slice:

Both Mill End and S.R. Harris are mega-cheap, but they also have coupons on their websites from time to time. Definitely worth a look if you are fabric shopping in the Twin Cities. But if you are fabric shopping elsewhere, I’ve found great deals online at:

  • Fabric.com — good prices, and check out the clearance area.
  • Fabricguru.com — I find this site really easy to navigate, and the fixed-price shipping is great!
  • eBay and Etsy — both sites feature sellers with yardage of current fabrics, as well as vintage cloth. If you have something in mind and know the name of the pattern, it’s worth checking if someone has it on offer.

Let us know if you have any sewing projects in the works. This will be my first serious outing for my new sewing machine. Exciting times, people! This room is finally coming together.

Posted in D'oh!, Decor | Tagged , | Leave a comment

Postcards to the Future

Lisa: Lincoln didn’t hide any gold in the White House.
Homer: Then what is his ghost protecting?

– The Simpsons

When I was a kid, a friend’s parents added an extension to their house. Inside an open wall, her dad painted

TONY

LOVES

SALLY

!!!

in huge letters between the studs. I was both charmed and slightly shocked — the contractor would see it the next day! Oh-la-la! Proclaiming one’s feelings was a much bigger deal to me back when I was nursing schoolgirl crushes. (I got over that — nowadays, folks glaze over when I speak repeatedly and at length of the Kev.)

This house holds some of its own affectionate graffiti:

"M" is hard to do.

Carving “M” is hard to do.

I love these little remnants from former owners who were also happy here.

Orange crate end now on our wall.

Orange crate end now on our wall.

We’ve also been lucky enough to find two informal time capsules. One was a newspaper dated 6 July 1952 inside an orange crate under the front porch. There’s no getting under the front porch unless the concrete steps are out of the way, so we figure that was when the prior front steps were put in. The other was a 1946 newspaper inside a coffee can inside the old concrete stoop, which we found when demolishing the old steps.

We’ve had so much fun finding the time capsules and other random little things around this place that we are carrying on the tradition. We’ve never done any substantial renovation without leaving something behind for someone to maybe find later. Here’s our bedroom remodel capsule:

time capsule

It’s not much — some ticket stubs and recent coins to date the find, and a page from the June HGTV magazine showing high/low prices for home decor items. I popped these items in the bag and tucked it into a little space between beams before we installed the trim.

The only constant is that we always throw in something with a date. Anything else is random, and depends on the space available. Once, we threw in the cleared electrical permit. Sometimes I pick something odd, like an action figure or a random cartoon. The kitchen wall contains House on the Rock tokens. It’s fun to leave a weird little gift for future owners, even if they may not ever find them or care. I’d like to think this house attracts the kind of folks who would like to find our Easter eggs — in any event, I’ll never know either way!

Never one to do things by halves, my dad has a locked briefcase containing a time capsule he created at the Millenium to be opened a century later. It’s a real time capsule, with all sorts of interesting items and a letter from my dad talking about the current time and his predictions for the future. It’s an impressive thing, and someone will really enjoy opening it. They will learn so much. Comparatively, our little offerings are just postcards to the future, but we sure do enjoy sending them.

Posted in Construction, Romance | Tagged | Leave a comment

Chez Cattywampus

Even your dreams are square!

– Bart Simpson

That should be only our dreams are square, or at least only the dreams about this house. I’m convinced that from the moment of completion, houses just want to return to the earth one way or another. Builders say houses just naturally settle, but sometimes it seems rather more adversarial than that! They settle…and lean…and twist.

Market Cross House, Windsor

Market Cross House, Windsor

Thanks to the natural aging process, this house has few truly square angles. You wouldn’t know it to look at, but getting things level in this house is an exercise in patience. So we shouldn’t have been surprised when we started to frame in the wardrobe that this happened:

Hint: the new crossbeam is level.

The new crossbeam is level; the house is not.

The ceiling (and floor!) lose over an inch from square from the right corner to the end of the new closet opening. The opening for the new doors needs to be square, so we can’t fiddle the issue there. At the floor end of things, the doors are designed to install with a substantial gap at the bottom, so the slope should not be obvious. But the storage area above them…that’s going to be harder to fake.

My most recent working idea for the upper cabinet area was to have one long hatch that would lift up toward the ceiling. That concept is now out — a short but long hatch would accentuate the difference between the square closet and the sloped ceiling. Ergo, the new plan…more or less the same as the old plan.

crooked5

In the center of the upper frame opening, we’ll add a wide divider that will break the horizontal line across the top. Then we will install cabinet doors on either side that open outwards. The hope is that we can downsize and drop the left-hand side doors just enough that they look as if they are same height as the right-hand side. We’ll also need to play with the crown moulding, possibly shaving it a bit at one side so it runs closer to level against the lines of the closet.

So it’s situation normal ’round here! Anyone else dealing with weird angles in obstinate houses? We wish you every good luck with that.

Related Posts Plugin for WordPress, Blogger...
Posted in Construction, D'oh!, Walls & Floors, Windows & Doors | Tagged , | Leave a comment