Good Easy Plants: The Habitat for Humanity Edition

C’mon, Carter, build us a house, you lazy bum!

– Homer Simpson

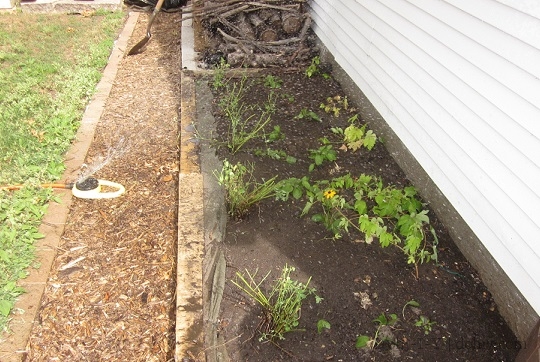
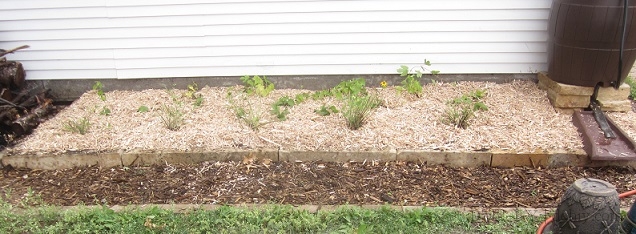
I volunteer on landscaping projects with Habitat for Humanity, and it is always a good time — it’s typically the last volunteer project for a Habitat house, so the family is really enthusiastic, and very involved in planning the garden. I really like the family I’m working with now — two very opinionated (and sweet) teenaged girls with their father wrapped around their little fingers. He deferred to them, and if I hadn’t introduced some balance, this garden would have been ALL PINK, ALL THE TIME!

Vanilla Strawberry Hydrangea (from Proven Winners)? Can we order 25 of them??

Vanilla Strawberry Hydrangea? Can we order twelve?? And plant pink roses in front of them???

Habitat sources its plant material from a local nursery at cost. We work on a tight budget, but the nursery offers plants that go the distance. While the ordering list changes a bit each planting season, there are always some reliable standards to choose from. These are good-looking, hard-to-kill characters that any temperate garden could use — the John McClane of perennials!

Of course, the list includes anchor plantings, like yews and junipers, but let’s skip to dessert. Here are some of the best go-to performers we get to work with:

1.  Echinacea (Purple Coneflower)

Coneflower
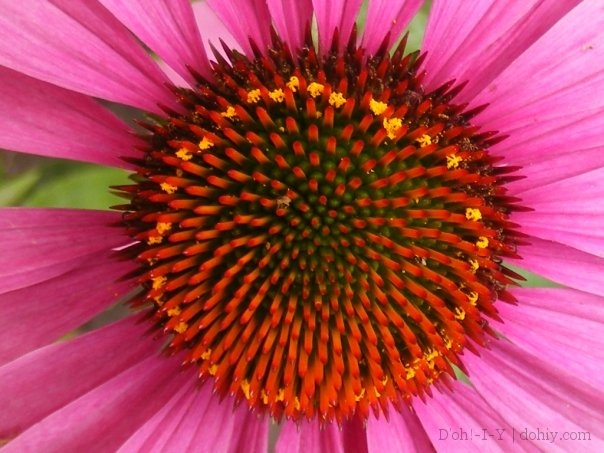
Really more deep pink than purple (to the delight of my girls), coneflower has a long bloom period, resists drought, attracts wildlife, and cures the common cold. Ok, it doesn’t do that last thing, but this is the plant that echinacea extract comes from, which is said to boost immune function. There are all sorts of varieties, but I like the classic prairie flower shown here — it’s the one I grow.

The Lady Bird Johnson Wildflower Center calls coneflower “a showy, easily grown garden plant.” Double bonus!

Coneflowers

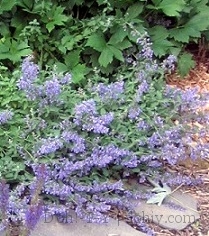
2. Agastache (Anise Hyssop)

I heard a Master Gardener refer to hyssop once as “pretty friendly”, which is a nice way of saying that it spreads. It’s more assertive than coneflower, with really exceptionally virile seeds that seem to move a fair distance away from the plant. I have one near a stepping stone path, and I pull out a few seedlings a week all summer. Actually, I think I’ll move that one!

Agastache "Blue Fortune" shown here at North Creek Nurseries

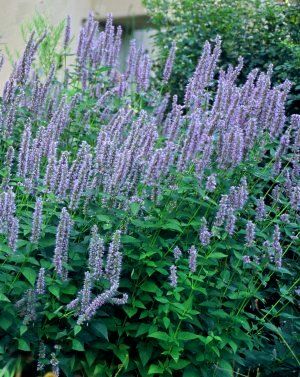
Agastache “Blue Fortune” – North Creek Nurseries

But they are terrific — big, bright spires of flowers over scented foliage. Bees and butterflies come calling in droves. Super-resistant to disease. This one looks particularly good interspersed with rudbeckia. Speaking of which…

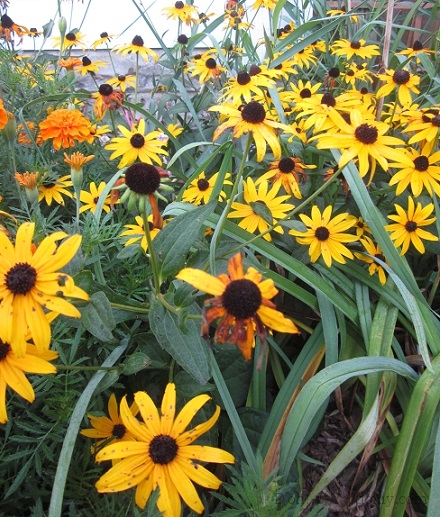
3. Rudbeckia (Black-Eyed Susan)

Habitat (and I) prefer the “Goldsturm” variety. Don’t pay full price. Grow it from seed. Buy stragglers from the garden center at the end of the season. Pick up divisions from friends. It will reward you many times over. It’s a beautiful, long-blooming flower that spreads nicely. Like coneflower, it deals well with the dry season, and comes back reliably. Plus, how cheerful is this??
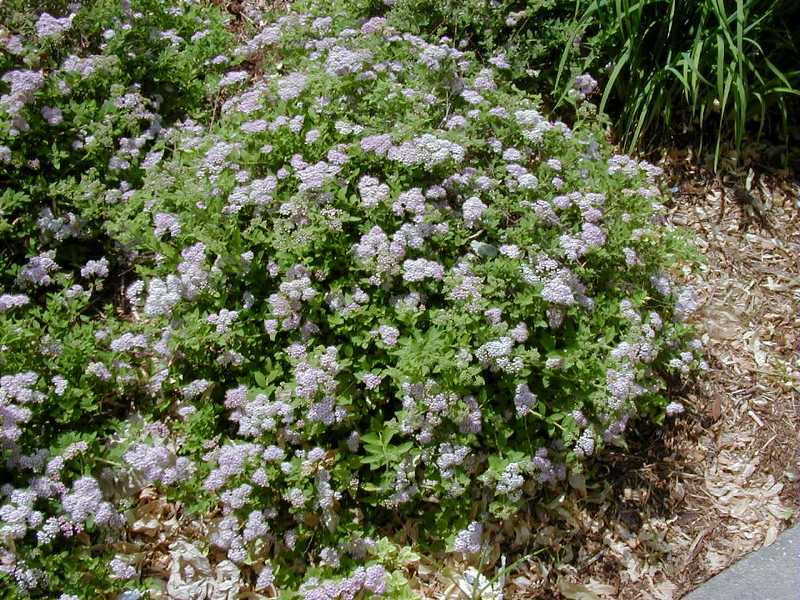
Rudbeckia

4. Spirea

Spirea is a Japanese flowering shrub that mounds neatly, providing a great backdrop or serving as a good understated feature all on its own. Butterflies love it. It has a long flowering season, and then nice autumn color. “Little Princess” shows up on planting lists a lot. Despite being part of the rose family, I’ve never known spirea to demand an ounce of attention.

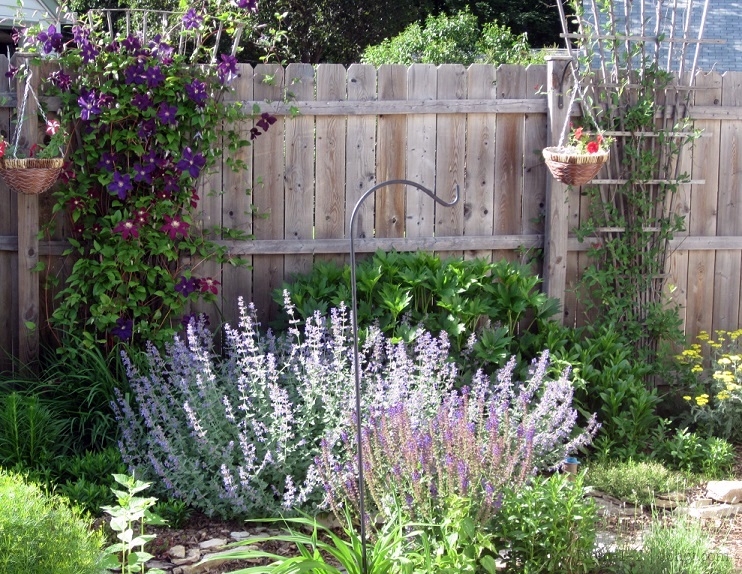
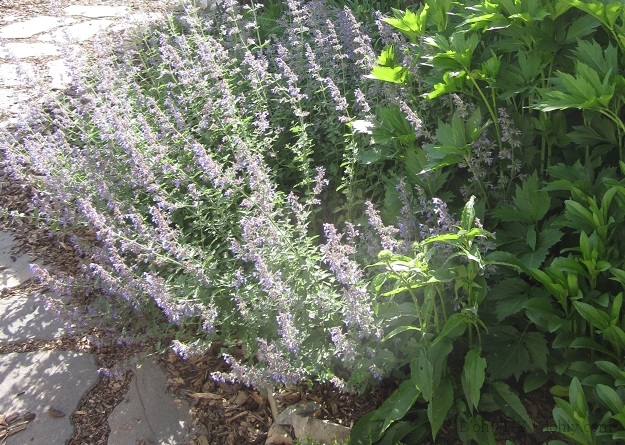
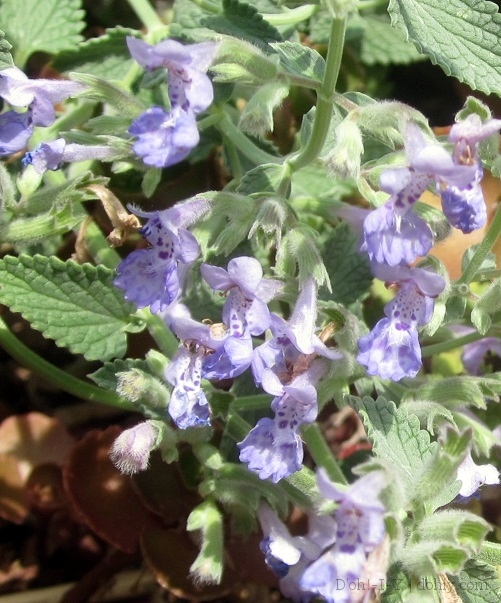
Weigela and catmint also appear regularly for Habitat, as well as in the D’oh garden. Of course hostas are a big contender, as are some of the specially bred hydrangeas (Incrediball and Little Lime often play starring roles).

For the rose-inclined, the planting list usually contains a hardy shrub rose or two — this year, the Easy Elegance roses are taking the lead, but the Canadian Parkland series (including, appropriately, Hope for Humanity) and the Pavement roses have made strong showings. These are all vigorous bloomers and ridiculously hardy. (In fact, I think the Pavement roses are so enthusiastic that they are considered invasive in some areas, so check on that before planting.)

These lists represent serious knowledge on what plants work for inexperienced gardeners. I like to go back and check on houses I worked on years ago, and the gardens always look good. If you want easy, give these a try!

Posted in Yard & Garden | Tagged , , , , , | Leave a comment

A Hip Way to Grow Hops

What the dilly-o?!

– Marge Simpson

Earlier this year, Ben gave the Kev hops rhizomes, which we’ve been nurturing in pots. We wanted to give them a permanent home in a raised bed behind the garage that didn’t exist at that point. Now that it magically exists, I needed to move the hops in so they could get settled before winter.

Hops are commonly considered vines, but technically, they are bines. Vines attach with tendrils or suckers, but bines simply wind around a support. Instead of needing to spread out to give tendrils or suckers new places to attach, bines can grow straight up.

To harvest hops, the line supporting them is detached and laid down for easy picking. Or at least that was the theory when I planned hops for the back of the garage. Support ropes would run from the ground to the roof of the garage, giving the hops a great, full-sun location while breaking up the siding expanse.

It needs…something.

I wanted to start with five bine supports running straight up the back of the garage between the rain barrel and the compost bins. Since the lines would be 3-4+ meters tall, I wanted them to be well and truly secured at the bottom (I’ll attach hooks to the garage frame at the top).

I decided to rig the base up out of stuff we had on hand, starting with some old framing timber we removed from the closet wall in the bedroom. The five bines would be about two feet apart — I didn’t have one 10-foot length of wood, but two shorter pieces would do as well. This is tough, old lumber and will last a long time in the ground. I marked the two pieces and drilled five holes where the ropes would attach and two larger holes in each piece for pegs. (Drilling did not go well, but it got done.)

Drilled Hops Support

Hops support hole on the left, staking hole on the right.

I needed loops through which to thread the ropes, and sticking with the what’s-on-hand model, I used nylon rope. Nylon rope won’t rot under grade, and it’s nice and bright to find in the dirt. I cut lengths of nylon for each loop so that there would be about three inches above the board with a knot under it.

Nylon Rope from Lowes

Nylon Rope from Lowes

One great advantage of nylon rope is that you can bind it with heat. To make the knots secure, I melted them into undifferentiated masses of goo. I also melted the open ends to prevent raveling.

I couldn’t find our campfire starter for this fiery purpose, so I used matches. I have no Match Fear since my freshman roommate took up smoking (in the hallway, which was a difference without a distinction). She was, however, scared to light a match. In a probably-annoying show of teenage bravado, I repeatedly demonstrated how Not Scary match-lighting was. Now I can light a whole birthday cake full of candles with one match in front of fretting spectators. Having roommates promotes personal growth.

Melting Nylon Rope Together

Because I’m a belt-and-braces girl, I ran the loops through galvanized washers and then through their respective holes. (I’ll wait ’til spring to attach the ropes.)

Loop Secured

Then, I dug a trench along the garage’s base so that the loops would be just below the raised bed’s surface. Once the boards were in place, I hammered long pegs through the bigger holes to pin the boards in place.

Hops Supports in Trench

To keep track of the loops, I attached twist ties to poke up, and then I backfilled the trench. Between the weight of the soil and the stakes in the ground, the ropes will be plenty secure.

Backfilled trench -- I circled the twist-tie markers in this shot.

Backfilled trench with circled the twist-tie markers.

I enriched the soil with some of our home-made compost and planted the hops, along with some Black-eyed Susan seedlings and catmint divisions. I also scattered Sweet William seeds from our existing patch through the middle of the bed. Then, I watered it all thoroughly.

Bed and Sprinkler

Once it was good and watered, I topped with wood chip.

Mulched Hops Bed

It doesn’t look like much right now, but next year, there will be flowers in this bed with the hops stretching high above them. Or at least that’s the plan! (Update: see how the hops did first year, and how our rope choice changed the second year.)

Posted in Garage, Outdoor Building Projects, Yard & Garden | Tagged , , , | Leave a comment

The Long and Winding Road That Leads to a Door

Oh, no! This will take forever!

– Lisa Simpson

Stacey is a star at finding great deals on Craigslist. Last summer, she found a screen door for $15. It was supposed to replace the porch door; now it lives in the garage, and it’s headed back to Craigslist because Stacey found a better door.

I said I’d pick up the new door, but it wasn’t particularly nearby. Along the way I posted this photo to Instagram.

gravel road

So I went to pick up the door that Stacey bought on Craigslist.

She thought that was pretty funny.

Stacey may be a Craigslist addict, but I think this makes me a Craigslist enabler.

Posted in Porch, Romance, Salvage, Uncategorized, Windows & Doors | Tagged , , | Leave a comment

Droopy Doors

 It’s time to get some closure … extreme closure.

– Homer Simpson

If you live in an old house, there’s a good chance that you have encountered a droopy door. In our case, the hall closet door was drooping and wouldn’t latch. It kept swinging open and blocking the hallway. The solution was a wedge, but that made using the closet difficult.

Hall Closet Door

The hall closet door wedged shut.

The reason the door doesn’t stay closed is because the latch is too low to go into the hole in the strike plate.

This is the strike plate for the closet door. You can see where the latch has worn off the finish at the bottom of the hole.

This is the strike plate for the closet door. You can see where the latch has worn off the finish at the bottom of the hole.

To show the problem, I marked the position of the bottom of the strike plate hole on a piece of masking tape.

The bottom of the latch is below the bottom of the strike plate hole.

The latch and the strike plate don’t line up.

You can see that the bottom of the latch is below the level of the hole in the strike plate. The door can’t latch is because the lock side is too low. The hardware has become misaligned due to door drooping.

It is natural to suppose, as I did, that the drooping is due to the weight of the door pulling on the top hinge. However, when I looked at the hinge side gap between the door and the frame, I found a larger gap at the bottom hinge than the top.

There is no gap between the door and the frame at the top hinge.

There is no gap between the door and the frame at the top hinge.

There is a very small gap between the door and the frame at the bottom hinge.

There is a very small gap between the door and the frame at the bottom hinge.


Other measurements showed that it was the door itself that was drooping. For instance, the gap between the door and frame at the top on the lock side was smaller than the gap at the bottom.

gap at the top of the door

3/16″ gap at the top of the door

The gap at the bottom of the door

5/16″ gap at the bottom of the door.


Also, the gap at the top of the door is larger at the lock side than the hinge side.

gap at the top of the door

There is a wider gap at the top of the door on the lock (left) side, as compared to that at the hinge side.

Slightly puzzled, I set about measuring the dimensions of the door itself. It turns out, the door itself is not square.

Closet door with corners labeled

The diagonal B-C is longer than diagonal A-D

The distance A-D is 82½”, whereas B-C is 82⅞”. That’s only a small difference, but enough to cause the misalignment, and to show that the hinges weren’t the problem.

As you can see, this is a panel door. It is made up of a number of pieces of wood joined together. Over the last ninety years, the weight of the door pulling on the joints has caused movement at each joint.

So, things droop over time. Not really news, I know.

But getting back to the task at hand: How does this new-found knowledge help us to make the door close properly? It doesn’t!

Forget about the out-of-square door. That’s just part of your house’s character (and it would probably be really difficult to square up all those panels). There is a quick and easy fix to this problem: pack off the bottom hinge.

Pack off the bottom hinge

Pack off the bottom hinge with paper, cardboard or wood.

The amount of packing to add is the difference between the bottom and top gaps on the lock side. In this case, 5/16″ minus 3/16″ = 1/8″. Make holes in your packing material for the screws, and replace the hinges and door.

The latch is above the bottom of the hole.

The latch is now above the bottom of the strike plate hole.

Now the latch has been lifted up enough to clear the bottom of the strike plate hole and the door latches again. The hinges weren’t the problem, but they were the solution.

The bottom gap is now 3/16", the same as the top.

The bottom gap is now 3/16″, the same as the top.

So, that was easy. I wonder why I didn’t do it months ago?

Posted in Before & After, Repair & Maintenance, Windows & Doors | Tagged , , , | 3 Comments

Back in the Groove, but Suitably Chastened

Stop remembering TV and get back to work!

– Marge Simpson

Earlier this week, we said good-bye to Kevin’s sister, our nephew and his friend. We had a blast, and miss them loads. We did so many things — including corrupting new young minds with Farkel. We are so lucky that folks are willing to come a long dang way to see us — it’s a lot of work, but it’s fun work and we love it. We love them.

(As an aside: we regularly have houseguests for two weeks or more, but I still learn something every time. This time, I learned that it’s a good idea to tighten the set screws in bathroom towel racks and hooks before they see extra use. Those things loosen up over time, and I lifted one right off the wall with a towel the day after our guests left. That would be so awkward for a guest, parts of the house coming off for no reason!)

The visit gave us a welcome break from house stuff. Sometimes, when I’ve had a break, I think, “Do I really actually enjoy that stuff?? ‘Cuz this time off is super-fine!” But then I start thinking up projects and it starts again. Last night, for instance, I had a sudden yearning to use … the HAMMER DRILL.

Worx Hammer Drill

Worx Hammer Drill

I’ll come back to the project itself another time. For now, I just want to warn y’all — if you’ve had a break from DIY:

DON’T GO LURCHING STRAIGHT TO THE HAMMER DRILL!

A hammer drill is a serious piece of kit. I was using it to drill fairly large holes into some old and very hard wood. It’s a great tool for that, but in my post-break enthusiasm, I didn’t use basic safety practices you could teach to a gibbon. Learn from my d’oh’s!

Thing one, put the wood on some sawhorses. I mean, come on! Don’t get all excitable and drape the wood off the bench or lean it against the vise. It takes two minutes to set up sawhorses. Just do it.

Putting the work below your center of gravity on a stable surface gives you more control over the tool. You want to have a good proportion of your weight above the machine to manage it better. Especially if you are all Grover-arms like me.

(I originally image-searched for “Grover trying to lift something” — it yielded a wide range of results, none of which were Grover trying to lift something. But I’m guessing there’s a plastic surgeon named Dr. Grover out there.)

Thing two, clamp the board down to the sawhorses! You don’t need to be holding onto the board while also drilling. Eliminate extra things to do with your hands so you can control the drill (or saw or whatever power tool you are using).

Thing three, make sure the bit is really properly tightened. If you don’t get it super tight and the drill stops dead because it hit a knot or something, then STOP. Unplug the tool and pull out the bit. Don’t try to force the drill because one of three things can happen:

1. If the bit is stuck, the body of the drill itself will try to turn, which is like a Rottweiler trying to get its favorite chew toy away from you. Not good on the wrist and shoulder!

2. If you’ve got the drill up too high, the body of the drill will try to turn, thereby turning you and causing you to somehow smack the glasses right off your own dang face. IT CAN HAPPEN. Not good on the nose or the glasses. Or the drill.

3. You could seriously hurt yourself or someone else.

That third thing didn’t happen, fortunately, but not for lack of trying. Our hammer drill can be hand-tightened, but it does have a more elaborate tightening process that I should have followed for this tough old wood.

Home improvement is exciting, people. Just don’t get carried away by your justifiable passion and forget to use your brain!

Posted in Construction, D'oh!, Repair & Maintenance | Tagged , , | Leave a comment

Before and After: Local Dump to Path and Raised Bed

I can’t believe I’m spending half my Saturday picking up garbage. I mean, half these bottles aren’t even mine!

-Lenny

Over the last few years, we have been redeeming the garden. Once, it was mainly lawn with a few flower beds, but now, it’s mainly flower and vegetable beds with a small lawn. The last untouched part of the yard was an area behind the garage. Even improvements near the garage did not reach this zone.

The trash behind the garage nicely sets off the newly laid sod (or turf for UK readers).

The trash behind the garage nicely sets off the newly laid sod (or turf for UK readers).

As a first step, I built compost bins on a concrete apron. This took up about a third of the area and they are really useful. We also put a rain barrel behind the garage.

Our two-bin system, made of pallet wood, while under construction.

Part of the area behind the garage is devoted to compost.

But while the compost bins and rain barrel were a huge improvement, the rest of the space was still just a dumping ground.

Our plan for this transition area was to:

  • edge the lawn from fence to fence,
  • make a path that went the width of the yard behind the garage and along the end of the vegetable area, and
  • make a raised bed to grow hops in.
Hops flowers (via beersmith.com)

Hops flowers (via beersmith.com)

Why hops? you may ask. Well, I recently began brewing beer, of which hop flowers are a main ingredient. Very thoughtfully, Ben bought me some hop plants so that I could use their flowers in my own beer recipes.

We decided on bricks to edge the lawn, and limestone blocks to form the raised bed ‘wall.’ The bricks were a Craigslist score, and we already had limestone blocks, some of which we used elsewhere to cap a retaining wall. The path itself would be a simple wood mulch, which we could later change to stepping stones or another option.

The first order of business was to remove all vegetation from the proposed path and raised bed area. Next, I used stakes to map out a straight line across the edge of the lawn, then I dug a trench along that line. The trench was deep enough for the top of the bricks to be at ground level, with an inch or two of sand beneath them. (Sand helps level and set the bricks.)

Vegetation cleared and lawn edging trench dug

Vegetation cleared and lawn edging trench dug

The raised bed would run along the back of the garage and be the same width as the compost bin apron. After measuring that out, I dug a trench for the limestone block wall to sit in, on top of a layer of sand.

Trench dug for the raised bed wall.

Trench dug for the raised bed wall.

With the trenches dug, I laid landscape fabric over the prepared ground as a weed barrier, and filled the trenches with sand. I used a guide line to make sure that the bricks and blocks were laid straight, and that the top of the blocks were level. The tops of the bricks followed the contours of the ground. They are low enough that the mower can cut all the grass, but high enough to keep grass from invading the path.

The landscape fabric and edging bricks are in place, and the raised bed is taking shape.

Landscape fabric and edging bricks in place — the raised bed is taking shape.

With the bricks in place, I used filler sand to fill up any gaps around the bricks. This secures the bricks in place so that they don’t move when trodden on.

The finished path with brick and limestone borders.

The finished path with brick and limestone borders.

After leveling off the top of the raised bed, I set about replacing the water barrel. I first tamped down the soil beneath the water barrel to prevent lopsided settling. Then I rebuilt the stand using more of the limestone blocks. Finally, I spread mulched wood 2-3 inches deep to create the path.

The last great wilderness has been tamed.

The last great wilderness has been tamed.

So, that’s the last of the yard tidying projects completed. Now to head for a lawn chair in a shady spot, home brew in hand.

Posted in American vs English, Before & After, Garage, Outdoor Building Projects, Yard & Garden | Tagged , , , , | 1 Comment

Good Easy Plants: Catmint (Nepeta faassenii)

You want me to show this to the cat, and have the cat tell you what it is? ‘Cause the cat’s going to get it.

– Kirk Van Houten

Nepeta in the SpringSeveral years back, I bought three tiny catmint plants. These were Nepeta faassenii “Walker’s Low”. They were small and sweet and I found it hard to believe that they would grow to be the billowing waves of purple spires shown on the plant tag. But they did! And they’ve spread and been divided and helped populate the entire garden.

Nepeta is an excellent substitute for lavender, with its mounds of silvery green foliage and spikes of purple flowers. I have all sorts of trouble with lavender in zone 4, but nepeta is no bother at all. Actually, why do I keep trying to grow lavender?

Nepeta in the Foreground

Catmint (Nepeta faassenii) is related to catnip (Nepeta cataria), and cats find it nearly as irresistible. The nephews love to bring sprigs to our indoor cats. Mayya and Inigo both go from zero to intensely freaky in under 20 seconds. Then it’s all diluted pupils, zigzag chases and curly tails.

Nepeta in the Morning

Like Gaillardia, catmint draws the bees and butterflies. It’s lovely spilling out over the border or the edge of a wall with a full host of pollinators. Nepeta gives off a nice, light fragrance when you brush by (just ask the cats!). It mounds up and can be left to spread or given a haircut — it’s happy either way.

  • Ready to drive cats wild in zones 4 through 9 (US and world zone maps).
  • Vigorous grower that spreads well, but not invasively.
  • Low water needs once established.
  • Repeat bloomer, even if you don’t trim it back — better if you do.
Only when I took this photo did I notice that each flower is like a tiny orchid.

Only when I took this photo did I notice that each flower is like a tiny orchid.

Catmint plays well with others, gets cats stoned and requires little care. It’s a triple threat! If you have trouble with lavender — or even if you don’t — try a little catmint.

Want more good easy plants? Check out Gaillardia, Clematis and Weigela.

Posted in Yard & Garden | Tagged , , , , | 2 Comments

Random Skills: Knotting Thread for Hand Sewing

Bart: If you quit, it’d be like an expert knot tier quitting a knot-tying contest right in the middle of tying a knot.
Lisa: Why’d you say that?
Bart: I dunno, I was just looking at my shoelaces.

– The Simpsons

Back during college, I was replacing a button while chatting with my mom. As I worked on tying the knot at the end of the thread, she started to laugh. “What ARE you doing?!” she asked. “Tying a knot in this thread,” I replied, sensibly. “You’re certainly doing it the hard way!” she exclaimed. To which I said, “Well, YOU taught me to sew, woman!” But only in my head, because that’s Level Six Sass-Talk, and that’s not allowed in my family until you’re at least 29.

Hi, Momma!

She then taught me the World’s Quickest and Most Effective Knot-Tying Technique for sewing thread. (By the way, this “thread” I speak of is more commonly known as “cotton” in the UK.) Some of y’all may already know it, but it was a revelation to me! Moms know all the good tricks.

1. Moisten your index finger. I just lick my right index finger, but choose your own moistening technique. I have a friend and reader who hates the word “moist” but I’m sorry to say, you can’t moisten without moistness.

2. Wrap the end of the thread around said moist finger so the thread overlaps across the finger pad.

Thread Cross-over

3. Using your thumb, roll the thread off the end of your finger.

Thread Rolling Off

The thread will get tangled up in itself as you roll it.

Thread Rolled to End

4. Pull down along the thread with your middle fingernail against your thumb to set the knot.

Setting the Knot

And there you have it!

Perfect Hand Sewing Knot

Works like a charm, and much easier than trying to line up a second knot! I did a quick video to put all the steps together:

Once you’ve done it the first time, it will take you about a tenth of a second every subsequent time (unless you are trying to do it slowly for video purposes).

These pictures show the really deep creases in my palms and fingers. My mother has them as well — a fortune-teller turned her down once as being “too complicated”! My college boyfriend said my creases were because I never did any “real work” to wear them down. Retroactive nertz to him!

Got any funky sewing tips? Bad boyfriend stories? I love to learn new tricks (and hear tales of bad boyfriends), so please share them in the comments.

Posted in American vs English, D'oh!, Family, Repair & Maintenance | Tagged , , , | Leave a comment

Home Improvement Haiku

 Sneezing on a piece of paper does not count as a haiku.

 – Mrs. Crabapple

One of the best forwards I ever received was a list of Microsoft haiku. My fave from that page:

With searching comes loss
And the presence of absence:
“My Novel” not found.

In case you did not have a grade-school teacher who led a multi-week unit on the subject, haiku is a Japanese poetic form with five syllables in the first line, seven in the second and five again in the third.

Issa, a noted haiku poet

Issa, a noted haiku poet

As you can tell from the above image, haiku was traditionally a dignified and classic art form. The English version of the form, however, readily lends itself to silliness.

Bed-Haiku

someecards.com

cafepress.com

cafepress.com

nerdy-parent-haiku.american-apparel-baby-one-piece.lemon.w380h440z1

skreened.com/misshalloween/nerdy-parent-haiku

Speaking of nerds…I like to write haiku in notes to Kevin, usually about what’s in his packed lunch or what needs to be picked up at the grocery. So how about some home improvement haiku? Here’s a few inspired by our DIY adventures.

Bending like a reed
Metal sliver, defiant
Third nail now. Dammit!

Darkness surrounds us
Hold the light where I’m working
Higher. LOWER! There.

Fish-like scale, painted
Rainbow hues in one moment
I miss my thumbnail

The last screw that size
Really? Lowe’s closes at nine
We can make it, drive!

Do you haiku too?
We would love to read your verse
Please add in Comments!

Posted in D'oh!, Romance | Tagged , , | Leave a comment

Using French Cleats to Hang Framed Art

You sound like you’re ready to become your own boss in the exciting world of frame-nudging!

– Franchise Salesman, The Simpsons

Y’all may remember that I purchased some geeky artwork for our bedroom redo.

Framed, but not hung.

Framed, but not hung.

By the way, what ever happened with the bedroom project?? Well, we’re done except for the window treatments. I did not finish “treating” the windows before Kevin’s sister, her younger son and his friend arrived. We’re having such a good time with them that the windows will just have to wait! Haven’t been to Ikea yet, but it will happen…

I wanted to hang these facing each other over the bed, but I was afeared! I thought there was no chance I could achieve the elusive straight-and-level matched installation, especially since the frames were such a contrast with both the mats and the wall.

I perused the picture hanging hardware at Menards for ideas, and picked up a pair of these:

OOK 55310 Hangman French Cleat

This the OOK “Hangman” French Cleat. They come in several sizes, but this version is about five inches wide, and more than adequate for my needs.

OOK? (via)

Plus: OOK? High-five if you get this. (via)

So what’s so life-transforming about that? A French cleat interlocks over the whole length of the hardware, so if you get the hardware straight, the artwork will be as well. Hanging with wire is less precise because it’s hard to exactly pin down the distance from the top of the frame to the wire and using more than one hanger complicates matters.

Dohiy.com Organizing Art with Paper TemplatesWith the hardware purchased, I felt action might be imminent. I actually started to think about hanging the pictures rather than just moving them around the room so we didn’t trip over them. Audacious, right? I figured out where to hang them in relation to the headboard by using paper templates. I moved these around a fair bit while settling on the final location. The Kev had no opinion.

With the location established, the first hardware step is to attach the hanging part of the cleat to the frame.

Dohiy.com French Cleat Attached to Frame

Just snug this up to the frame and screw it on (I drilled pilot holes so the wood wouldn’t split). Because this is attached to the frame and straight, it’s naturally “level” on this side of things (assuming it’s really snugged up to the frame itself — being crooked as against the frame would be a problem).

The other piece attaches to the wall. I tried to take a good picture of the wall piece’s profile so you could see how it hooks together, and finally used a cat to prop the thing up. She was supervising anyway.

Dohiy.com Cat Demonstrates French Cleat Profile

The flat part on the right will be flat to the wall. The angled piece will jut out away from the wall so that the angled part of the frame piece will fit right against it. (The round bit is to insert a cheesy little bubble level; I used a long level instead in the interests of complete straightness.) The cat part lazes about looking simultaneously bored and critical.

Here’s a diagram in case you are spatial-relation-challenged as I am:

The difference between this diagram and the OOK thingy is that the OOK product nestles underneath the frame so that the frame is flat against the wall; no need for a spacer as shown in the diagram.

I measured down from the top of the frame to determine how far down the wall side would need to be to match up. Then I measured down from the top of my paper template the same amount and made a centered mark. I used our stud finder to, um, find a stud. Because that’s what it’s for. I drilled an extra hole in the wall piece to match up with the available stud. I screwed into the stud, then leveled as if my life depended on it, then added the second screw (and checked for level again).

Then it was Hangin’ Time.

One down, one to go.

One down up, one to go.

After measuring about 23 times and marking across carefully, I centered the other wall piece and attached it. There was quite a bit of checking and nudging and hinting and standing back and looking, but eventually, we got there.

Dohiy.com Leveled Art on French Cleats

Perhaps slightly closer to the wall light on one side, but unarguably level.

I’m still loving these prints — even more now that I can’t stub my toes on them.

UPDATE: After several months, the top rails on these frames bowed at the cleats and I had to resquare them. For lighter-weight frames like these, I would recommend shoring up the frames first, and then hanging with the cleats. Learn how here.

Related Posts Plugin for WordPress, Blogger...
Posted in Decor, Walls & Floors | Tagged , , , | Leave a comment