
I can’t believe I’m spending half my Saturday picking up garbage. I mean, half these bottles aren’t even mine!
-Lenny
Over the last few years, we have been redeeming the garden. Once, it was mainly lawn with a few flower beds, but now, it’s mainly flower and vegetable beds with a small lawn. The last untouched part of the yard was an area behind the garage. Even improvements near the garage did not reach this zone.
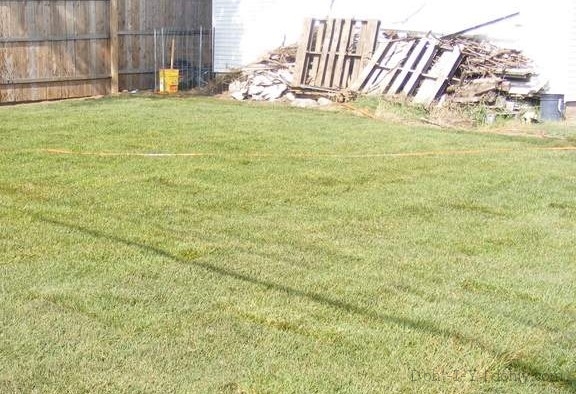
The trash behind the garage nicely sets off the newly laid sod (or turf for UK readers).
As a first step, I built compost bins on a concrete apron. This took up about a third of the area and they are really useful. We also put a rain barrel behind the garage.

Part of the area behind the garage is devoted to compost.
But while the compost bins and rain barrel were a huge improvement, the rest of the space was still just a dumping ground.
Our plan for this transition area was to:
- edge the lawn from fence to fence,
- make a path that went the width of the yard behind the garage and along the end of the vegetable area, and
- make a raised bed to grow hops in.
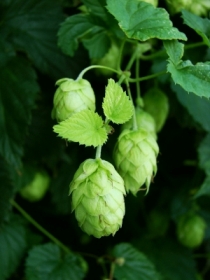
Hops flowers (via beersmith.com)
Why hops? you may ask. Well, I recently began brewing beer, of which hop flowers are a main ingredient. Very thoughtfully, Ben bought me some hop plants so that I could use their flowers in my own beer recipes.
We decided on bricks to edge the lawn, and limestone blocks to form the raised bed ‘wall.’ The bricks were a Craigslist score, and we already had limestone blocks, some of which we used elsewhere to cap a retaining wall. The path itself would be a simple wood mulch, which we could later change to stepping stones or another option.
The first order of business was to remove all vegetation from the proposed path and raised bed area. Next, I used stakes to map out a straight line across the edge of the lawn, then I dug a trench along that line. The trench was deep enough for the top of the bricks to be at ground level, with an inch or two of sand beneath them. (Sand helps level and set the bricks.)

Vegetation cleared and lawn edging trench dug
The raised bed would run along the back of the garage and be the same width as the compost bin apron. After measuring that out, I dug a trench for the limestone block wall to sit in, on top of a layer of sand.

Trench dug for the raised bed wall.
With the trenches dug, I laid landscape fabric over the prepared ground as a weed barrier, and filled the trenches with sand. I used a guide line to make sure that the bricks and blocks were laid straight, and that the top of the blocks were level. The tops of the bricks followed the contours of the ground. They are low enough that the mower can cut all the grass, but high enough to keep grass from invading the path.

Landscape fabric and edging bricks in place — the raised bed is taking shape.
With the bricks in place, I used filler sand to fill up any gaps around the bricks. This secures the bricks in place so that they don’t move when trodden on.

The finished path with brick and limestone borders.
After leveling off the top of the raised bed, I set about replacing the water barrel. I first tamped down the soil beneath the water barrel to prevent lopsided settling. Then I rebuilt the stand using more of the limestone blocks. Finally, I spread mulched wood 2-3 inches deep to create the path.

The last great wilderness has been tamed.
So, that’s the last of the yard tidying projects completed. Now to head for a lawn chair in a shady spot, home brew in hand.

Pingback: DIY garden path ideas: The best affordable 20 garden path ideas.