Happy Thanksgiving: Velma’s Pecan Pie

This is Thanksgiving, so glue friendly or I’ll take your glue away and then no one will have any glue to glue with.

– Homer Simpson

Thanksgiving in my family means pecan pie — pronounced peh-CAHN, as nature intended. A “pee can” is something you keep under the bed! The Kev loves the way I say “pecan” — it can’t be easily replicated by the English tongue. I love the way he says…well, everything, really, but “premier” and “tarpaulin” off the top of my head.

The Kev and I have many things to be thankful for — among them, you, gentle readers. In gratitude, I’d like to share with you my grandmother’s pecan pie recipe (US and UK metric versions). I’m not biased at all when I say it is easily the best pecan pie recipe in the whole wide world!

My grandparents Velma and Mickey back in the day.

My grandparents Velma and Mickey back in the day.

———————————————————————————————————–

Pecan Pie (US)

Unbaked 9″ pie crust (your recipe or purchased)

1½ C pecan halves
½ C granulated sugar
1 C light corn syrup
¼ C evaporated or whole milk
3 eggs, beaten
1 tsp vanilla
1 T flour
Pinch salt
¼ C melted butter

Line a deep pie tin with the crust; do not ventilate it. Roughly chop about 2/3 of the pecans, leaving quite a few intact halves. Place all the pecans in the bottom of the pie crust. Combine the beaten eggs with the sugar and syrup, then add all remaining ingredients, adding the melted butter last. Mix until uniform, then pour over the pecans. Bake at 350F for 50-60 minutes.

Velma's Pecan Pie

Nutty crunchy top, sweet gooey base.

———————————————————————————————————–

Pecan Pie (UK)

Unbaked shortcrust pastry (your recipe or purchased)

186 g pecan halves
113 g granulated sugar
236 ml golden syrup
60 ml evaporated or unskimmed milk
3 eggs, beaten
10 ml (2 teaspoons) vanilla
11 g (3 teaspoons) flour
Pinch salt
56 g melted butter

Line a deep tart tin with the pastry; do not ventilate it. Roughly chop about 2/3 of the pecans, leaving quite a few intact halves. Place all the pecans in the bottom of the pie crust. Combine the beaten eggs with the sugar and golden syrup, then add all remaining ingredients, adding the melted butter last. Mix until uniform, then pour over the pecans. Bake at 175C for 50-60 minutes.

———————————————————————————————————–

My reasons to be thankful (the guys, not the Cadillacs).

My reasons to be thankful (the guys, not the Cadillacs).

Happy Thanksgiving!

Posted in American vs English, Family, Food & Drink, Romance | Tagged , , | Leave a comment

The Deal on the Gloss: Painting a Wooden Storm Door

This is the peak hour for stoned teenagers buying shiny things!

– Apu

When we found our new storm door, I started looking for the right paint. I knew the color we were using, but I wanted to find a true high-gloss door paint that would give the finish you find on many British doors.

no_10_downing_street

Perhaps most famously on this particular door.

“Gloss” paint (US: seriously, no real well-known equivalent. High gloss? But that’s not as shiny as British gloss) comes in any color you can imagine, and graces all sorts of exterior doors, grand and otherwise.

The internet kept referring me to Fine Paints of Europe, but there’s only one retailer in the state, and it’s not conveniently located. Then I happened upon Grand Entrance, a new product from Benjamin Moore designed to achieve “European” standards of shininess on doors and trim.

Grand Entrance

It only comes in quarts, which is fine for door use. It runs about $40/quart, which seems steep, but (a) it’s $40 and (b) it does the job. Plus, I’ll paint the back door this color in the spring, so it’s $20/door. I had it tinted to match Valspar CI83, Beehive, a color I’d tried out on the old vinyl door.

The Kev painted the storm door while I was out of town. With the paint, I picked up a brush that promised an “ultra smooth” finish. I’m a sucker for ultra-anything.

Purdy brush

Ultra Kev applied two primer coats, using a high-grade exterior primer. The wood really sucked up these coats, so he sanded all the overlaps and laid down another primer coat. He also painted the inside face and the edges with a standard white exterior paint that matches the inside of the porch and let that set up completely before starting on the fancy paint.

Grand Entrance is a “waterborne alkyd enamel paint” — I don’t know much about paint technology, but the practical upshot is that it takes a long dry time. The incredibly tiny print on the can specified 16 to 24 hours between coats (at least, that’s what I think it said). Kev gave it two coats, and then we let it cure for three extra days after it seemed to be bone dry to install it.

We installed it on a cloudy day, and most of the photos did not show the high gloss.

shiny storm door

Yellow but not glossy


Shiny door 2

Ooh, there’s a bit of gloss!

I waited until a sunny morning to run out and take some more detail shots to show off the shininess.

Shiny door 3

Shiny door 5

It’s not a British door, but it looks super-shiny! Way to go, Benjamin Moore (and Kev)!

For more on our wooden storm door saga, check out how we found it, how we prepped it, how we picked the hardware and how we installed it. Our main piece of advice: start earlier in the year!

Posted in American vs English, Decor, Windows & Doors | Tagged , , , , | 7 Comments

Stocking Stuffers for the DIY Set

Bart: What did you get her, Dad?
Lisa: Yeah, whadja get?
Homer: A…very…thoughtful gift…but it’s a surprise!

– The Simpsons

It’s THAT time of year again. I’ve been prepping family shopping lists, and while I was at it, I put together some DIY-friendly gift ideas. These might be good for someone on your lists…or maybe it’s time to treat yourself? Either way, these stocking-stuffers are both cool and easy on the wallet.

1.  Sidewinder Pliers

I saw these cool pliers in a This Old House slideshow the other day, and I can’t get them out of my mind! Is this not the sexiest hand tool you’ve ever seen??

sidewinder pliers

The wiggly handle gives fine control, while the jaws can either grip or snip. Get ’em at Lee Valley for about $15.

2.  Magnetic Wrist Band

I gotta get me some of these. Only I’d want to wear them all the time because I’m always dropping stuff.

magnogrip

There are lots of versions, but Amazon has the MagnoGrip shown above for under $10.

3. Multitool Card

The Kev gave me one of these for my birthday this year (among girlier things), and they are so slick. They are the shape of a credit card, so they are easy to stash, but they include all sorts of gadgets. Mine has a magnifying glass, a screwdriver and a flashlight, among a bunch of other stuff.

Swiss Card

The Swiss Army Quattro (above) is a good one for about $16; there are other examples for more and less money.

4. Dipped Nitrile Gloves

It’s well-documented that I generally don’t like to wear gloves, but I am partial to nitrile. I recently discovered dipped gloves, which are great for gardening and DIY. The fingertips and the inside of the hands are nitrile, while the backs are breathable fabric. When they fit snugly, I can almost forget I’m wearing gloves. The ones shown below are about $10 on Amazon.

dipped nitrile glove

5. At Home: A Short History of Private Life (Bill Bryson)

As an Anglo-American couple, Kev and I share an affinity for Bill Bryson, an Iowa-born writer who has spent much of his adult life in England. (If you are similarly situated, check out Notes From a Small Island for insights and laughs.) Once known as a travel writer, Bryson is now perhaps better-known as the Guy Who Writes About Anything and Everything. And that includes things around the house. At Home: A Short History of Private Life covers the obscure backgrounds of the rooms and items we use every day.

bryson

At Home is about $10 on Kindle, and around $15 in softcover.

So there you go — some cheap and cheerful ideas for the home improvers on your gift list. If you have any to add, please leave a comment. Happy shopping!

Posted in Family, Repair & Maintenance | Tagged , , , , , | Leave a comment

Installing a Wooden Storm Door: The We-Love-The-Former-Owners Edition

In case you can’t tell, I’m being sarcastic!

– Homer Simpson

Earlier this year, we bought a new storm door and prepped it for hanging. The Kev painted the door while I was gallivanting with ghosts in San Francisco. We chose an oil enamel for the exterior side, so we took some time to get that smooth and fully cured before installation (more about the exterior paint another time).

We knew that the door frame would take some sanding and paint touch-ups, so we needed to get moving before the weather got too cold to paint. The existing storm door was one of those vinyl units with trim that attaches over the door frame.

The strip around the edge is an angled frame that screws into and covers the edge of the door frame and contains the hinge, latch and weatherstripping. (via)

The strip around the edge is an angled trim piece that screws into and covers the edge of the door frame and contains the hinge, latch and weatherstripping (via).

I reckoned that the wood under the storm door trim had not been painted in some time; since it would now be exposed, we anticipated sanding and paint touch-up. What we did not anticipate was this:

hacked door frame

Under the storm door trim, the frame had been packed off about a half-inch on one side, presumably to help fit the door. Fair enough. What’s completely bizarre, though, is that SOMEONE hacked away at the other side of the frame to increase the opening by the SAME AMOUNT THAT IT WAS REDUCED ON THE OTHER SIDE.

spock

D’ooooooooooooh! Before sanding and painting, we had to cover up that delightful mess. Kev cut down a piece of wood and nailed it in place.

repairing door frame

I sanded the frame, and caulked the gap.

caulked door frame

Given the door frame surprise and the time of year, the goal was to just get things presentable for the winter. When it’s warm again, we’ll revisit this whole door frame issue and repaint. For now, on this grey and cloudy day:

progress on the storm door

And from the inside:

inside porch

We’ll add a sweep to the inside of the door (and clean the window, good grief!) in the next week or so, but most of the finishing will wait until spring, including:

  • Rebuilding (and painting) the door frame properly.
  • Replacing the door sill.
  • Replacing the stoop railings (they look ok here; they are not ok).

Progress! Could have been more progress if the former owners weren’t trying to thwart us. What were they thinking?! But I should think more positively — if this place hadn’t been owned by dopes at some point, we wouldn’t have been able to afford it!

Still.

Posted in D'oh!, Porch, Repair & Maintenance, Windows & Doors | Tagged , , , | 2 Comments

DIY Fireplace Sound System

Bart: Don’t we get to roast marshmallows?
Dolph: Shuddup and eat your pine cone.

 – The Simpsons

We have a fireplace.

Doh Fireplace

We love it. But it’s fake! The surround is a reproduction and the fire itself is electric. There’s a much longer post about how we made this decision and built the mantel, but in short:

  • It’s surprisingly realistic — when I reached into it in front of dinner guests, one gasped “AAAAAGH!” in anticipation of my being burned.
  • It’s a very effective little space heater, which allows us to keep the central heat down a little bit while we keep the main room warm.

After we installed the fireplace, I wanted to add even more fake elements to make it more realistic. Primarily, I wanted it to sound like a fire. This idea was not unique — several companies make sound components for electric and gas fireplaces.

  • Kracklebox (self-contained unit with sounds and speakers; Dimplex includes the unit with some of their fires).
  • FireSong Fireplace Sound System (expensive, but designed to work in “cool” area of gas fireplace).
  • Fire Crackler Sound System (comparatively affordable, and I might have bought it if I’d found it before making my own).

These options range from $39 (on sale from $59) to $199, but you can do much the same thing for less than $20.

First, pick up a cheap MP3 player (or you might have one sitting around from the pre-smartphone era). Ours is a lipstick-sized player that also works as a thumb drive, similar to these:

A cheaper option is to buy an MP3 player without memory (this one is under $3), then use an SD card.

Second, buy some small portable speakers that run on batteries.

We have a foldable set like this, purchased for about $5.

We have a foldable set like these, purchased for about $5.

There are many small portable speaker options for not a lot of money, or again, you might just have some in storage.

You probably see where this is going — third, go download yourself some fire sounds! Here’s a list of downloadable fireplace MP3s for less than a dollar apiece. I picked out one that was an hour long, and then I saved it to the MP3 four times with different titles (you could also hit “repeat” on the player, but it’s easier to just hit “play”).

When browsing fire sounds, be aware that some of them have piano music or thunderstorms or “nature sounds” in the background. That’s fine if you want that, but I only wanted fire noises. Audiophiles note that some of the sound files loop in a noticeable way. If you are sensitive to that, you may want to look for a continuous recording (or make your own). It doesn’t bother us because it’s just background noise.

Plug the loaded player into the speakers, and voila: $16 fireplace sound system! Good for fireplace-adjacent snuggling when it’s cold outside.

If you have an electric fireplace, you’re done. I just put the player/speakers inside the surround.

Doh-Fireplace-arrow

IF YOU HAVE A GAS FIREPLACE, it’s too hot in there for MP3 components. In that case, drop the whole kit and kaboodle into a decorative basket and set it on the mantel. That’s an extra $3 or so at Goodwill, so you could still come in under $20.

For extra verisimilitude, you might want to add fireplace scents. I usually can’t be bothered, but I did buy this incense set:

These are a little tricky to light, but they do last a long time and add considerable atmosphere! There are also “woodsmoke” candles and other options to customize your fake fire experience.

Once you have the player and speakers, this takes less time to do than it does to explain. Hope this tutorial helps you add a little extra synthetic charm to your artificial hearth, leading to genuine good times!

(Also see our update about our use of the system over the last year.)

Posted in Electrical, Energy, Romance | Tagged , , , , , , , | 4 Comments

Phancy Phurniture Phrom Phyfe

Willie: I’m from Scotland too! Where do ya hail from?
Homer: Uh…North Kilttown.

– The Simpsons

Our original dining room furniture was a work table and a few folding chairs. My folks gave us some money for real dining furniture, and we started perusing the want ads (this being in the long-long-ago before Craigslist).

We found an antique mahogany table and sideboard with six chairs. “It’s too grandma-y,” I grumpily opined. But the Kev said that it was high-quality furniture at an excellent price. And that he liked it. Since most of the house decisions to that point had gone my way, I yielded.

I soon found out why “grandmother” sprang to mind. On seeing it, my mother said, “Ooh, that’s Duncan Phyfe–your great-grandmother had a very similar set!”

willie

Duncan Phyfe: Better-looking, more successful, but also a Scot.

So who is this Duncan Phyfe character anyway? Mr. Phyfe was an 18th-19th century cabinetmaker originally from Scotland, near Inverness. After emigrating to the states, he set up a successful furniture business in New York. He changed the spelling of his name from “Fife” to “Phyfe” to attract well-heeled customers. (Apparently, people love themselves some unnecessary P’s – just ask Price Pfister.)

Phyfe’s work employed neoclassical themes, and original pieces command huge prices.

sdfgfg

They are even exhibited in major museums (this poster is from the Met).

The style experienced a huge revival in the early 20th century through the early 1960s. This furniture is often called “Duncan Phyfe” but would more properly be referred to as “Duncan Phyfe style.” 

Many US furniture companies produced work in the style (and many still do). One of the seats (heh) of the American furniture industry, Thomasville, North Carolina, built an enormous chair to commemorate local furniture-makers. They built it from concrete and steel and chose a style they thought would also stand the test of time — Duncan Phyfe.

sdf

LBJ standing in the “Big Chair” in Thomasville, 1960 (via).

I grew to love our phurniture. The finish has a great patina, and it’s very well-made. I really like the line of the legs, which is simple but elegant.

Oh, you have the camera out? That must be to do with moi.

Oh, you have the camera out? That must be to do with moi.

Our chairs have the iconic lyre back seen in the Thomasville memorial (which is still standing, in case you are looking for road trip landmarks). The backs are the only overt ornamentation, and they are surprisingly comfortable.

Mayya demonstrates the "seat" aspect of the chair. (Been meaning to reupholster these since Day 1; apparently, it's not a super-high priority!)

Mayya demonstrates the “seat” aspect of the chair. (Been meaning to reupholster these since Day 1; apparently, it’s not a super-high priority!)

Other back styles include carved roses and scrolls or fretwork.

 Rose back chair

Also look for subtle details like fluting and brass claw feet, especially on the classic drop-leaf table.

Duncan Phyfe-style dining furniture is readily available on the second-hand market. Occasional tables and upholstered pieces are trickier, but do crop up. On ebay and other national sites, sellers generally identify the style with the correct spelling, but on Craigslist, it’s more hit or miss. Try looking for “Fife” or just “mahogany” furniture. For the distinctive dining chairs, search for “lyre” or “harp” backs (I found similar chairs for use at larger parties by searching for “harp” chairs — $10 each!). I often see “rose” dining chairs as well, so descriptive searches are worth trying.

I still think it’s pretty grandma-y, but in a good way.

Posted in Decor, Furniture, Romance | Tagged , , , , | 6 Comments

I Think We Have a Winner!

Of course, there’s no way to see into the Simpson home without some kind of infrared heat-sensitive camera. So let’s turn it on!

– Kent Brockman

OK, so it’s been over a month since we last worked on the porch floor. Mostly procrastination was to blame. But it was also because we’ve been waiting for an infrared stripper.

You may remember from the end of the first post about stripping the porch floor that we had been thinking of buying quite a fancy infrared stripper. Well, we found a cheaper option. And that’s usually the one we go with! Infrared is infrared, after all. It’s not like you’d get a better quality of electromagnetic radiation from a more expensive piece of kit.

We ordered the Speedstripper from a small company in the north of England. When it arrived, a couple of weeks ago, the handle was broken. Hmmm… so, we contacted the seller. He was very cooperative and offered to ship another one immediately. The new one arrived this week, and I took a break from painting the porch door to give it a spin.

Fully functioning infrared stripper

Fully functioning infrared (and mesored) stripper

The stripper takes a few minutes to get up to operating temperature. I found that holding it about ¾” from the floor soon had the paint ready for stripping.

The part of the floor I tried had not been touched by any of the other methods we’d tried. After just one heating, all the green and most of the grey paint came off. I warmed the remained grey paint one more time, and it came straight off.

Successful paint removal with infrared stripper.

Successful paint removal using infrared stripper.

This was a pleasant surprise. I didn’t really think it would be any better than the heat gun was.

So there we have it. The infrared method is the one we will go with. The floor will still need some sanding after stripping, but I think that was always going to be the case.

This is not a sponsored post, but if you would like to order this thing, we bought it here.

Posted in Porch, Salvage, Walls & Floors | Tagged , , | 2 Comments

If You’re Ever In Cottonwood, Arizona…

If you really love Larry, prove it!

– Homer Simpson

After the conference last week, I came over to Arizona to see my parents. We took a short trip over to Cottonwood to experience Larry’s Antiques & Things. Larry’s is one of those ranging, many-roomed antiques places, only writ much, much larger. Larry’s has two acres of stuff. Two. Acres.

Bath tubs and gas pumps

Bath tubs and gas pumps: together at last.

If you are anywhere near the place and are in the market for anything vaguely vintage, check it out. You never know what you might find.

Larrys Mona Lisa

For instance…

Larry’s has a lot of everything (including old house parts, which I just bought back home), and is particularly strong in vintage signage.

Larrys signs

If there’s one of something, there’s likely to be another to compare it to.

Larrys Lamps 2

You might find something you didn’t even know you needed.

Larrys Big Jeans

The prices struck me as straight retail with some exceptions, but they were willing to deal.

Unless I read the tag wrong, this headboard/footboard set was $89.

Unless I read the tag wrong, this headboard/footboard set was $89.

The place pulls in the punters from all over.

Larrys Alien

Cottonwood is a cute town with plenty of other shops (including Ye Ole Hippie Emporium, which we unfortunately missed out on this time) and cafes. If you are in striking distance, it’s a fun ride out.

Posted in Decor, Furniture, Salvage | Tagged , , , | Leave a comment

Old Home Away From the Old Home

I’m sorry that the Krusty Haunted Condo is closed. But the haunted information booth is open.

– Info Booth Attendant

When I can, I prefer to stay in an older, non-franchise hotel.  It’s certainly not for the luxury – these places tend to be a little bit down at heel. But they offer other features, including a chance to live with some vintage architectural features for a short time.

I was in San Francisco for a conference this week, and I stayed at the Hotel Whitcomb. Reputedly haunted, the Whitcomb is known for flickering light fixtures and odd noises. I coincidentally stayed on the “haunted” floor, and I can attest that flickering lights and unusual noises have more to do with age and maintenance than with the spirit world. That is, unless there are poltergeists who like to have enthusiastic but remarkably short-lived sex in the room adjacent to mine.

The hotel’s lobby is spectacularly appointed with Tiffany glass and coffered ceilings.

lobby

Built in 1911, the hotel served as the interim city hall while the original was rebuilt. Apparently, there are still jail cells in the basement. In 1916, the building became a hotel as originally intended.

The rooms are comfortable, but lack most of their original flourishes. The hallways, however, are another matter.

It's Kubrickian!

It’s Kubrickian!

It was hard to photograph the hall light fixtures, but I believe the bases are rewired originals. They probably originally had exposed light bulbs, but have been retrofitted with those “boob” shades.

nice fixture

The other feature of these places is something amusing always happens. When service responses aren’t standardized, people’s quirks enjoy freer rein. Except for one Fawltyesque innkeeper in Nottingham whose demeanor and fiberglass-pod bathrooms almost put us off independent accommodations for life, we’ve gathered a lot of stories at these places.

At the Hotel Whitcomb, the doorman helped me flag a cab when there wasn’t one to be had. The gentleman was wearing pristine livery, including a frock coat and top hat. He proceeded to march out in the middle of Market Street and pull this pose:

karate kid crane pose

One of the great missed photo opportunities! (And I had a cab in 20 seconds.)

Have any good hotel moments?

Posted in Decor, Electrical | Tagged , | Leave a comment

Revisionist Histories: Staining a Fiberglass Door, Part 2

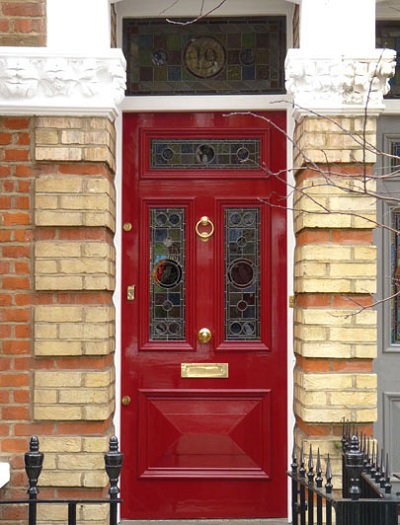
Last time, I explained how to prep an unfinished woodgrain fiberglass door for staining. This time, we’ll stain and seal the fake wood to give you an entrance that looks like the Real Door it wants to be.

The analogy breaks down rapidly, I admit.

This analogy breaks down rapidly, I admit.

There are a lot of tutorials out there for this job, but I found that some issues were not covered and that not everything worked as advertised. The process described here integrates the adjustments I made. As I mentioned last time, this series describes how to stain a door that is already embossed to look like wood — to learn how to fake woodgrain on a flat door, check out this video.

Ok, let’s DO THIS!

1. Selecting Gel Stain

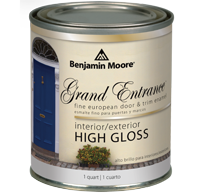
In Part 1, I listed project supplies. You will need gel stain for this project. Fiberglass is not porous, so it will not take traditional wood stains; they just puddle up on the surface or streak. “Staining” fiberglass is really a sort of faux finish because the gel stain all settles on top. The thick formulation simulates the depth of a real wood stain.

I like Old Masters, but Minwax is fine too -- as long as it's gel stain and it's the color you want, go for it.

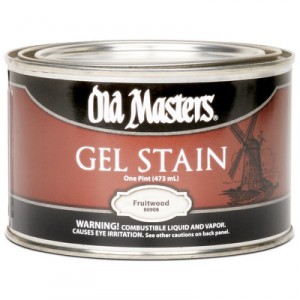
I like Old Masters and General Finishes, but Minwax is fine, too, and easier to find. As long as it’s gel stain and it’s the color you want, go for it.

Once you know what color you want the finish to be, head out to look at gel stains, keeping in mind you can layer different colors to reach something that isn’t already on the shelf. Also, the darker you want your door’s finish to be, the more coats you will need to build up.

Keep in mind that gel staining involves removing much of the stain after application, so you may need quite a bit. I used up about half of an 8-oz. can of black stain, half of an 8-oz. golden oak, and about half of a quart of Old Masters mahogany shades. I was completely lavish with the stuff and I was going for a deep finish (with the same general layering concept as my other stain-matching exploits), so judge your needs accordingly. Since then, I’ve become more efficient, but don’t worry about using a lot of stain — it’s not that expensive (relatively speaking), and I like the result I achieved that way.

2. Assume the Position

After assembling your supplies and prepping the door, set it up where you want to work. I preferred working on it on sawhorses, but you may like to be more vertical. Gel stain doesn’t really run, so vertical is fine from that perspective.

I worked vertically after I had to move indoors from the garage. Door is about 75% stained here.

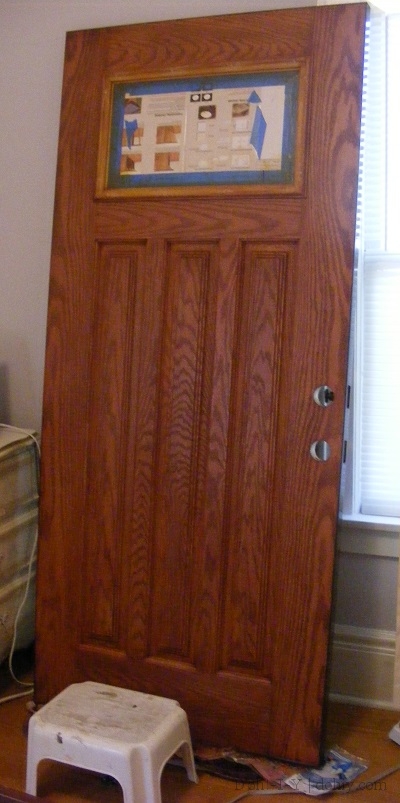
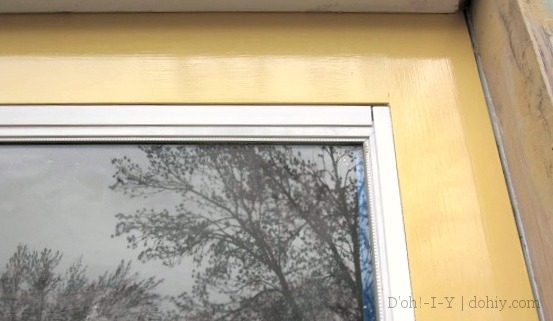
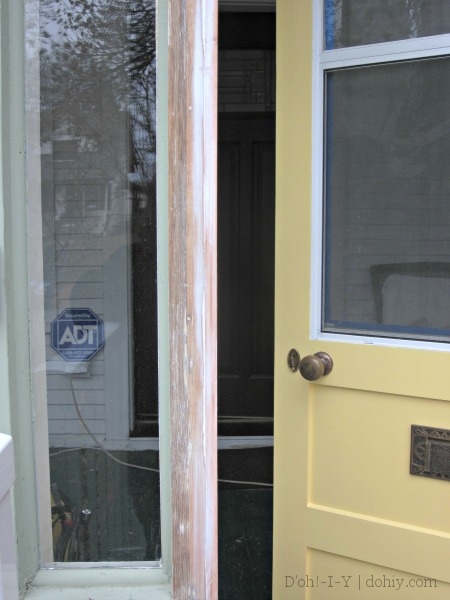
I worked vertically after I had to move indoors from the garage. Door is well over halfway stained here, but you can see the problems I had around the window.

Whether horizontal or vertical, it’s important to respect the full drying time, and then some. You want the surface Sahara-dry before you flip it and lean the new stain against a saw horse or a wall. I did one whole side to completion before doing the other side and then the edges.

Before you start staining, it’s useful to learn the specific order to follow when staining or painting doors. Basically, work from the inside out roughly as follows:

  1. Raised panels and adjacent recesses.
  2. Interior flat surfaces that have vertical graining.
  3. Flat surfaces that have horizontal graining.
  4. Flat surfaces on either side of the door (these will be vertically grained).
  5. The door’s edges.

Finishing the panels in a certain order is a good way to make sure that you aren’t leaving weird smudges and lines against the grain. If you go in this order every time, you will also know where you’ve been as the layers build up.

Using the same order

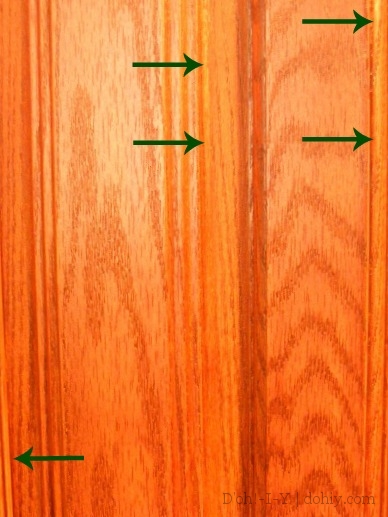
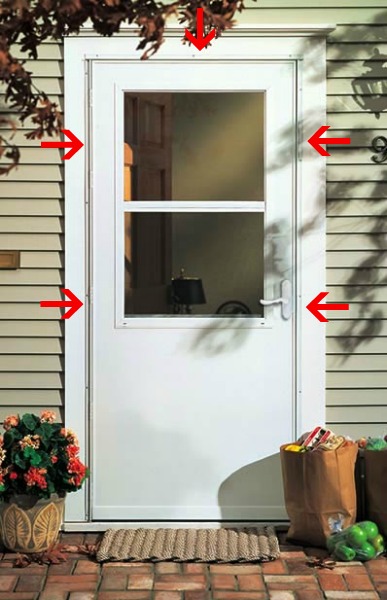
Early in the project, I learned the importance of sticking to the same order. The arrows show places that didn’t get a full finish on the first red layer.

Don’t worry if you overlap from one of these categories onto another a little bit — it’s all getting stained eventually! Having said that, when you are doing one side of a door, plan to continue until you’ve hit all the surfaces on that sides to avoid smudging at the overlaps.

3. And Now, At Last, The Actual Staining!

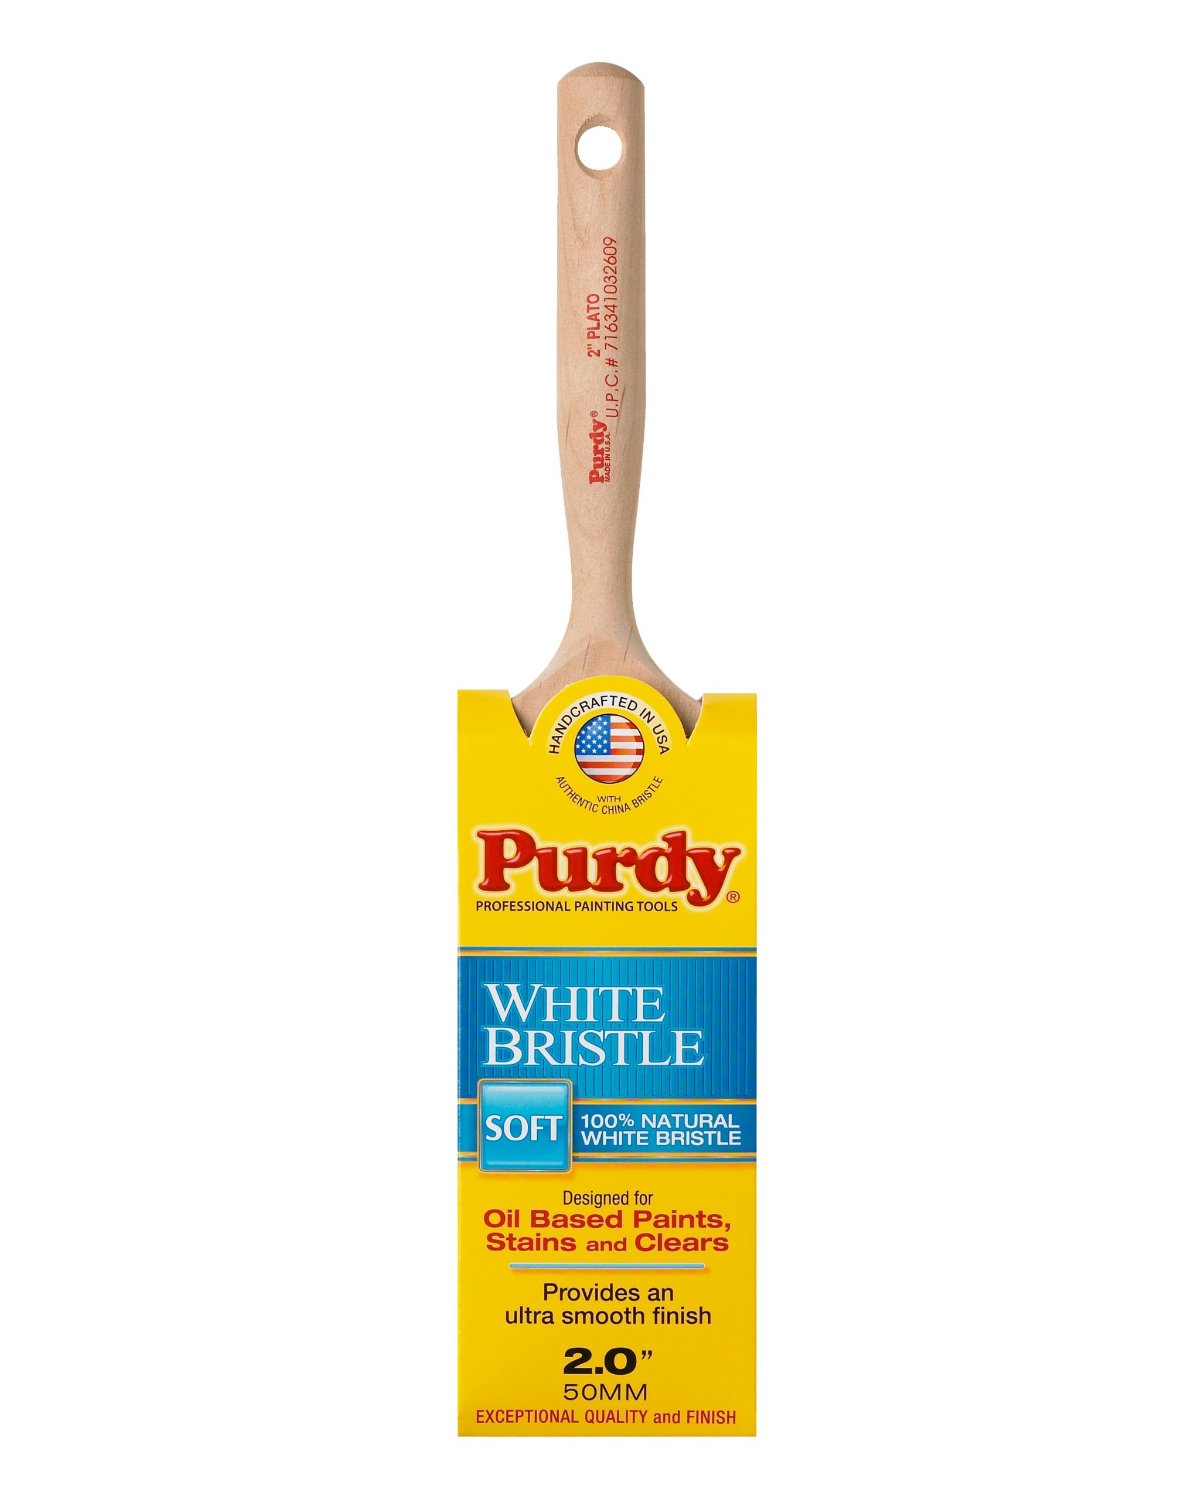
Welcome to the heart of the project! It’s time to crack open the stain. There are two ways to apply it: brushing or rubbing. I bought some outrageously priced brushes, but later found that rubbing the stain on with a painter’s pad worked better for me.

My technique ultimately involved rubbing on the stain with one pad, then buffing it with another to get a uniform finish. Moving across each side of the door from inside out, I built up thin coats until I had the depth of color I wanted. I ended up with six coats on each side (I layered colors to match our existing woodwork).

After the golden oak layer

Layering colors: golden oak + red = NEON!

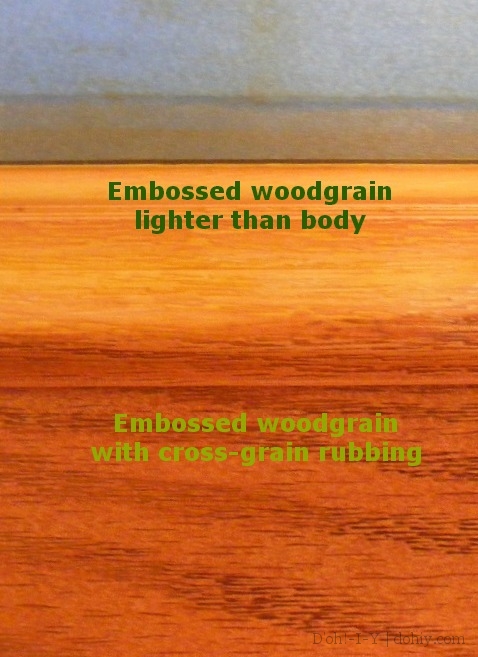
Every tutorial I’ve seen says to go with the grain. I found an exception. The grain effect on fiberglass is achieved through texturing, with the “grain” being lower than the surface. Look at any piece of actual stained wood and you’ll see that the grain is the darkest part of the surface, but fiberglass graining means the lowest points are recessed and easy to skip over. If you find grain that is not getting stained, rub (or brush) harder! But also try moving a dark stain cross-grain just enough to deposit stain in the lowest grooves. IMMEDIATELY rub that area with the grain to avoid smudges. I used a Spanish Oak (almost black) stain for grain emphasis and for overall darkening.

Bringing out woodgrain

If you are trying to match existing woodwork, try to bring some of the trim you are trying to match into your workspace. I laid down a golden oak base, then layered an Old Masters mahogany tone. When I compared to our trim, I discovered that my initial mahogany layer was tending a little too aubergine (US: eggplant), so I buffed that layer down and used a redder version for subsequent coats. Without the trim to place right up against the door, they would have looked the same to me and given me a mismatch. The trim will also let you know when you’ve made the finish dark enough.

Here's the door against the pre-existing trim after hanging.

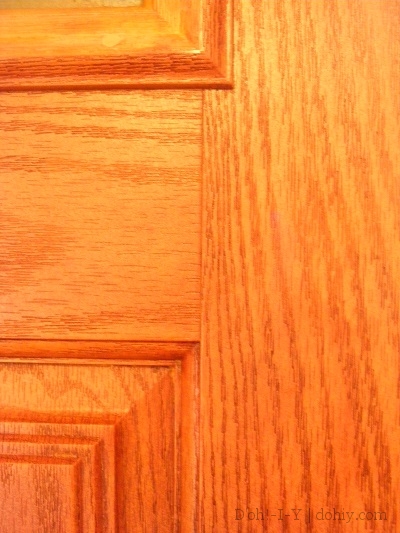
Here’s the door against the pre-existing interior trim after hanging.

4. Tips and Troubleshooting

This all sounds fairly straightforward (if time-consuming), but the tricky thing is avoiding tell-tale smudges. Wood absorbs stain, but fiberglass doesn’t care — the gel stain pigment just sits on top, and if you rubbed some of it unevenly, it will just set like that.

The last thing you should do after each coat is to carefully examine each joint and panel to see if there are any smudges or lines left from your application or rubdown. Then leave the room, have a quick drink, and come back and look again while you still have some open time. More than once, I missed a smudge on first inspection, but taking a breath and coming back gives you fresh eyes.

Smudges galore at the window plugs -- this spot was rubbed down a couple of layers with an eraser sponge.

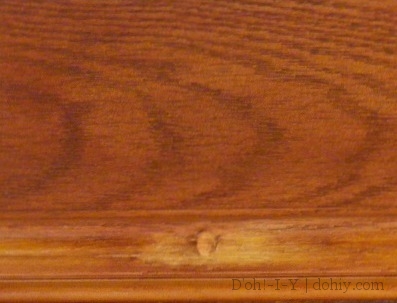
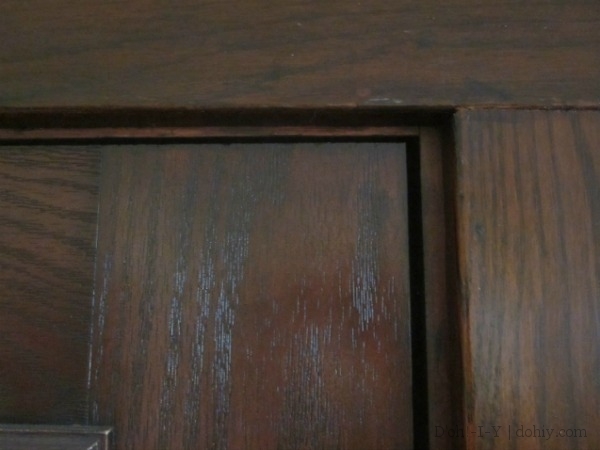
Smudges galore at the window plugs — this spot has been rubbed down a couple of layers with an eraser sponge prior to touch-up.

If you find you have some smudges or lines after everything has dried, freak not. I found recommendations online to use mineral spirits (British: white spirit) to rub down those areas so you can start over, but that turned out to be hard to do in real life. That stain did NOT want to budge! I found that a nearly bone-dry eraser sponge very lightly applied is much easier and as effective.

These are terrific (and so are the generic versions).

These are terrific (and so are the generic versions).

When you are fixing smudges or line, you don’t need to (and don’t want to) get down all the way to the original surface; you just need to get rid of enough of the smudge to build up a uniform finish over it. Use your judgment given the number of coats remaining and the stain color (the less you take off, the easier it is to match back up). Try to avoid this issue in the first place because feathering in can lead to more unevenness or smudging.

Keeping your layers really thin will help you avoid this issue.

As you can maybe tell, this project is a big pain in the neck! But you are near the end…

5. Sealing Your Masterpiece

After you’re certain — CERTAIN — that you are at the color and tone you want, and that you’ve fixed any booboos, and that the thing is super-dry, you can seal it.

Use a high-quality spar urethane and follow the specific brand’s instructions. I used one that allowed the finish to be wiped on because I’ve never yet brushed on urethane without leaving bristles in the finish.

I’m anti-brush! THERE, I SAID IT.

If the urethane requires a sand-down between coats, take it very gently indeed. You don’t want to cut into your finish because it will come up in a big hurry. I used three coats in a satin finish.

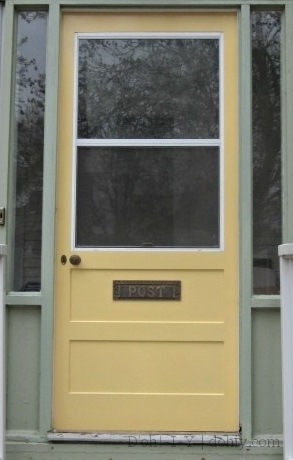
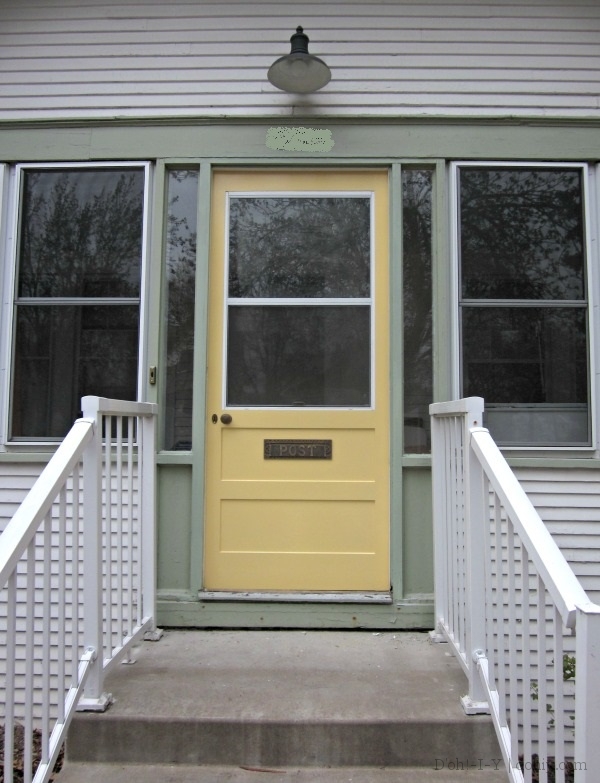
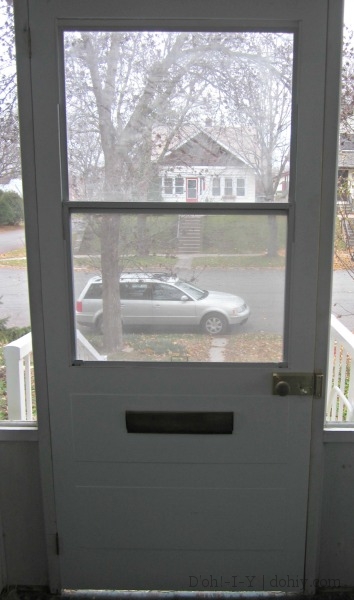
The door has been up for quite some time now, and it looks good!

Door from porch

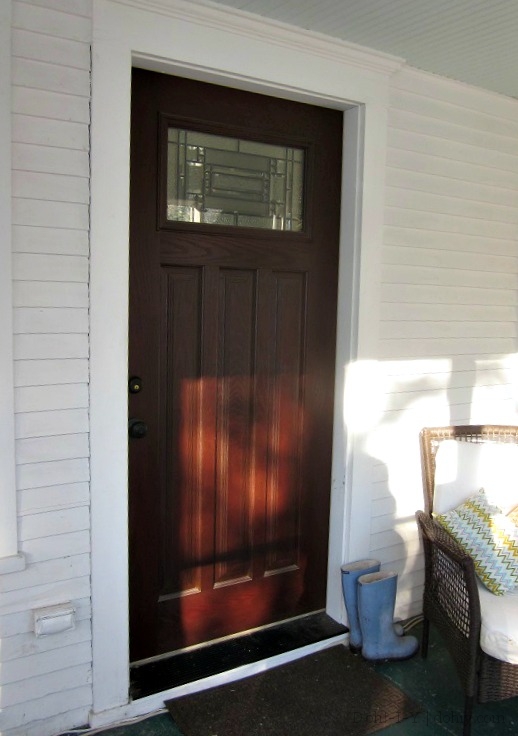
This morning on the porch. Those are not prop wellies! I really wear them!

Visitors ask if it’s the original door, and I was tickled that a builder friend asked if I wanted to finish doors for him. I said sure if he wants to wait several weeks for each door while I cobble together the time.

Full frontal

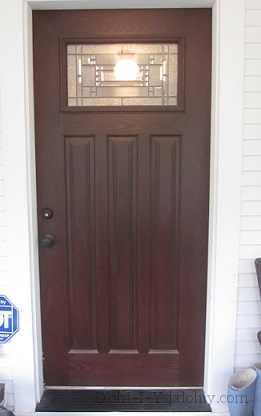
Full frontal with wellies! HELLLLOOOO, GOOGLE IMAGE SEARCH.

So that’s that, then. Warm house, wood-like door. Hurrah! Anyone else sporting a fiberglass door?

Related Posts Plugin for WordPress, Blogger...
Posted in American vs English, Decor, Windows & Doors | Tagged , , , | 10 Comments