
Grade me…look at me…evaluate and rank me!
– Lisa Simpson
The electrical inspector was here this morning. Last night, we went on a wire-labelling and tidying spree, and each of us still woke up thinking, “Oh, we should have also…[something-ed].”
I hear a fair bit about “those St. Paul inspectors” but we’ve always had constructive experiences. If something is wrong, they will tell us very specifically what it is and how to make it right. But we really wanted to pass first time to put the project back on schedule (more or less).
The inspector first reviewed the electrician-installed subpanel and the AC wiring, which passed no problem. He looked around at our work and commented, “Wow, you really labelled everything!”
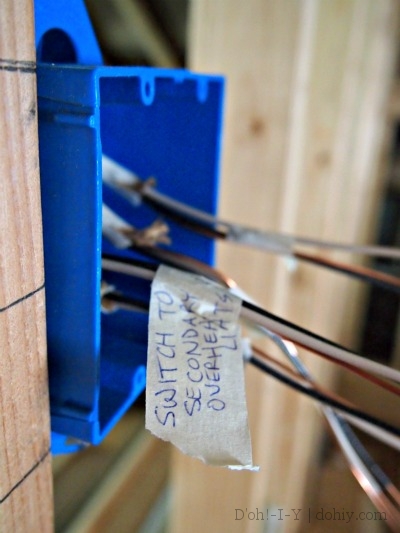
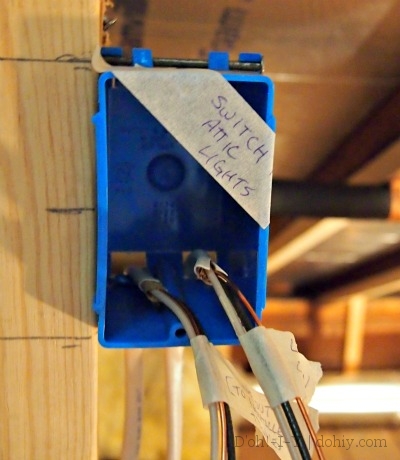
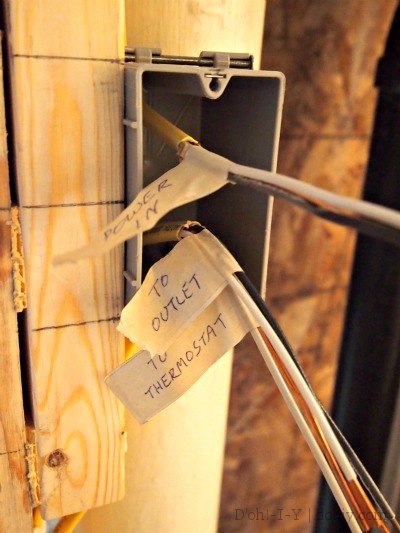
Yes. Yes, we did.
We also had our load calculations available for review and the working circuit map, which turned out to be unnecessary, but it would have been hard to explain without the documentation if the inspector had asked.
The upshot: we passed! Sweeeeeeeeeeet.

If you are doing your own wiring project (under permit, of course), here are our tips for rough-in inspections:
- Do everything to code. Right? As I’ve said before, I don’t feel comfortable telling you how to wire (there are many electrician-produced resources), but the first step is to DO IT RIGHT. Beyond that, though, you can help the process along in several ways.
- Remove trip hazards and clean up. The inspector will be happier if s/he doesn’t have to risk life and limb to check the work out, and a clean workspace shows that you actually give a rip. And of course, turn off any live circuits that the inspector is looking at! Shocking the inspector is no way to pass a rough-in.
- Label. Label label label. This is a good practice anyway, because it’s hard to figure out what wire came from where once the walls are closed up. In addition to wires in boxes, label any feeders waiting to be put into the panel.
- Make the wires final-ready. Cut back the sheathing to show the individual wires, and strip the ends. Everything should be ready to start hooking up once rough-in is approved. Keep in mind you shouldn’t have anything wired in yet — switches and outlets go in after the wiring itself is approved.
- Be consistent. The code might not require that all your wires be run at a certain height in a certain situation, but if you keep things tidy and consistent, it’s easier to inspect.
- Be knowledgeable. Know what you did and why. When the inspector asks what’s on a specific circuit, know what’s on that circuit, its amperage, and which panel it runs to. Know if there are GFCIs on the circuit, where the beginning and end of the run are, what type of wire you used, how many items are on the line, and what kind of breaker you will install. This is all stuff you will know if you plan your circuits and install and label it yourself, but you might want to review before rough-in.
- Ask questions. If you aren’t sure about something you’ve done or how you are going to finalize it, just ask. Inspectors are a terrific resource, and they want to see you do it right. You paid for the permit — ask the question!
I am so relieved!

2 Responses to Electrical Rough-in: Not So Rough