
Hug me, squeeze me, tug at my fur!
– Waylon Smithers
Some decades ago, my mother scored a couple of chairs cast out of some bigwig’s office. Now they live with us, including this rattily slipcovered one in our living room.
Well, it’s on the porch here. It’s surprisingly hard to find a place to photograph a dang chair.
Although I’m slipcover-mad, it didn’t work here. Wrong fabric, wrong kind of chair.
When considering redoing it, I thought, “How about faux pony/cow hide? Juxtaposed against the more traditional motif? That could be fun and different!” Then I saw this tour on Apartment Therapy:
Whatever, AT. The tour was published on October 12, and I ordered my fabric October 10, which makes my idea totally unique and not at all informed by Le Corbusier or every Western film ever made.
I ordered two yards of faux fur from the Online Fabric Store for $7.20/yard. Why faux? Because this is a lark — it’s not worth spending real money. Besides, if I want to sit on a pony or a cow, I’ll sit on one.
But not this one. Too scary. (via)
First thing was to remove the slipcover. I found the seat screws were missing, so diassembly was easier than expected.
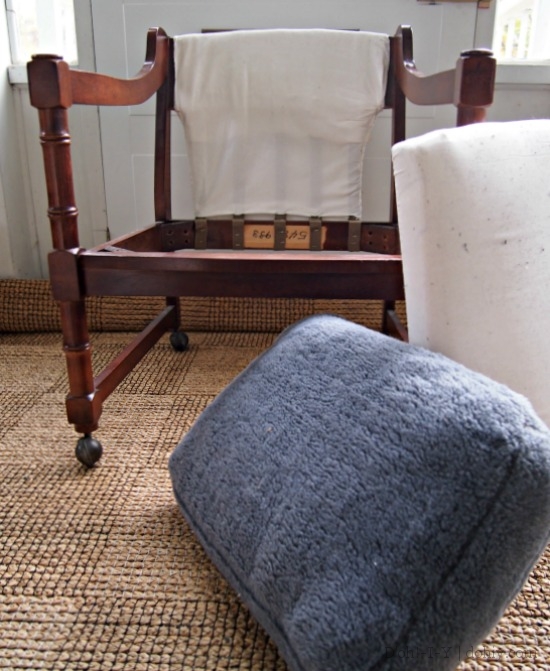
Thirty seconds later…
I cleaned everything, then used pinking shears to cut a piece for the seat to run back to front, overlapping the underside by a couple of inches. I left a seam allowance on the sides. After inverting the fabric and pinning it to the cushion, I cut side pieces and pinned those to the top.
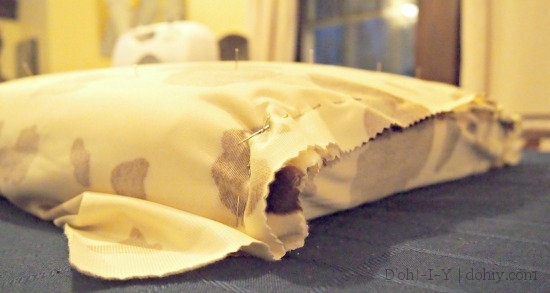
Too many pins, too much seam allowance.
I sewed it all together using a heavy-duty needle and thread. This bit of sewing avoids bulky folds for a smoother top. After sewing, I flipped it outside-right and pulled it over the cushion firmly (fitted but not straining).
STAPLE GUN TIME! I cut strips of uncorrogated cardboard about a half-inch wide (cereal boxes are good). With the cushion face-down, I pulled the fabric evenly around the base. Putting a cardboard strip over the fabric, I stapled through the cardboard and fabric into the wood. The cardboard spreads the pressure, reducing wear on the fabric that can cause rips.
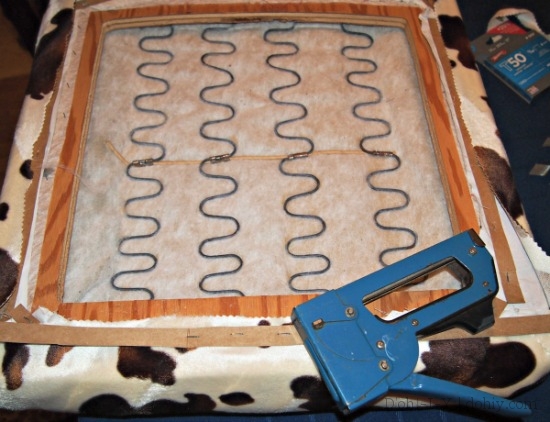
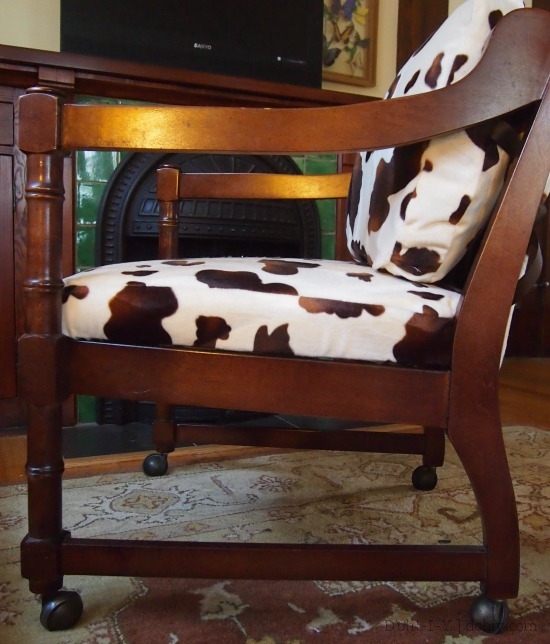
I trimmed off the extra fabric. Seat DONE.
Next, the back. This chair originally had an open back; I previously added strapping to support a back cushion.
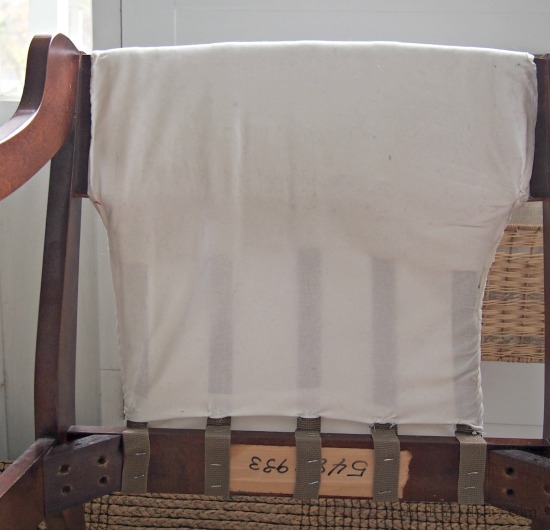
You can see the strapping pretty well here. It’s just stapled to the frame multiple times. The top bar is padded out with batting, and then the whole thing is smoothed over with muslin. And cat hair.
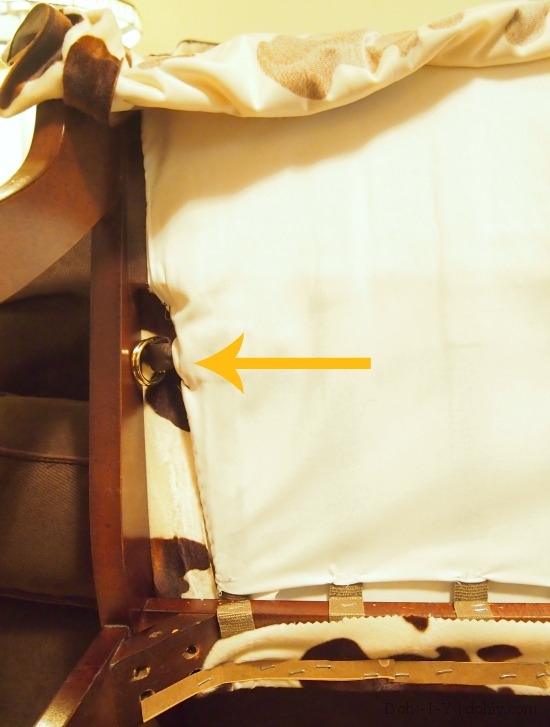
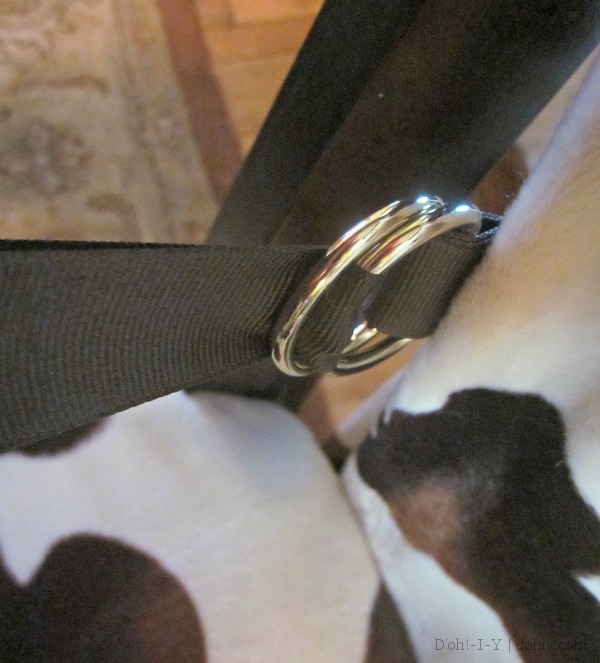
I sewed double D-loops onto the straps for cushion anchors.
Late night reupholstery = mood lighting
To do the back cover, I cut a long piece to wrap around the entire back. I folded the edges under to make the piece the right width, and tacked it with a few hand stitches. Starting at the inside bottom frame, I stapled the fabric to the frame (with cardboard; see bottom of photo above). At the top, I flopped the piece over and stapled that down inside the back above the initial staples. The piece is flat but not super-taut because it will need to move with the cushion slightly. A few side stitches helped keep it neat.
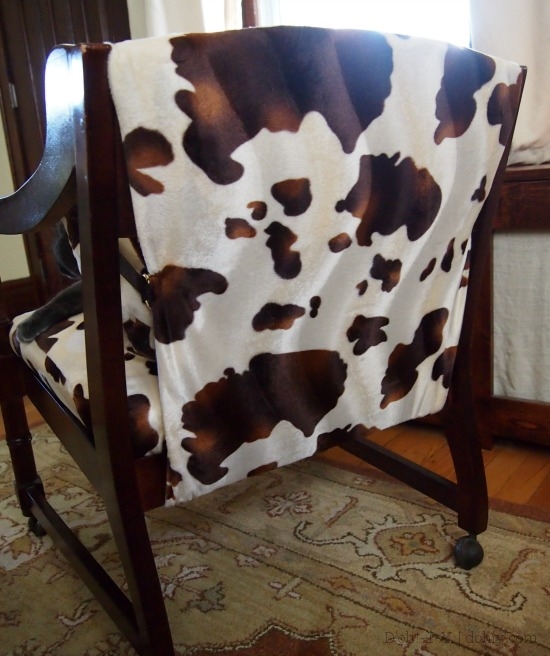
Far from perfect, but it’s the BACK.
I made a simple cover for the back cushion. To attach it, I sewed a piece of grosgrain into each back side seam (about 3/4 of the way “up”) so there was at least a foot dangling outside the cushion. I reinforced the seams and hemmed the ends, then whip-stitched the cushion inside.
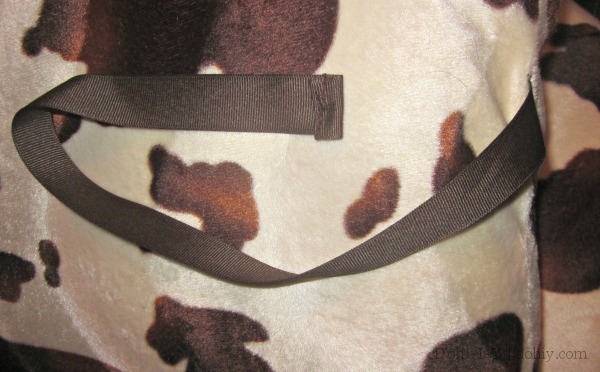
I ran the ribbons through the D-clips belt-style to hold the cushion in place.
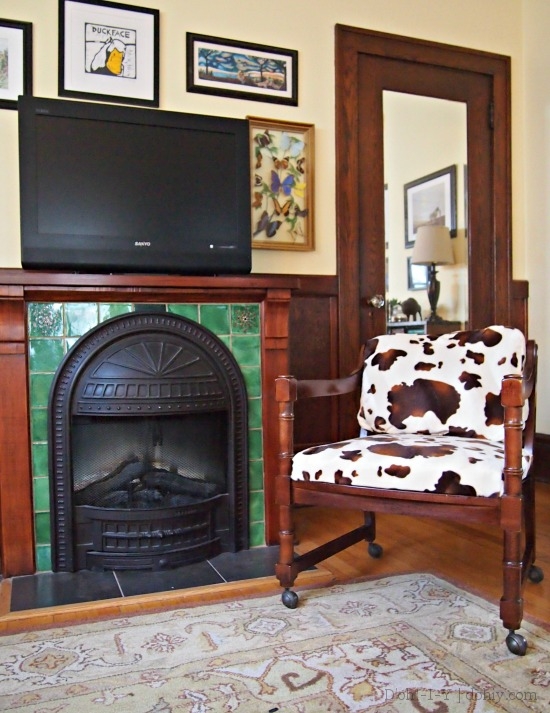
Done!
Here’s the seam on the side of the cushion.
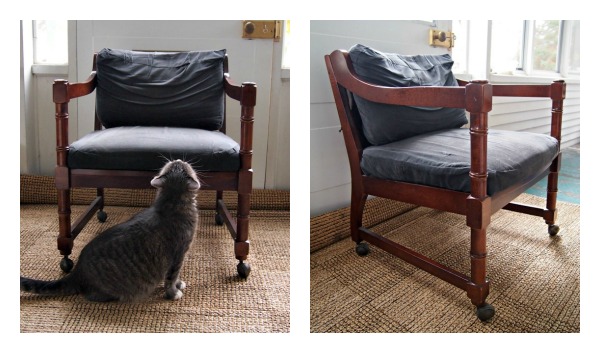
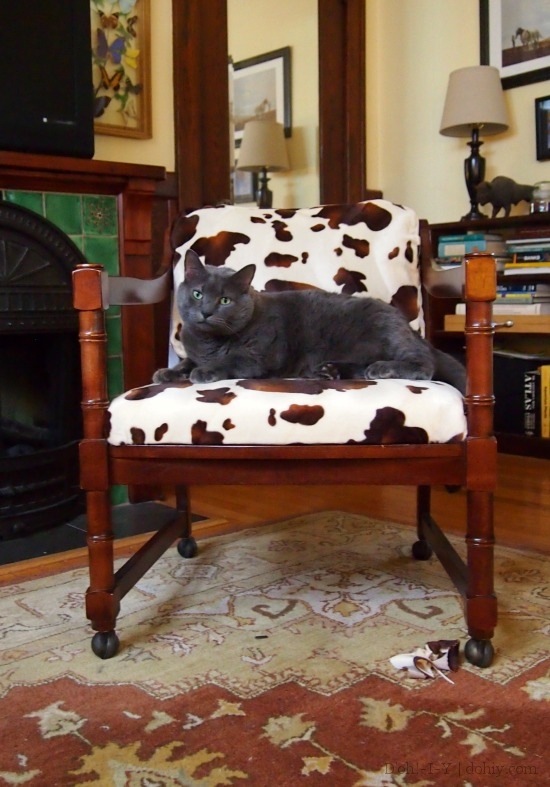
 And here’s the chair with its usual occupant.
Before I close, thanks to my lovely mother, who gave me the name for this post, and a memorably funny moment on the phone earlier this week:
Me: I’m recovering that occasional chair in the living room.
Mom: Oh, yeah? I love those chairs. With what?
Me: Fake pony fur.
*long pause*
Mom: You’re kidding, right?
I could never shake Mom’s cool when I was trying! How could I know that fake fur upholstery was her line in the sand?!

4 Responses to Phony Pony