
Tap-a-tap-a-tap-a.
– Vicki Valentine
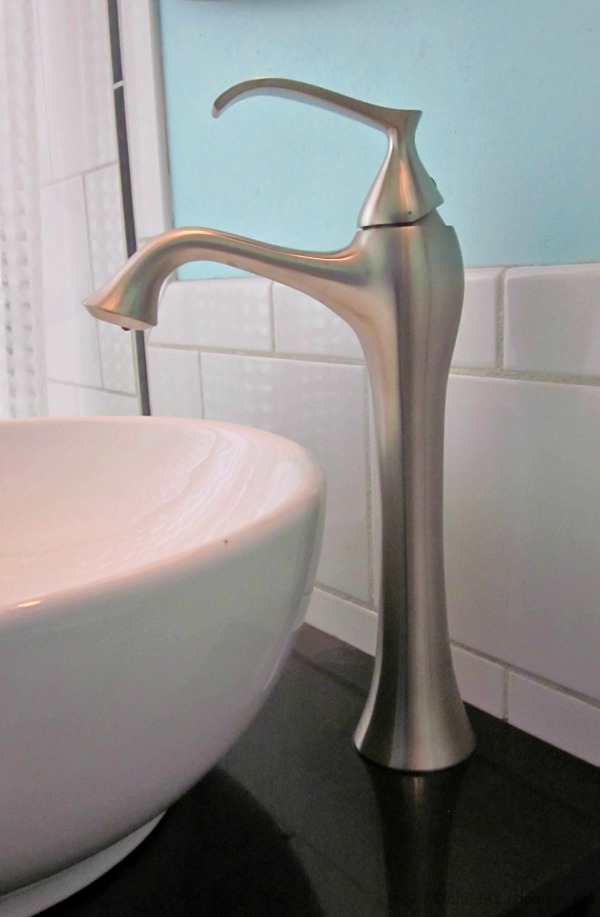
When we remodeled our main bathroom, the faucet was bought for economy’s sake, and its finish did not hold up well. I was patiently awaiting the right sale or stock clearance for a replacement when a great option appeared almost immediately. We found an open-box deal on a new Kraus tap.
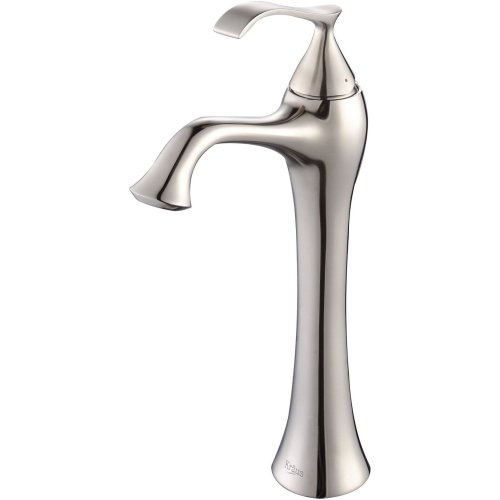
It much simpler than its predecessor, which pleases both of us, and it was a very good deal. I wasn’t familiar with the brand, but a few industry sites indicated that the warranty, quality, and customer service are good. The finish is said to be thick and resilient, so fingers crossed we won’t be back in the pits for a long time.
For small jobs like this faucet swap, the Kev and I don’t have a typical division of labor — it’s just whoever gets around to it, or we do it together if that works out. But I wanted to do this post because…
Lady readers, this job is completely doable.
It requires very few tools and absolutely no Y chromosomes!
Here’s how!
1. Assemble your supplies. You don’t need much:
- An adjustable wrench (UK: spanner)
- A Phillips screwdriver
- A big old towel or two
- A big bowl
- Cleaning supplies
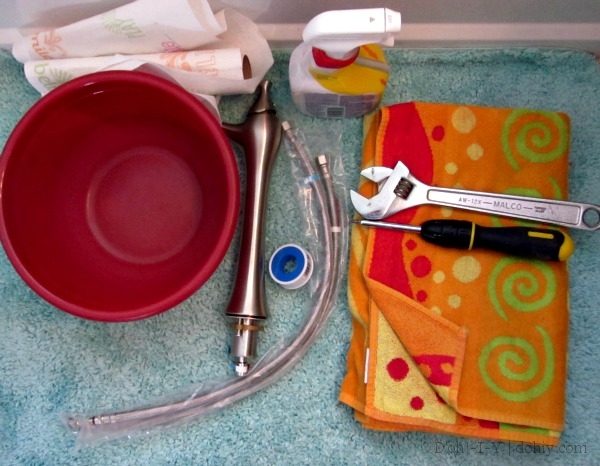
It’s also nice to have a big sealable freezer bag to collect any loose hardware for the old faucet in case you want to donate or sell it. You may want a pillow in case you need to work lying on your back.
2. Clear out the area under the sink. Express surprise at the rubbish you’ve stowed down there; throw half of it away. Put the old towel under the supply lines on the wall to catch drips and put the bowl nearby.
3. Turn off and drain the water. There are valves under the sink for the cold and hot water supplies. They are the silver handles on either side of the drain.

Turn them off (right/clockwise). After they are off, turn on the existing faucet to clear as much water as possible out of the lines.
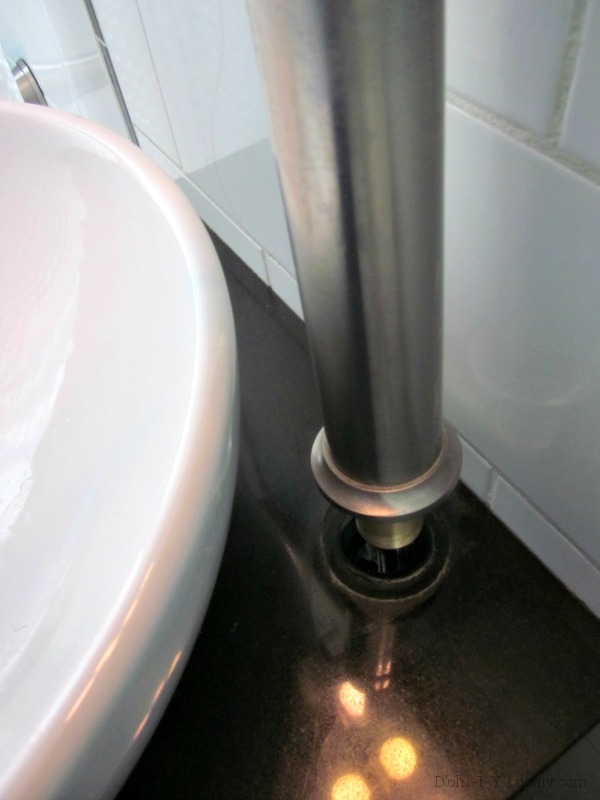
4. Unscrew the mounting hardware under the counter. Don’t pull the faucet out yet because it’s still attached to the water supply! Just loosen the nut that holds the faucet in place and slip it off the threads. You will probably need to start it with the wrench (left/counter-clockwise — that’s “anti-clockwise” in British English), but then loosen it by hand after the first couple of turns.
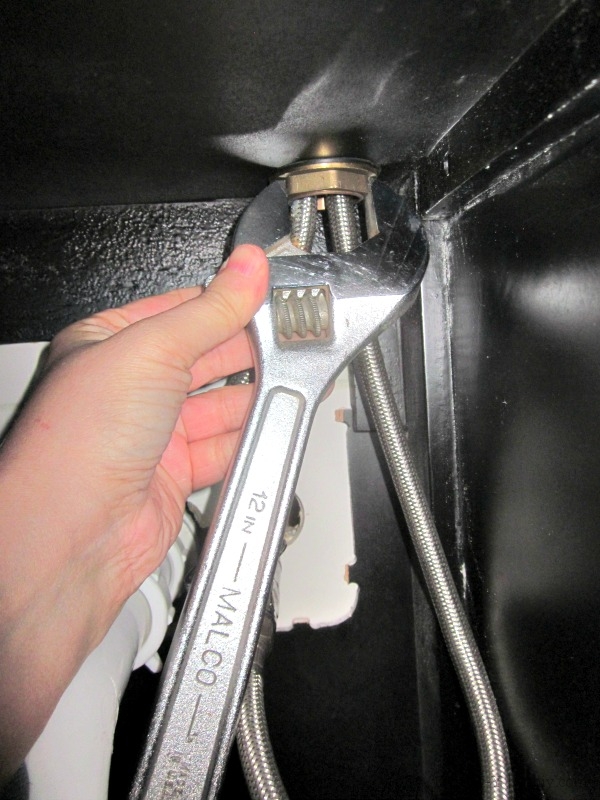
You may not have enough room to hold the wrench straight out from the nut, but you can get enough leverage at another angle (use the handle, though–I’m holding this way because I have a camera in the other hand!).
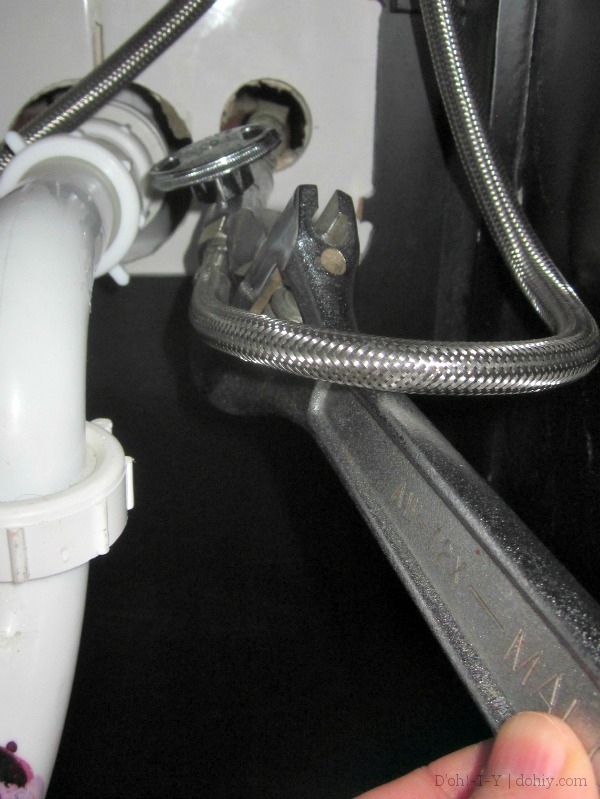
5. Disconnect the hoses from the wall. Here’s where your towel and bowl will come in handy! Loosen the nut attached to the hose that goes into the wall fitting (in front of the valve you turned off). Again, you’ll need the wrench to get it started. Loosen it and keep the open end facing up when it comes free. Set the open end in the bowl, and most of the water will drain there. Repeat for the other side.
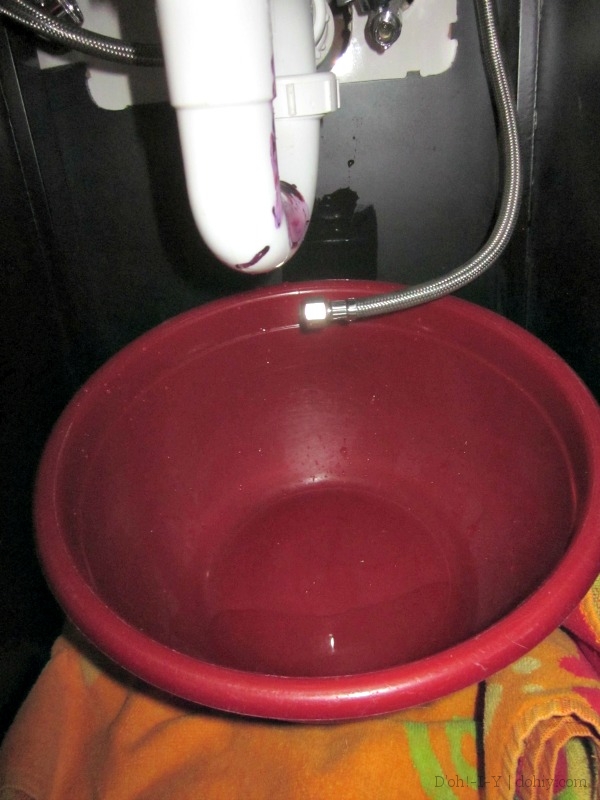
You don’t want to be too rough with the supply lines because you don’t want to open up a leak inside the wall. Be firm, but don’t go full Hulk with a huge amount of torque on the supply lines. Slow and steady.
6. Remove the old faucet. Once the lines are drained, take the mounting nut off the lines and then lift the old faucet out through the top of the counter, pulling the old hoses along with it. Before starting with the new faucet, clean and dry the area formerly covered by the old faucet body.
Lifting out the old faucet.
7. HALFWAY. Take a break!
8. Put the new faucet through the countertop. You’ll want to follow the specific instructions for the new unit, but I’ll make some generalizations. There will probably be a rubber washer or O ring that slips over the threads and sits underneath the faucet body, so put that on first.
O ring already on the faucet.
I had a hiccup at this point. The new faucet would not go through the hole, resulting in a Happy Gilmore-esque reaction from me. On closer examination, I realized that the hole in the granite top did not match up perfectly with the hole in the wood top of the cabinet. I put a grinding wheel on the trusty Dremel and sanded the ridge in the wood down, giving the faucet a straight shot.
Terrible picture to show the misaligned wood and granite tops (a contractor did this, and we paid him).
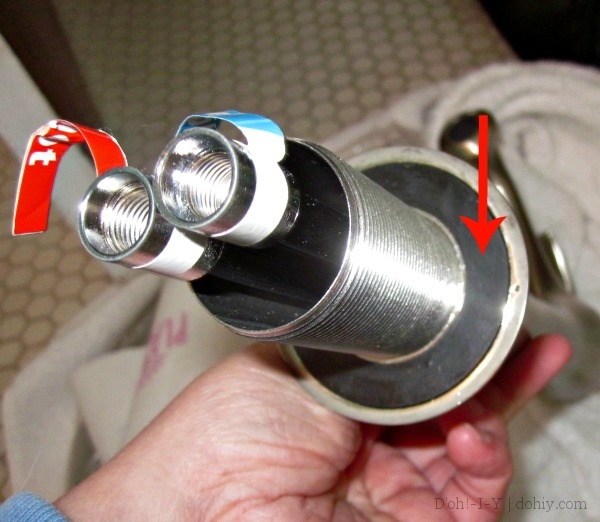
9. Secure the faucet in place. Following the instructions, thread on the mounting hardware for the faucet. The old faucet just had a rubber washer and a big nut, but the Kraus has a weird series of things: a rubber washer, then a brass washer, then a threaded piece with two Phillips-headed screws through the sides. It doesn’t matter, though, because the theory is the same — hand-tighten all the stuff they give you, then double-check that the faucet is pointing the way you want it to up top (adjust if necessary), and finally tighten with a wrench (or, for the Kraus, with a wrench and then a screwdriver). Make sure the faucet is really solidly in place, with no movement when you use the handle. Well, except that the handle should move, of course.
Keep the helpful “Hot” and “Cold” labels on, but out of the way when you are tightening the nut.
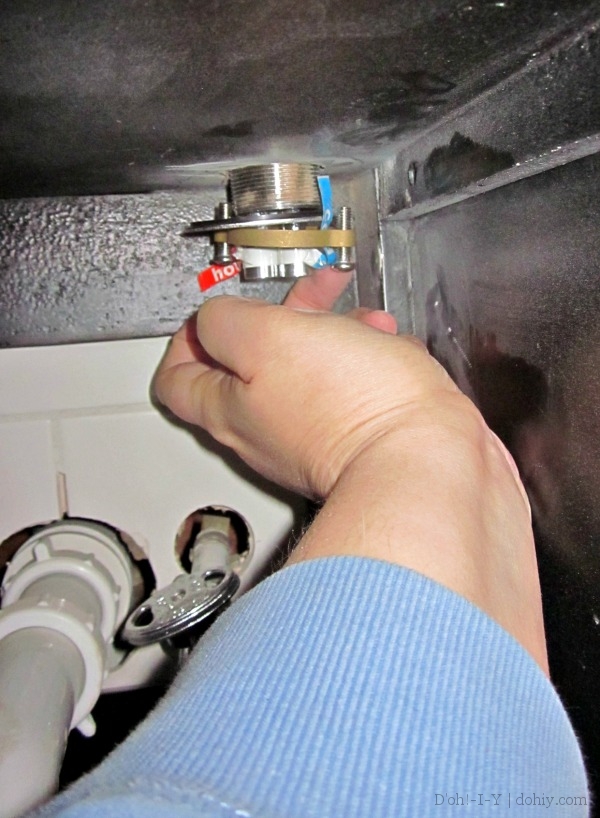
10. Attach the new hoses to the faucet. Attach the new hoses to the faucet first because you will turn the hoses to screw them in. You can’t do that if they are already connected to the wall (as I figured out after I tried to do so).
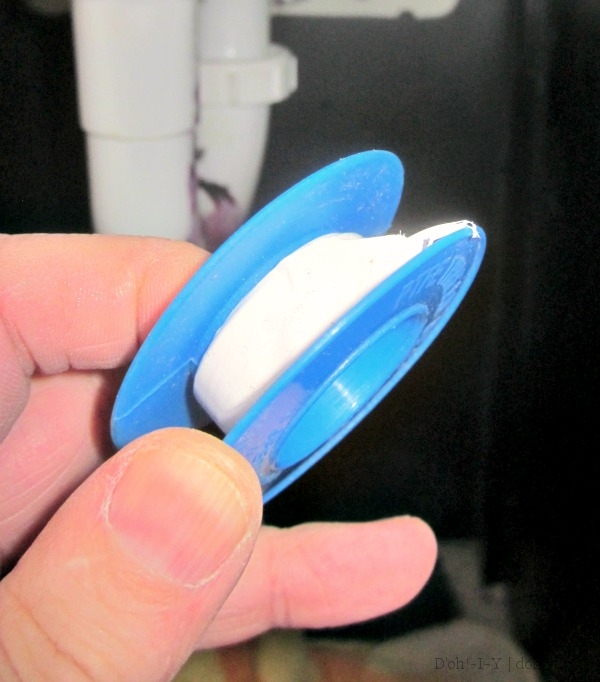
Thread tape.
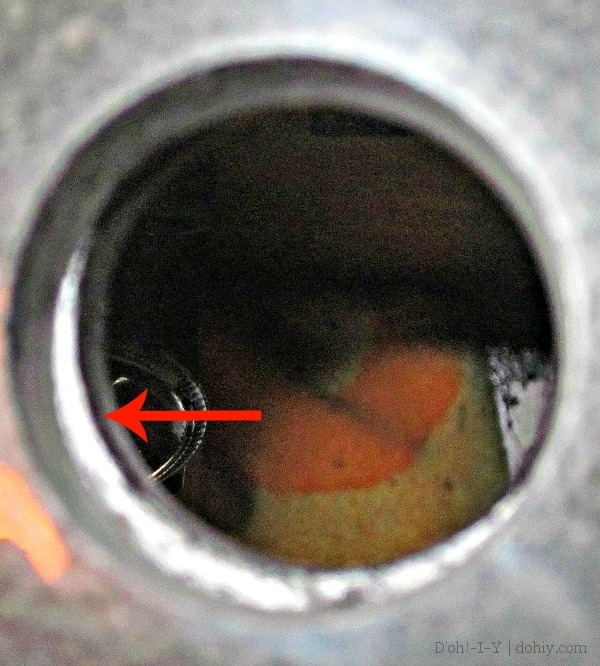
Your new faucet might come with some plumbing thread tape as ours did, or the directions might tell you to use it. If so, it’s cheap and easy to use. Wrap a small piece around the thread at the top of the new hose before screwing it into the connector at the bottom of the faucet (the protruding pieces marked “hot” and “cold”).
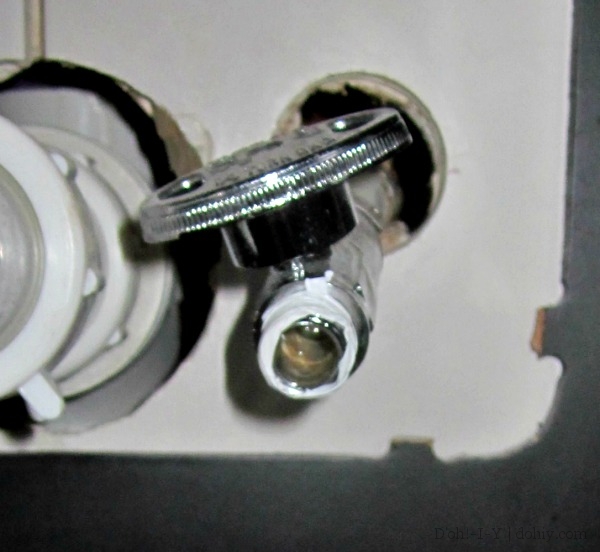
Thread tape on some threads (although not the threads we’re talking about in this step). This is also a good view of the valve handle, at a jaunty angle above the threads.
Thread tape has the consistency of wet toilet paper, and it will scrunch up a bit as you screw the piece together, but not to worry–it just helps fill up the spaces between the threads to help prevent leaks. Hand tighten the connections, then snug up with the wrench.
11. Attach the new hoses to the supply lines. Dry off the threaded ends of the supply lines, and wrap on some thread tape (shown above). Then screw the hose connectors onto the threads until hand-tight. Use the wrench to finish up, remembering not to go crazy twisting the supply lines. Most of this step might be easier to do lying down and looking up at the connections, especially if you have a pillow.
12. Turn on a supply valve! The moment of truth! Make sure your towel is in place, and slowly turn on the supply valve for the cold water. Mine leaked! So I turned the valve back off and tightened the connection between the hose and the supply line another turn with the wrench. This time, no leaks! Repeat with the hot side.
13. Test the faucet. Jump up and turn on that faucet. It will splutter a bit at first, but get a good stream going. Then feel around all the connections while it’s running to see if you have any leaks. If not, hurrah! If so, just recheck the problem spots, possibly disconnecting and redoing a connection with more thread tape.

Mayya having her first sink drink with the new tap.
I left the cabinet clear and put some newspaper under the sink. I’ll leave it this way for a couple of days to make sure there isn’t a slow leak I haven’t caught yet.
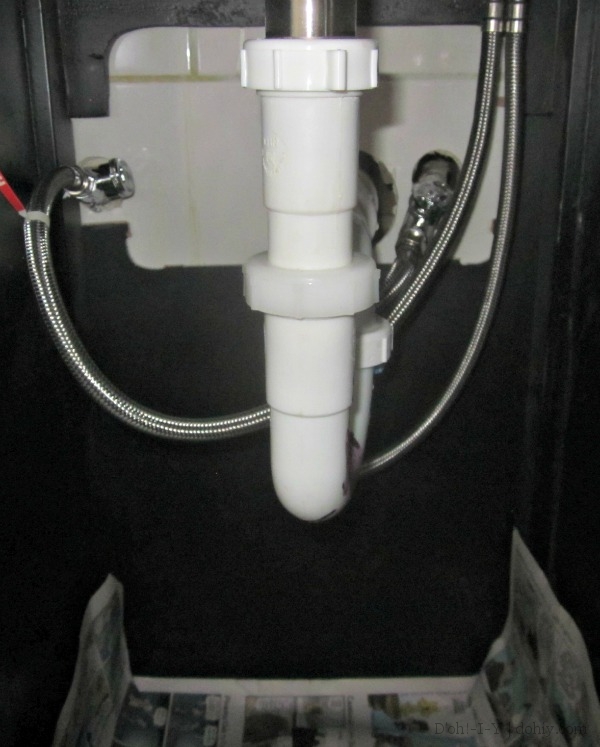
The newspaper (or a paper towel) will show if there are drips. During this time, I’ll probably apply some wax to the faucet to help protect the finish since the last model fared so poorly.
Now take a small amount of the money you would have paid a plumber for this job and pick up a pint of ice cream or some margarita mix, and celebrate. New skills and a new faucet!
