
Can’t sleep, clown’ll eat me…can’t sleep, clown’ll eat me…
– Bart Simpson (in a clown bed)
Things are starting to get done in the bedroom. Back at the dawn of time in March, we researched and then ordered a storage bed. It was an unfinished piece that we ordered from a company out east.
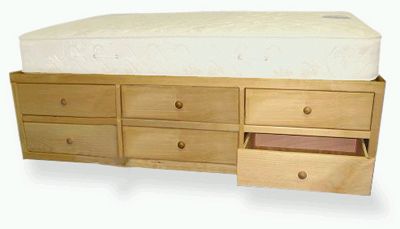
12-Drawer Queen Storage Bed by Delroc Furniture
Since its arrival in early April, I’ve finished the wood and added cup pulls. It was looking pretty done by that point, but we needed to wait until we could get it into the bedroom to do the last few things.
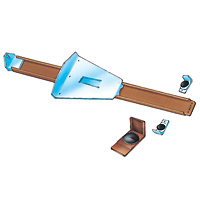 One of these things was to make the drawers more functional. It was my original intention to add metal drawer glides to the piece. There was an option to have the bed delivered with or without them; the price increase for glides wasn’t bad, but it sent the shipping through the roof (must put it over some weight limit). But we still wanted to avoid wood-on-wood induced sawdust and to have the drawers move smoothly, so we decided to order without glides and retrofit. I picked up some single-rail, undermount glides from Rockler.
Before getting freaky with glide installation, we mocked up one drawer to see how it would work. The Kev built a center support for the rail to attach to and we tacked it all together.

I attached the glide itself to the underside of the drawer. With duct tape, natch.

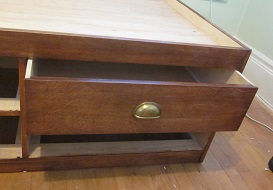
We inserted a drawer and it worked! But it made the inset drawer fronts sit a little high in their openings. It was within tolerances, but it didn’t look great. It is nice that the glide locks the drawer in so you can’t yank it all the way out, but these days we’re not rock-n-roll enough to be strewing furniture parts hither and yon. The glides are good for retrofitting — I do recommend them for that — but they just weren’t going to work for us.
Feels slimy, but isn’t.
The alternative was drawer tape. Drawer tape attaches to the rails a drawer sits on and reduces friction (and dust creation). Initially, we could only find thick (10 mil, which is 3/8″) nylon tape. That was thick enough to put the inset drawer out of good alignment, just as the metal glide had. But then we found Slick Strips (ewww, I know), which are only 1/32″ thick — less than one mil! According to Woodcraft, “This special UHMW (Ultra High Molecular Weight) adhesive-backed flexible plastic film has a low coefficient of friction and a high abrasion resistance that surpasses even Teflon.” Even Teflon! It takes one’s breath away.
The Kev cleaned the drawer rails and swiped rubbing alcohol on them to remove any oils. After cutting the strips to length, it was just a matter of pulling off the backing and sticking them down. I don’t know WHAT this adhesive is, but it sticks like grim death, which is great in the long run but a little tricky in the installation. We persevered.
Moment of truth — the drawer slides wonderfully, and the skinny tape doesn’t mess up alignment. It’s a winner!
So that was one thing. The other thing was that this bed is basically two separate dressers, and we wanted to bolt them together for long-term stability. First step was to align the two halves and then clamp them together so we could drill bolt holes that would line up correctly.
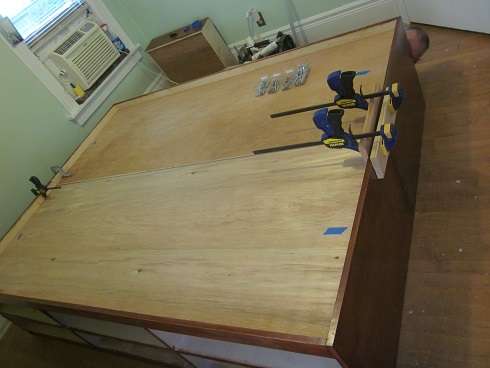
This is where we began to think the bed was gonna win on the home stretch. In the picture, you’ll notice the openings for the drawers are not super tall and the sides of the bed are comparatively deep. But did you notice what these dimensions meant for the Kev when trying to drill through the structure from one side to the other?
Quite a bit of stretching, cramping and generalized moaning ensued from both of us, since a bolt inserted on one side must be immobilized from the other. The face-smooshing exceeded even cinematic levels.

We managed to add six bolts — three along the upper structural rail and three along the bottom. I need a massage to put all my various shoulder muscles back into place, but you can stick a fork in this bed because it is DONE. (Update: Here’s our review of the bed after using it for a few months.)

4 Responses to Making the Bed