
Doll: I’m Krusty the Klown and I’m going to kill you!
Homer: Heeheehee! Didn’t even pull the string that time.
– The Simpsons
When I squared up the Princess Leia frame the other day, I worked by faint, cold light filtering through a tiny, high window. I do love martyrdom, of course, but on this occasion, my suffering was because the pullchain on the big worklight was broken.
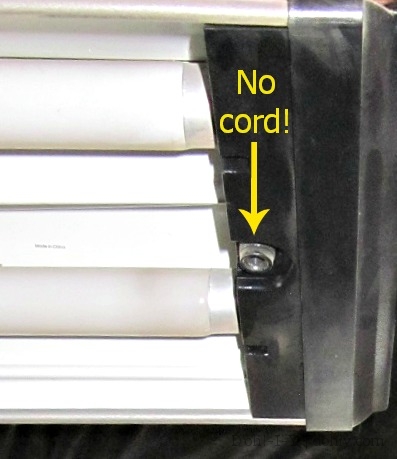
If you have pullchain lights or fans, you’ve likely had the fun surprise of pulling the chain or cord clear out of the fixture.* I’m certain light and fan manufacturers would prefer that you buy a replacement unit, but fortunately, swapping out one of these switches is not difficult. You just need a basic grounding (heh) in electrical work, including how to apply a wire nut.
Not for this
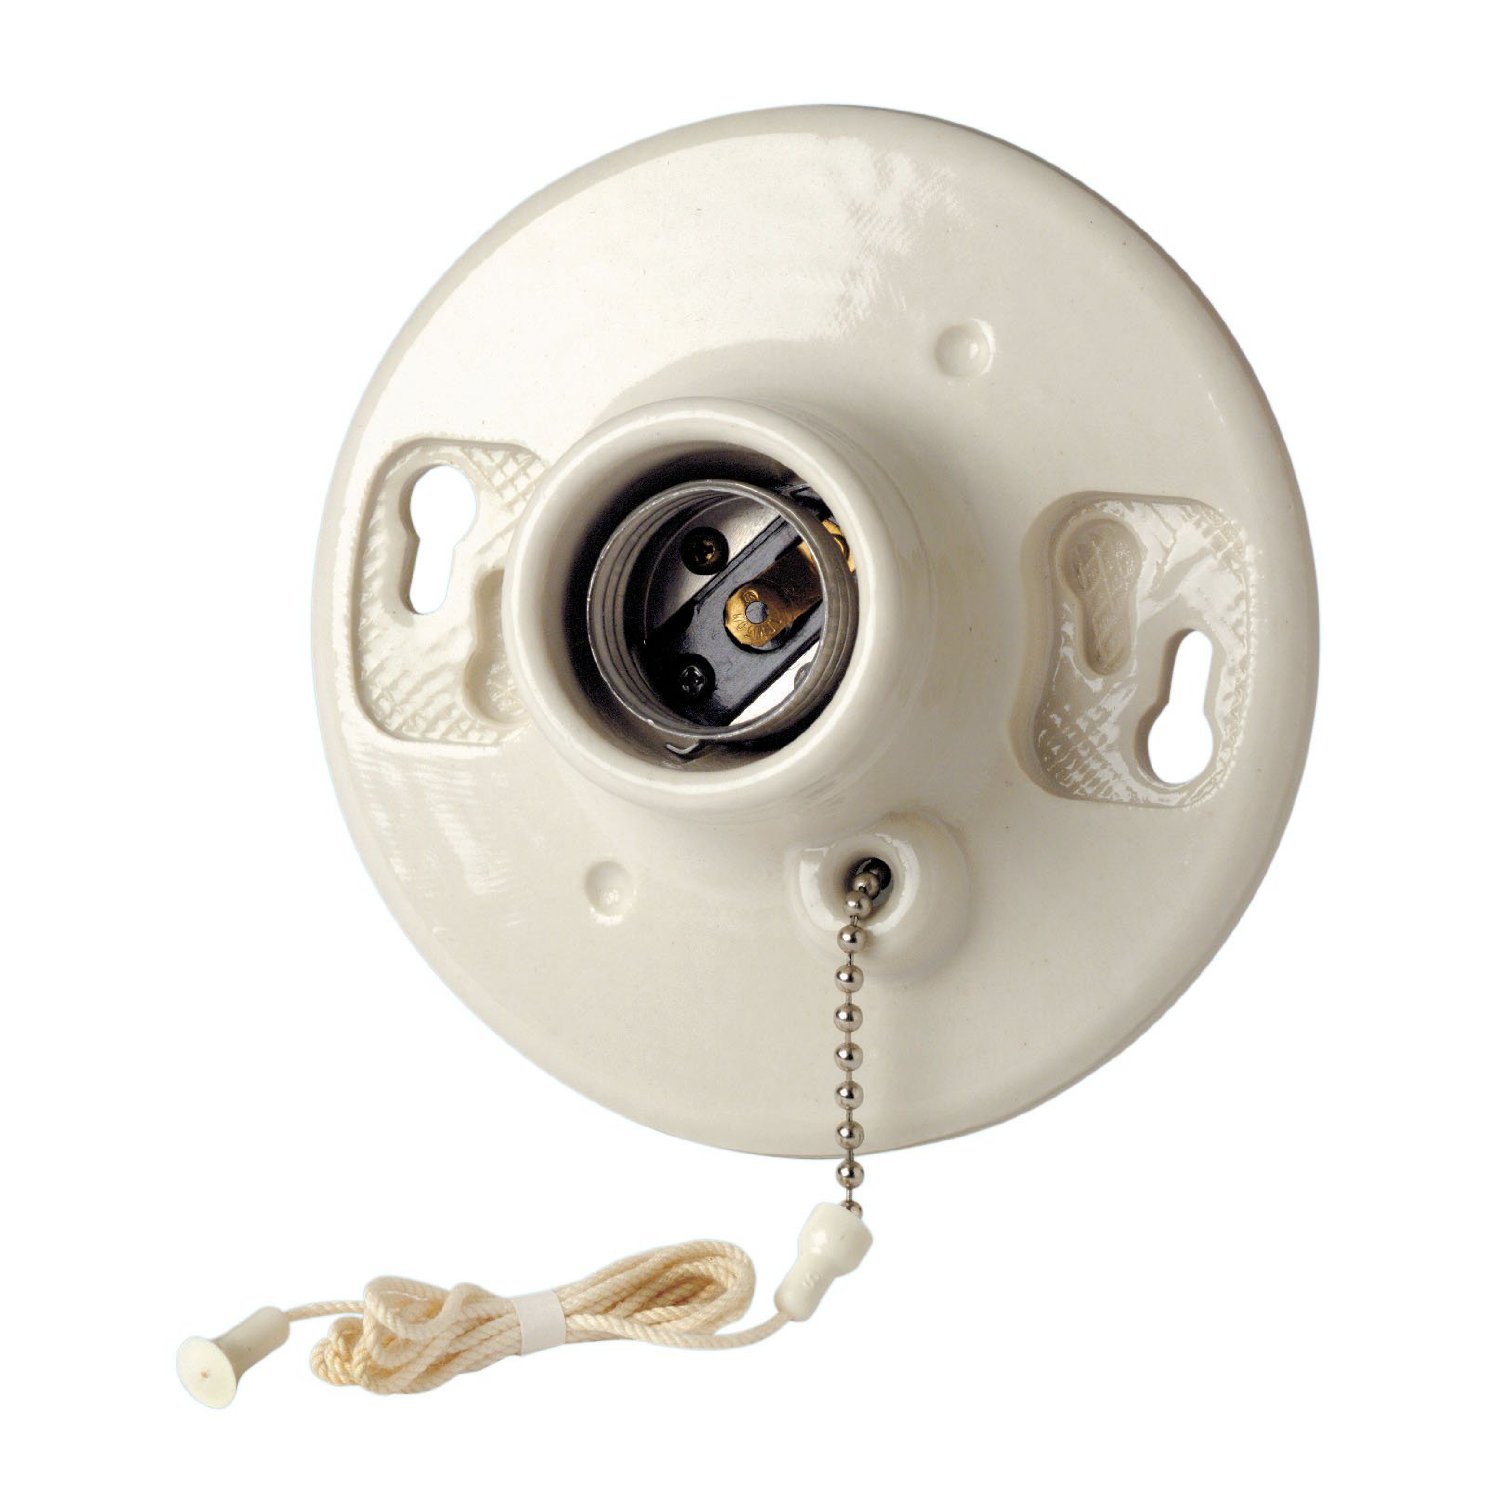
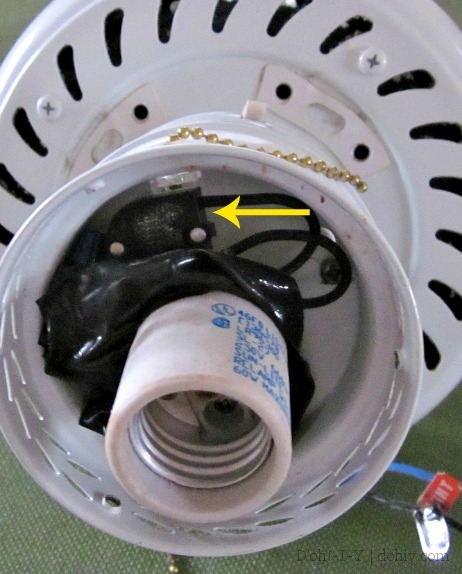
Before starting, please note that this process does not apply very well to the old-school porcelain lamp bases (such as the one on the left) with pull chains. Those switches are often integral to the housing, and in any event, it’s just as cheap and easier to buy a new base. Be aware, you also need to be completely clear on how to wire a light socket to wire a porcelain lamp base to replace one of those; the wiring described here won’t work for you.
With that disclaimer, here’s how to replace a pull-chain switch!
First, TURN OFF THE CIRCUIT OR UNPLUG THE THING.
Second, GO BACK AND MAKE SURE YOU TURNED OFF THE CIRCUIT OR UNPLUGGED THE THING. It’s especially important to do a double-check with a voltage tester on hard-wired items.
Take whatever it is down so you can work on it. Remove breakable stuff like lightbulbs and set them aside.
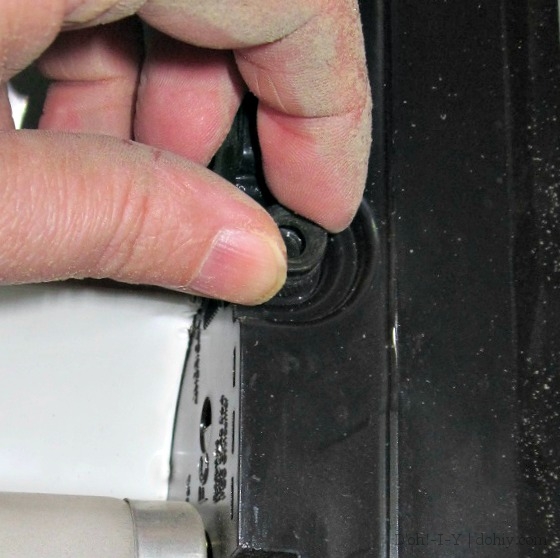
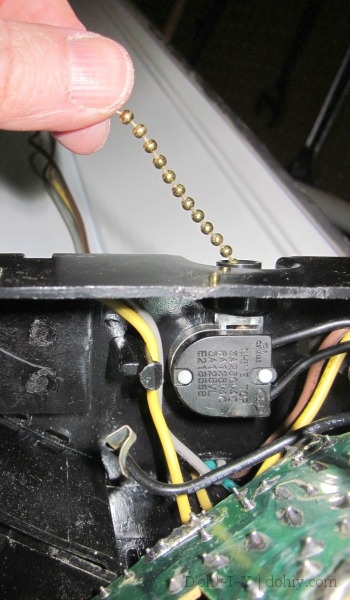
Unscrew the pass-through nut that the pull chain…um…passes through, and then disassemble the housing over the switch.
In my defense (although not a great defense), the top of the light was covered in sawdust.
The housing will vary widely depending on what you are working with. When I did this job on a ceiling fan light, there were obvious bolts holding everything together, but for this cheap fluorescent worklight, everything sort of snaps together, so I had to do a fair bit of prying and nudging. I did a little bit of the nudging with a hammer. Carefully and lightly, but still with a hammer.
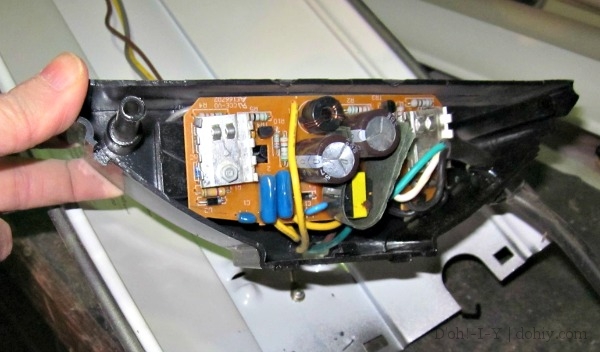
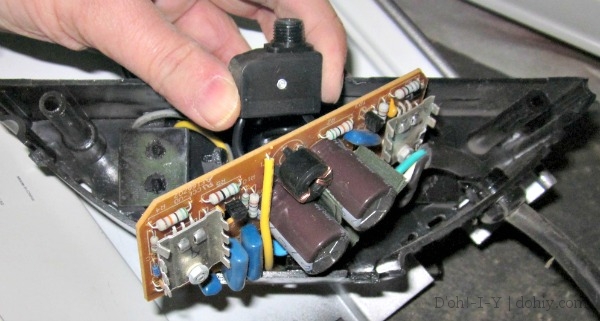
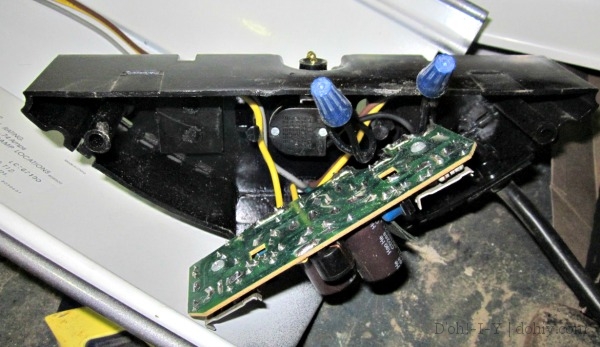
The innards
Once you are inside the housing, you may need to shift a circuit board around to pull out the bad switch. Just pull it out of the way slowly and gently by the edges and you won’t damage it. Try to avoid touching any of the connections on the board or any items attached to it.
Pull the switch out. It will have two wires that you need to disconnect.
The wires are coming from the bottom (or top, depending on perspective) of this old switch. The plastic housing is permanently riveted together (or it was).
Best case, wires from the switch will be connected to wires running to the circuit board with wire nuts that you can just unscrew. More likely, though, these wires will run into the switch, in which case you will need to either unscrew the housing (if you are lucky and it’s a housing with an obvious screw holding it together), or you will need to pry the dumb thing apart (if you are me and it’s today). If it’s the latter, it’s no big deal — the switch is broken anyway, so the fact that you are going to break into the housing isn’t ruining anything worth saving. Long story short: One way or another get those wires disconnected from the switch.
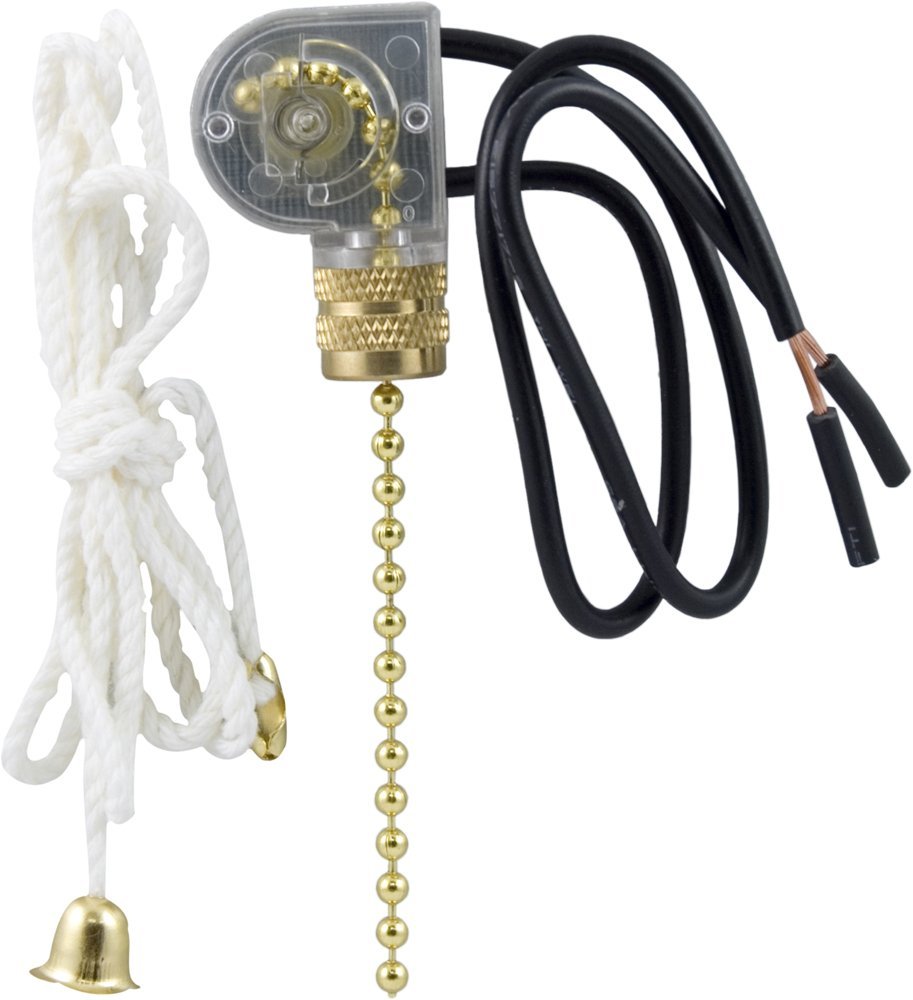
You can buy a replacement pull-chain switch anyplace with a basic wiring/lamp parts department. Make sure you buy one that will handle the current you want to put through it; also, make sure it’s the right application. Fan pulls might be three-way switches (for off-low-high power), so don’t use those to control lights or vice versa.
If you are a house-parts hoarder, however, you might already have one on hand.
Me: Hey, have you seen that ceiling fan carcass?
The Kev: No.
Me: The one I said I could cannibalize for parts someday?
The Kev: Still no.
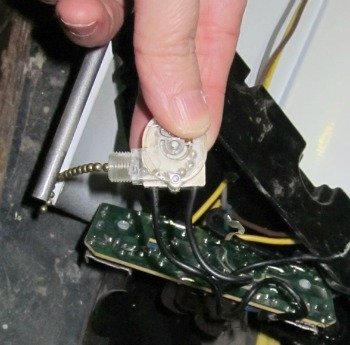
I found it anyway, and ta-da! A switch.
There it is!
These switches are all pretty standard, but the physical size may vary a bit. This variance can make it tricky to put everything back together at the end, so if that will be an issue, you can order the exact replacement part. Look for the part number imprinted on the switch you just took out and search for that. It should not cost more than $10 with shipping online, or about $5 from a hardware store.
“New” switch ready to go.
Thread the chain through the hole in the fixture housing, then convince the threaded part of the new switch to follow it. This part can be fiddly because you are working in a small space. Have the pass-through nut close to hand so you can seal the deal once the threads emerge on the outside of the fixture.
Make your connections. On a switch, you are making a connection for current to run to the light, so you are interrupting the hot line to the fixture when the switch is off. It therefore doesn’t matter which wire to the switch connects to which wire extruding from the switch. Clean up the wire ends if you need to, or strip back further if you have the wire and need a cleaner end for the connection.
Pick a pair, apply a wire nut, then wire nut the remaining pair, and tuck in your connections. (I usually wrap wire nuts with electrical tape, but it’s not technically necessary.)
Reverse what you did when you took the fixture apart and reinstall everything. Since the pull chain on the new switch may be short, attach more chain or cord to it with those oblong key chain connectors that are typically attached.
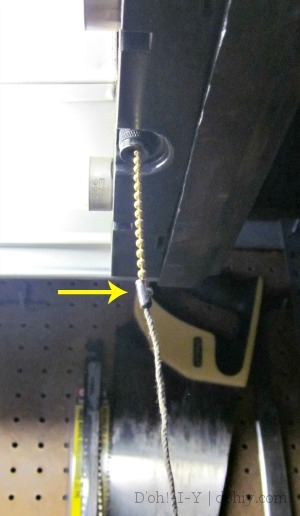
Extend the pull using this thing.
BLUE SMOKE TEST TIME! Turn the circuit back on or plug in the fixture. Pull the chain. Popping sounds? Puff of smoke? Turn it off immediately and figure out your problem. If you just got a light turning on and off as if nothing had happened, you are done! Congrats!
Seeing is terrific!
These fixtures have much longer working lives than their cheapest component, so knowing how to replace such a piece reduces waste and saves money over time.
—–
*Unless you are in the UK, where they make pull switches so hardy that they run them up into the ceiling as if they will never need replacing–and honestly, I’ve never even heard of one breaking, so maybe they don’t. Must be made of adamantium or something.
