And here I am using my legs like a sucker!
– Homer Simpson
Before we start, check out our sidebar — House of Hepworths featured our vanity table makeover this week! Color me DELIGHTED. If you don’t already visit regularly, hop over to HofH for great ideas. The Hepworths just moved, so I’m looking forward to seeing what she does with their new place. Thanks again, Allison!
Now to the matter at hand…
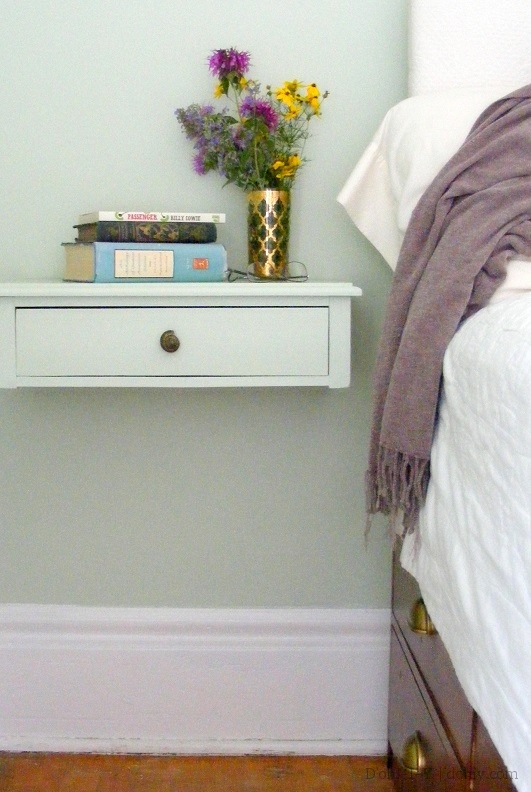
A storage bed is a fine and noble thing. When it has drawers right up to the headboard, though, it complicates bedside table logistics. On Kev’s side, we decided to “float” a nightstand by attaching it to the wall. A wall-mounted nightstand would provide a landing place for books (and tea and glasses and cats and implements of destruction) while allowing unfettered access to the bed drawers.
Instead of starting from scratch, I perused Craigslist for something to convert. Many end tables and nightstands are available from ol’ Craig, but few were the right size or met my semi-stringent criteria:
- A single drawer box, with the surrounding frame screwed or bolted together (rather than stapled or glued).
- Wider than deep (to snuggle against the wall).
- Enough solid wooden construction to be able to drill through…
- …but not too heavy.
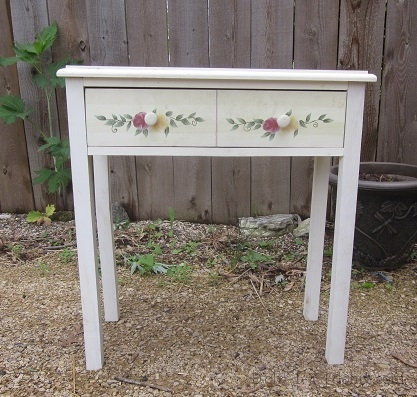
Here’s our criteria-meeting, fifteen-dollar winner:
Clearly, the first task was de-rosing. I applied wood filler where needed, then sanded the whole thing and primed it.
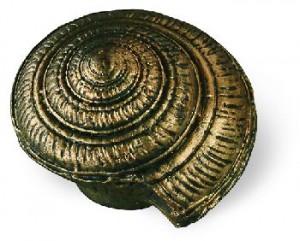 To make the table as unobtrusive as possible, I painted it the same color as our bedroom walls, Benjamin Moore Hollingsworth Green. It took three coats to cover up those roses, even with the primer. After poly on the exterior, I spraypainted the inside of the drawer black (just for kicks), then I installed the new drawer knob. The Kev’s other mission in life (besides Ben, me, the house, and about 40 other things) involves fossils. He saw this ammonite knob by Siro Designs at Lowe’s about a year ago and liked it, so when I started working on his nightstand, I picked one up.
Then I de-legged the table. You’d think this would have come earlier, but I kept the legs through the painting stage, because they gave me a built-in drying rack. No fancy de-legging plan here, just a gal and her trusty reciprocating saw…
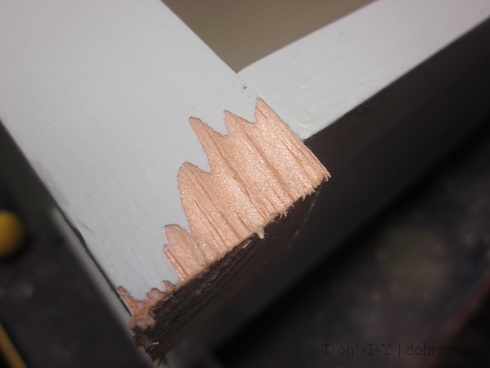 D’oh! Should have started sawing from the front! Since I didn’t, I ended up having to touch up the finish post-de-legging. The drying-rack aspect of leg-having was worth it, but I learned a valuable lesson about saw direction!
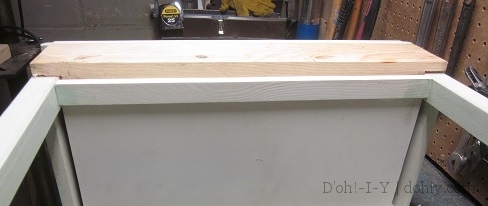
We considered a few different options for mounting the table to the wall, including L-brackets, cleats and super-long screws. The beefiest parts of the table did not line up with the wall studs for any of these options. Kevin had the great idea to add a wood mounting plate across the back so we could screw it in wheresoever the studs turned out to be. He cut a piece of wood to span the back, and we notched out around the frame. Then we screwed that piece to the table.
Instant installation flexibility!

“Just checking the walls…”
With the plate attached and studs located (a la Basil Fawlty — we really need to buy a stud finder!), we leveled the table at the same height as the vanity table on the other side and screwed that puppy in! We used two of what my dad would call “long-winded” screws for the stud (three-inchers), and anchor bolts to secure it through the laths in several other places. You wouldn’t want to sit on it, but it’s plenty solid for its purpose.
Add the drawer and there you go! The before again:
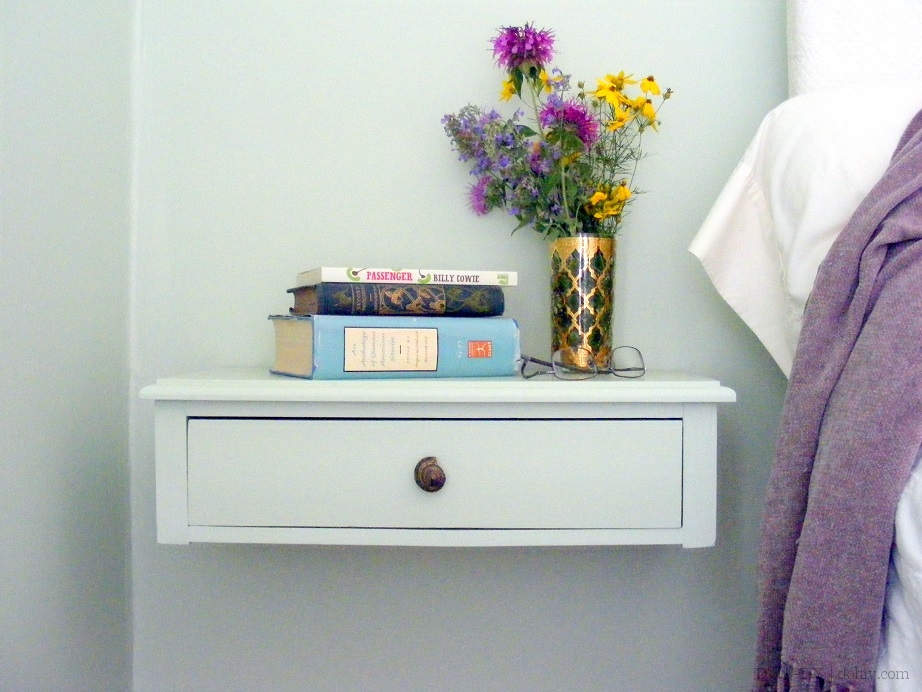
And the after:
Kevin has enough room for his stuff, and there’s still complete access to the drawers. I like how it keeps the floor clear — I could see doing this even in the absence of storage bed motivation.
All in all, finding the right table in the first place (and finding the stud in the second) were the trickiest parts. If you don’t mind wandering around Craigslist (and already own a stud finder), it’s a fun project. Give it a try and let us know how it goes. (And remember not to saw back to front!)
Update: Apartment Therapy readers, thanks for stopping by! See how this project held up long-term (short story: pretty well overall).







Pingback: 5 Bulky Furniture Pieces You Could Eliminate for Sleeker, DIY Alternatives – Pioneers Discovers