Spider pig, spider pig,
Does whatever a spider pig does.
Can he swing from a web?
No, he can’t — he’s a pig.
Look out! Here comes the spider pig.
– Homer Simpson
This weekend, I decided instead of just touching up the baseboards, I’d strip the particularly goopy spots before repainting them. This morphed into an unexpectedly long bad time. Stripping is Not Fun, especially when you are using environmentally sensitive chemicals. Next time, atomic weaponry.

Like this one at Home Depot.
But! We finally had something go easier than expected! We needed to add an electrical box for the overhead light in the bedroom. Old knob and tube wiring tends to enter a fixture through a framing member — in other words, above the light fixture, there are two holes in a piece of wood that wires poke through. This rather fails to meet modern requirements, which reasonably ask for wire connections to be isolated in a box. And if you want to put in a ceiling fan at any point, said box needs to be attached to a brace that spans two joists to avoid … well, I don’t know what it avoids exactly. Something about vibrations. I suppose it also helps support the extra weight. Anyway, you need a ceiling fan box if you ever intend to install a fan, which we might.
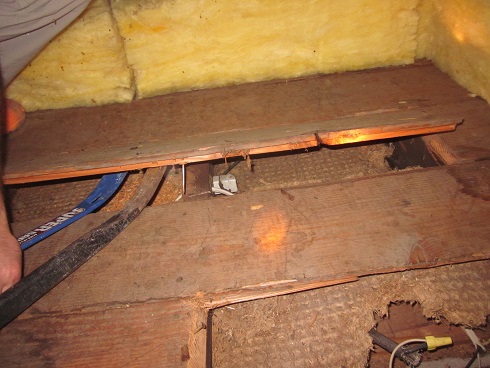
To get to the wiring, we went up into the loft above the bedroom and started pulling up the appropriate floorboards. After we pulled up the two that had obviously been moved before, we realized we needed the one in between them. SAWZALL TO THE RESCUE!
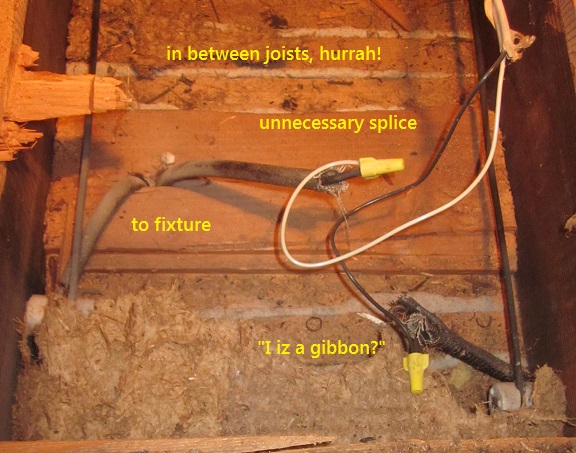
Someone’s been in here before to wire in the wall switch; originally, the bedroom light would have been on a pullchain from the fixture. Judging from the sheathed wiring, that change happened maybe in the 1980s. Way to hold out, former owners! Convenience is so overrated.
But despite upping the convenience factor, this work looks like it was done by a lobotomized gibbon. There’s a completely unnecessary splice and all connections are simply floating between the floorboards. We eliminated the splice by pulling the sheathed wire into the box, and we’ll install a box to house the other connection until we get around to completely replacing the older wiring.
But the good news is … the current light location is already between the joists! We don’t have to make a new hole! Or patch the old one. Or move the wiring. Such a relief!
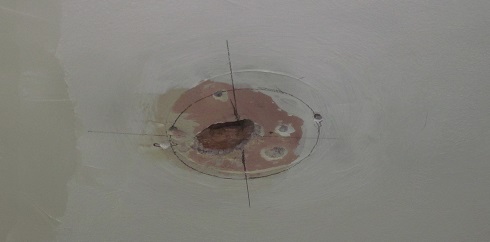
So next step was to pull out the wires and then mark where the box will go.
Ok, tangent: see that formerly hidden color? That’s the original color of the room. It’s sort of pink, sort of brown, sort of yuck. The woodwork was originally a red-brown finish. So pinky brown and red woodwork. Some folks insist that you should restore the original colors that the All-Wise and All-Tasteful Homebuilder selected. In this case, dude was color blind.
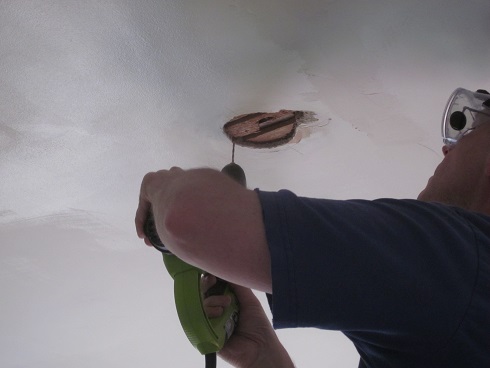
Back to the matter at hand: the Kev drilled a series of holes around the edge so we could chip out the plaster, and then perforated the lathes as well.
Kevin (while working on the ceiling): “This is when being Spiderman would really come in handy.”
Me: “Yes, home improvement is the primary thing I would focus on if I were Spiderman.”
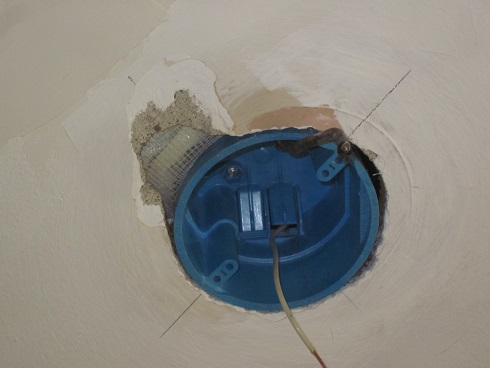
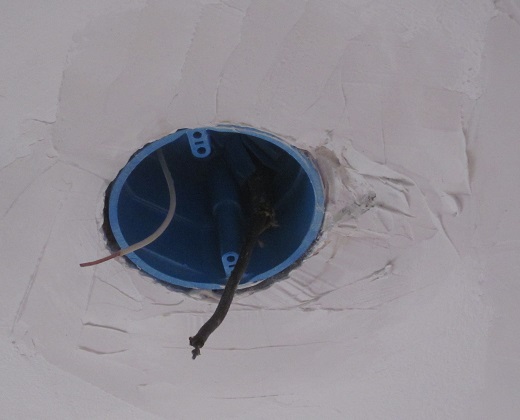
Once the hole was clear, we fitted the box and Kev screwed the brace to the joists. We had a little extra plaster come out, so I stapled down a couple of layers of mesh joint tape to back the plaster repair.
And after the first layer of plaster repair (from a different angle):
And that was that! Finished in dozens of minutes rather than dozens of longer time units. The tide is turning!



2 Responses to Getting Boxed In