
It worked! The de-bigulator worked!
– Professor Frink
Ever had anything framed? It’s spendy, huh? And completely worth it–professional framers really know their stuff. But sometimes, you want to frame an inexpensive poster or something that you love but that doesn’t make sense to splash out on.
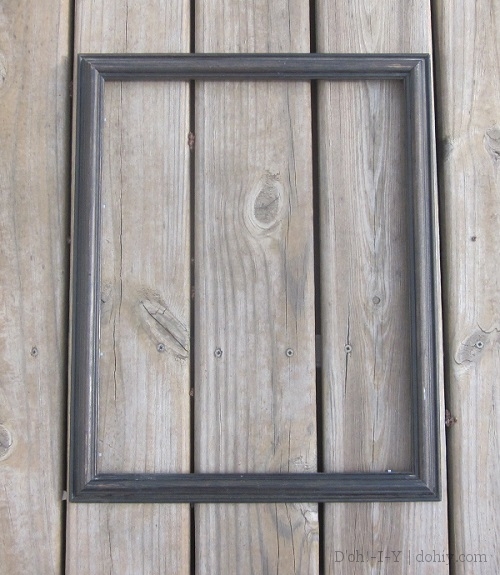
Often, you can find a frame just the right size–and sometimes with an intact mat–at a thrift shop or garage sale. But if you have something that’s a weird size, a standard cast-off frame might not cut it. In that case, measure your image (plus mat, if desired) to identify the dimensions you are seeking. With that in hand, stop at Goodwill (or similar) and look for a wood frame that is the right size in one dimension. I found this puppy, which is the right length, but too big height-wise.
It was housing this fabulous canvas, which my friend Wendy said looked like a mustachioed Stacy Keach. One of his character roles, perhaps?
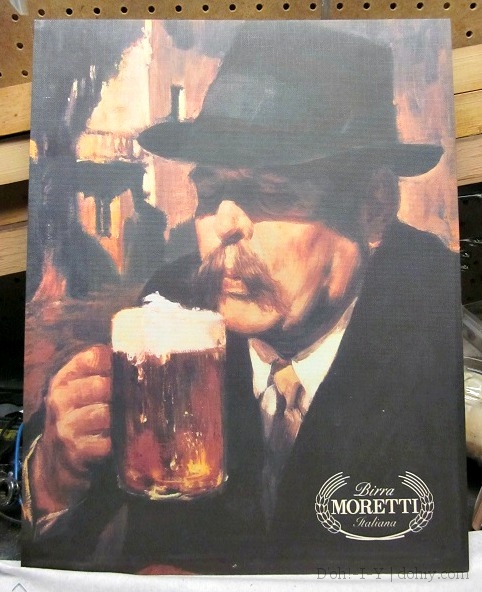
Oh, beer…I love you so much…
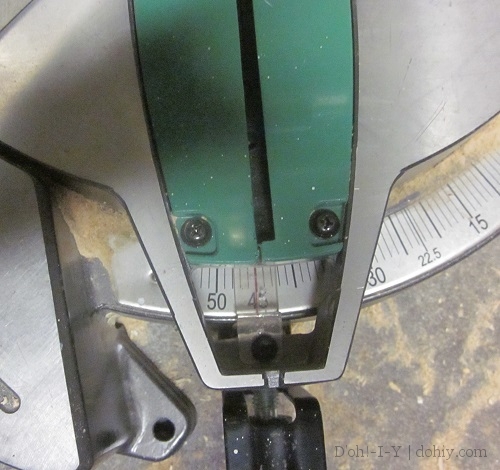
Mark the dimension you want on the inside of the frame. Set your miter saw to 45 degrees (or you can use a miter box and a hand saw; it’s still 45 degrees) and line up the blade so that the shorter end of the cut matches your mark on the frame.
No picture of the actual cutting until I get that camera installed in my eyeball.
Once you’ve cut the first piece, you can use the offcut to measure exactly the amount to cut off the other side (once you detach it).

Mark and miter that side too, then detach the other offcut, and check that the cuts line up with the loose side that you just liberated.
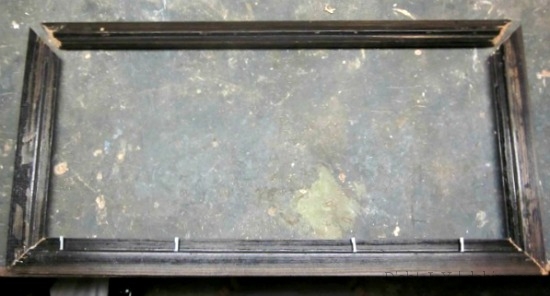
I tacked these pieces together with staples, then used flat corner braces to join the pieces securely.

My joints were close, but not super-tight. D’oh! After touching up the raw edge with a stain marker, I backed each joint with black electrical tape to shade any gap. Framers would be appalled.
I cut a piece of glass for the new frame from some scrap glass I had in the garage. I also picked up some mat board. I don’t have a mat cutter, but I thought, hey, a mat cutter is basically a razor blade set on an angled base. So I screwed a razor blade to a random offcut from the miter saw. Questionable concept, bad execution.
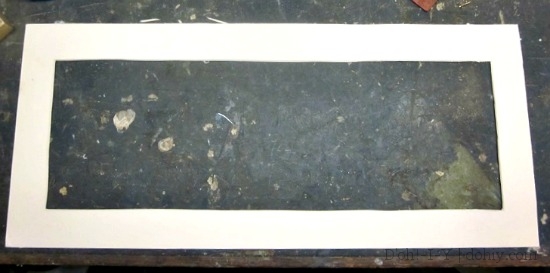
D’oh.
“Well!” I thought. “Fortunately, I have lots of extra mat board!” But take two was…WORSE. Take three was pretty awful too. It turns out you can’t just strap a razor blade to a piece of wood and cut a mat. I’ll have to learn how to do that properly at some point.
In the meantime, I came up with a Plan B. I took the least-bad mat and wrapped it in a scrap of sheer curtain fabric, adhering it with spray adhesive.

The idea was that the fabric would blur the wobbly edges of the mat to a semi-acceptable level. And it does, pretty much. For now. I guess.
But let’s focus on the fact that the frame was successfully smallified! Here’s the whole thing assembled.

The picture is cover art we bought at a Portland Cello Project concert. If you think you might like Pantera or Kanye West played on cellos–and who wouldn’t?–check them out.
I’m reorganizing our gallery wall, so I’m not ready to hang this guy yet. When I do hang it, I’m going to use a technique that a commenter told me about in response to this post about framing problems.
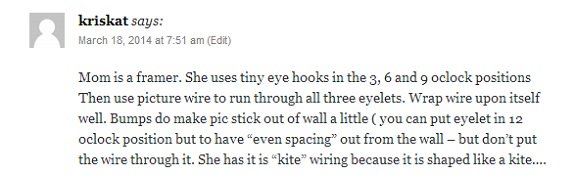
Told you framers know their stuff! Thanks for that tip, Kriskat (and Kriskat’s mom!).

6 Responses to Smallifying a Picture Frame