
So you see yourself more as a buffet-style intellectual.
– Declan Desmond
 We bought our Duncan Phyfe dining set and buffet from an angry man. “This stuff is classic, but my wife wants oak,” he fumed. He was annoyed that we wanted to sit in the chairs before buying, and irritated that we could not fit everything into the truck for one trip. We had to leave the excess pieces outside so we didn’t bother him when we returned. But he gave us a good price, and between that and his mood, we didn’t do an in-depth inspection on each item.
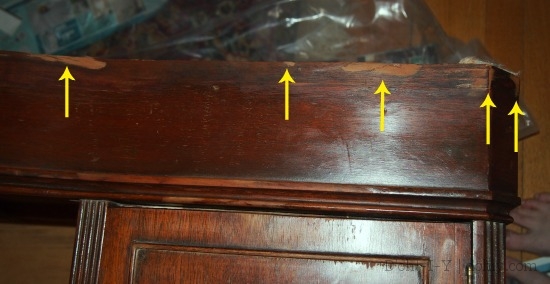
We did notice that the veneer on the buffet (UK: sideboard; Chez D’oh: cyborg) seemed to have some superficial water damage, but the piece was solid otherwise. The veneer was all there, just bleached out and loose. And so it has been ever since.
We intended to fix this quickly, but the YEARS fly when you have 40,000 home projects in the queue. Recently, I further damaged the veneer, so it sprang to the top of the list.
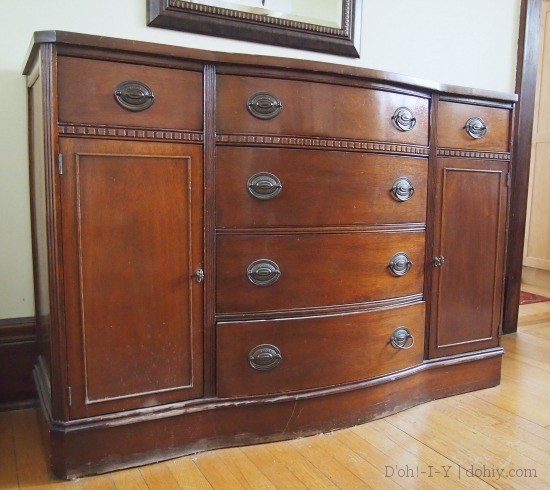
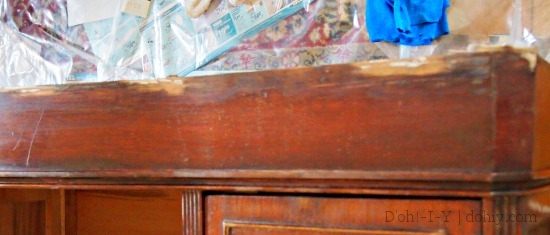
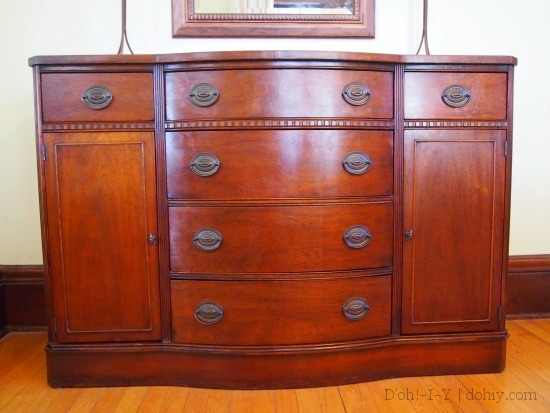
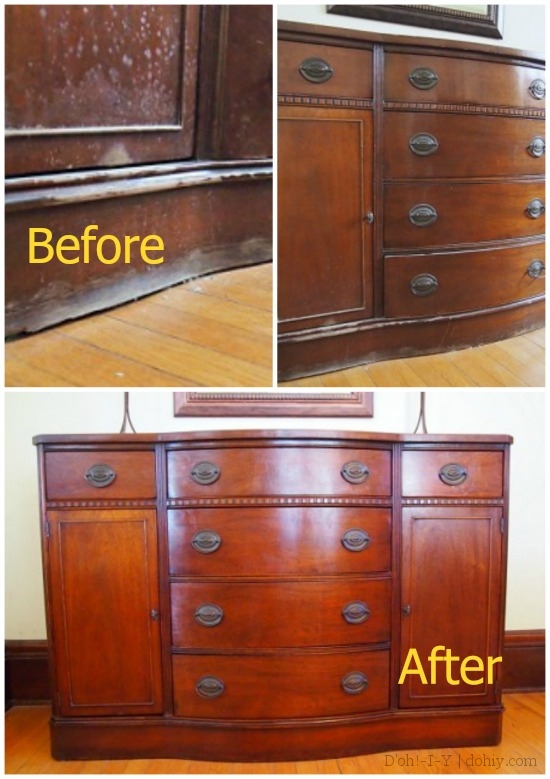
Sideboard before
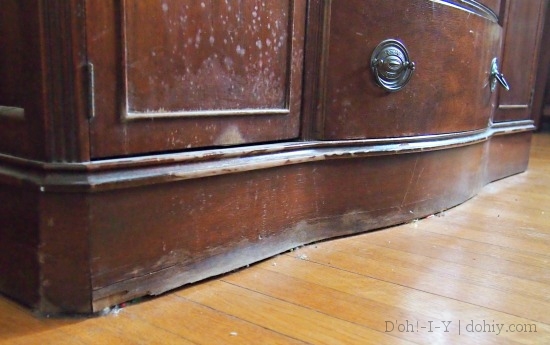
Close-up on the damaged veneer (and some dust bunnies, why not)
I’ve never repaired veneer, but fortunately, this damage is far enough from the eye that my newbie imprecision won’t be noticeable (or at least not as noticeable as the existing problem).
I emptied the sideboard and flipped it on its back. After cleaning the whole piece thoroughly, I carefully scraped out the old glue from underneath the loose veneer.
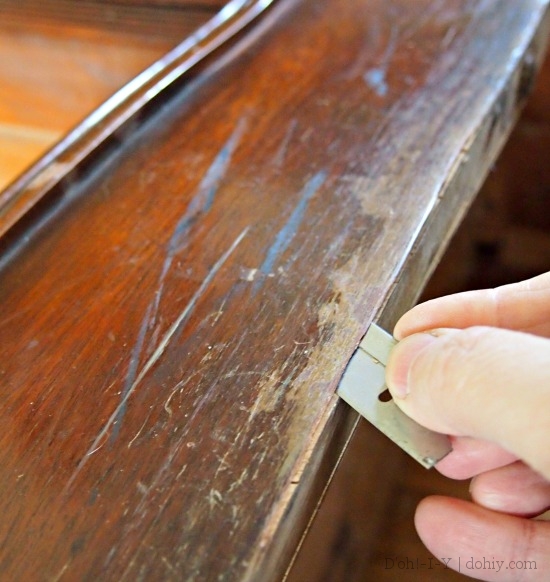
A razor blade did the trick.
I pressed the veneer down to make sure it would go back into place and hadn’t warped beyond use. I spread clear-drying carpenter’s glue underneath the veneer as evenly as possible.
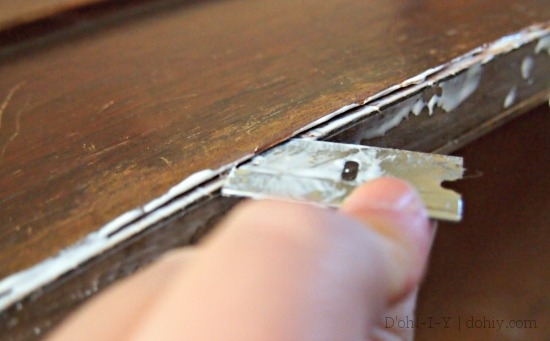
Same razor blade
I pressed the veneer into place, clamping as I went. I also glued in and clamped the broken bits, which were (luckily) shaped distinctively enough to be able to place them definitively. (Here’s info on replacing veneer if you don’t have the detached pieces.) Then I used a WHOLE LOTTA CLAMPS to press evenly around the curved front.

All the clamps we own, plus a couple of rocks
There were still a few voids after gluing. I used wood filler on those areas. I always way-overfill, but you need some overfill to allow sanding back smooth with the wood surface.
Gloopy overfill
And here’s where I screwed something up so you don’t have to! After the wood filler set up, I decided to take the palm sander (with very fine sandpaper) to the whole area. I barely touched one corner and almost ran through the veneer.
No. Nonononononono.
So…after that, I used very fine sandpaper by hand very carefully to achieve a smooth(ish) finish on the base.
Same area with wood filler sanded in
I’ve had some practice matching stain colors. I used a combination of cherry and ebony gel stain to match the existing finish. It isn’t perfect, but it blends pretty well considering the extent of the damage.
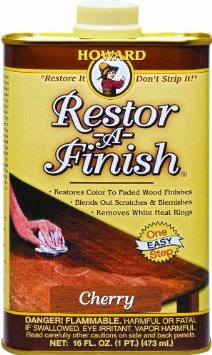
Finally, I rubbed down the whole finish with some Howard Restor-a-Finish in Cherry on super-fine steel wool (UK: wire wool). I love this stuff, but be aware that you can’t use polyurethane stains or finishes over it.
Howard’s is super-easy; apply with the grain using steel wool (to take out minor white spots like those on the door), then wipe off with a clean rag. MADE OUT OF OLD UNDERPANTS. Keep that in mind next time you come for dinner. Then I top-coated with Howard’s Feed ‘n Wax. I put it all back together, and here it is.
In natural light (the Howards just adds to the original stain, doesn’t change its color)
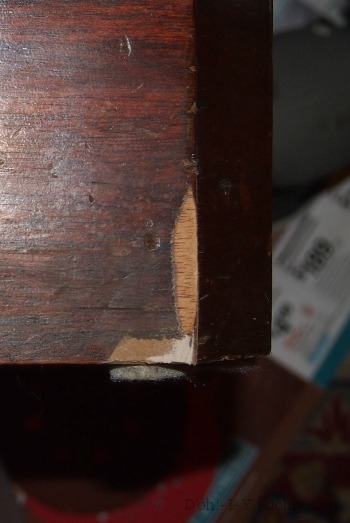
I know it’s not perfect, but I’m pleased with the improvement on the bottom left corner, where the veneer was the worst.

Formerly broken veneer
I also took a dent out of the top from the wayward mirror — super-easy! Next time.

6 Responses to Fear No Veneer